
Sushi bake is a popular twist on traditional sushi. It combines seasoned rice, creamy sauces, and fresh fish into a comforting, easy-to-make casserole. This dish is perfect for gatherings or a cozy meal at home. Its growing popularity is due to its versatility and crowd-pleasing appeal.
In this post, I’ll share the top 5 secrets to making the perfect sushi bake recipe at home. These tips will help you create a sushi bake that’s crispy, creamy, and full of flavor every time!
The Essential Ingredients for a Perfect Sushi Bake Recipe
Sushi Rice: Why the Right Sushi Rice Matters and How to Prepare It
The key to a great sushi bake is the sushi rice. Unlike regular rice, sushi rice has the right texture, flavor, and stickiness that helps hold everything together. Therefore, using the right rice ensures your sushi bake has the perfect consistency.
Why the Right Sushi Rice Matters:
- Texture: Sushi rice is short-grain, which makes it stickier than long-grain rice. As a result, it binds together well and holds up in the bake.
- Flavor: Sushi rice is seasoned with rice vinegar, sugar, and salt. This combination adds a tangy and sweet flavor, which complements the other ingredients.
- Authenticity: Traditional sushi rice elevates your dish, bringing it closer to authentic sushi. By using the right rice, your bake stays true to its roots.
How to Prepare Sushi Rice:
- Rinse the Rice: Begin by rinsing the sushi rice under cold water until the water runs clear. This step removes excess starch, which can otherwise make the rice too sticky.
- Cook the Rice: Use a 1:1.2 or 1:1.5 rice-to-water ratio, depending on your rice. Cook it in a rice cooker or on the stovetop. After cooking, let it rest for 10 minutes to finish the process.
- Season the Rice: Mix rice vinegar, sugar, and salt in a bowl. Heat it to dissolve the sugar, then let it cool. Once cooled, gently fold this mixture into the warm rice.
- Cool the Rice: Allow the rice to cool to room temperature before using it. Otherwise, hot rice can make the nori soggy.
Pro Tips:
- For extra flavor, you can add a piece of kombu while cooking the rice. This will infuse an extra layer of umami.
- Additionally, adding a splash of mirin to the vinegar seasoning will give the rice a touch of sweetness.
- If you don’t have sushi rice, consider using Calrose rice as a substitute. It’s not quite the same, but it can work well in a pinch.
By following these simple steps, you’ll make perfect sushi rice, providing the ideal base for a delicious sushi bake.
Nori (Seaweed): How to Layer It Properly for the Best Flavor and Texture
Nori, the edible seaweed used in sushi, plays a crucial role in a sushi bake. It adds a savory, umami flavor and enhances the texture of the dish. When layered properly, nori can elevate your sushi bake by creating a balance of flavor and texture. Here’s how to do it.
Why Nori Matters:
- Flavor: Nori has a unique salty, umami flavor that complements the sweetness of the rice and the richness of the other ingredients. It’s essential for creating the authentic taste of sushi.
- Texture: The texture of nori changes when baked. Initially crisp, it softens slightly under the moist layers of rice and creamy fillings. This contrast adds an interesting layer of texture to each bite.
- Aesthetic: Nori also enhances the visual appeal of your sushi bake. The deep green color adds contrast and makes the dish look more appetizing.
How to Layer Nori Properly:
- Start with a Base Layer: First, line the bottom of your baking dish with a sheet of nori. This creates a foundation for the rice and prevents it from sticking to the dish. Be sure to trim the nori to fit the size of your dish, if needed.
- Layer the Sushi Rice on Top: Once the rice is ready, spread a layer evenly over the nori. Press the rice gently to ensure it sticks to the nori. Avoid packing it too tightly, as the rice should still remain slightly fluffy for the best texture.
- Add the Fillings and Creamy Toppings: After the rice layer, add your choice of fillings, such as imitation crab, salmon, or shrimp. Top it off with creamy sauces like spicy mayo or eel sauce. The nori acts as a base to hold these ingredients in place.
- Top with a Final Layer of Nori: For added flavor and texture, place another sheet of nori on top of the fillings. You can either leave the nori whole or cut it into strips to create a more decorative look. This will crisp up as the dish bakes.
- Bake and Serve: As the sushi bake cooks, the nori crisps up and absorbs the flavors from the rice and toppings. This adds a satisfying crunch and an extra layer of umami flavor. Be sure to check the bake frequently to avoid overbaking the nori, as it can become too dry and bitter.
Pro Tips:
- Pre-toast the Nori: For an even deeper flavor, lightly toast the nori sheets with a flame or in a dry pan before layering it in your sushi bake. This step intensifies the umami taste.
- Use Fresh Nori: Always opt for high-quality, fresh nori for the best flavor and texture. Avoid nori that feels too dry or brittle, as it can negatively affect the dish.
- Experiment with Layers: Don’t be afraid to experiment with multiple layers of nori. Some recipes call for alternating layers of rice, nori, and toppings to create a more complex flavor profile.
By following these steps and tips, you’ll be able to layer your nori perfectly, ensuring your sushi bake has the ideal balance of flavor and texture.
Imitation Crab: Using Imitation Crab in Sushi Bake and Its Benefits
Imitation crab, also known as surimi, is a popular ingredient in sushi bakes. While it’s not actual crab meat, it mimics the flavor and texture of crab, making it a great addition to your sushi bake recipe. It’s cost-effective, easy to work with, and adds the right balance of flavor and texture to your dish. Let’s dive into why imitation crab is often used in sushi bakes and the benefits it brings.
Why Imitation Crab is a Great Choice for Sushi Bake:
- Flavor Profile: Imitation crab has a mild, sweet flavor that complements the other ingredients in a sushi bake. It mimics the taste of real crab without being overpowering, allowing the creamy sauces and rice to shine through.
- Texture: The texture of imitation crab is similar to real crab meat, with a tender yet slightly firm consistency. This texture helps it blend well with the rice, nori, and other fillings, providing a satisfying bite.
- Cost-Effective: Real crab can be expensive and might not fit into every budget. Imitation crab offers a more affordable alternative that still delivers the desired seafood flavor and texture. It’s perfect for home cooks looking to make sushi bake more accessible without compromising on taste.
Benefits of Using Imitation Crab in Sushi Bake:
- Easy to Prepare: Unlike fresh crab, imitation crab requires no cracking, peeling, or cooking. It’s pre-cooked and ready to use, which saves time in the kitchen. Simply shred or chop the imitation crab into bite-sized pieces and mix it into your sushi bake.
- Versatile: Imitation crab is highly versatile. You can mix it with creamy sauces, season it with spices, or even incorporate it into different layers of your sushi bake. It can be used in many different styles of sushi bakes, whether you’re creating a traditional flavor or experimenting with new combinations.
- Long Shelf Life: Imitation crab has a longer shelf life than fresh crab, making it a convenient pantry item. It’s often sold in vacuum-sealed packages, which helps maintain freshness until you’re ready to use it.
- Lower Fat Content: While imitation crab isn’t a low-fat food, it generally has less fat than real crab. This can be beneficial if you’re looking to reduce the fat content in your sushi bake without sacrificing flavor.
- Allergy-Friendly: For those with shellfish allergies, imitation crab can be a great substitute for real crab. While it’s still made from fish, it’s often a safer option for those who cannot consume shellfish.
How to Use Imitation Crab in Sushi Bake:
- Shred or Chop: The first step is to shred or chop the imitation crab into small pieces. You can use your hands or a knife to break it into bite-sized strips or chunks, depending on your preference.
- Mix with Sauce: For extra flavor, combine the imitation crab with a creamy sauce like spicy mayo, cream cheese, or eel sauce. This will infuse the crab with added richness and a creamy texture that complements the other layers of the sushi bake.
- Layer with Rice and Toppings: Spread the seasoned rice and nori in your baking dish, then layer the imitation crab on top. You can also mix the crab with other fillings like shrimp or vegetables for a more complex flavor profile.
- Bake to Perfection: Finally, bake the sushi dish until it’s golden and bubbling. The imitation crab will blend with the other ingredients, creating a cohesive and delicious bite with each spoonful.
Pro Tips:
- If you want to add more flavor to your imitation crab, consider sautéing it lightly in butter or adding a splash of soy sauce before mixing it into your bake.
- For an extra creamy texture, mix the imitation crab with a bit of cream cheese before layering it in your sushi bake.
Imitation crab is a reliable and tasty ingredient that brings both flavor and texture to sushi bakes. By using it, you’ll create a dish that’s both satisfying and budget-friendly.
Cream Cheese: The Secret to a Creamy, Flavorful Bake
Cream cheese is an essential ingredient in many sushi bake recipes, adding a smooth, rich texture and a subtle tangy flavor that complements the other ingredients. While it’s often used in savory dishes, its role in sushi bake is crucial for creating a creamy consistency and a well-balanced flavor profile. Here’s why cream cheese is a must-have ingredient for a delicious sushi bake.
Why Cream Cheese Matters:
- Creamy Texture: One of the most significant benefits of cream cheese in sushi bake is its ability to create a smooth and velvety texture. When combined with the other ingredients, it helps bind the rice and fillings together while adding a satisfying richness to the dish.
- Flavor Balance: Cream cheese adds a mild tang that contrasts nicely with the sweetness of the sushi rice and the savory flavors of the imitation crab, shrimp, or other fillings. It enhances the overall flavor profile without overpowering the other ingredients.
- Moisture: Sushi bake can sometimes turn out dry if the ingredients aren’t well-balanced. Cream cheese helps keep the bake moist and ensures every bite is creamy and delicious, especially after baking when the top layer crisps up.
How Cream Cheese Enhances the Bake:
- Binding Agent: Cream cheese helps hold the sushi bake together, ensuring that it doesn’t fall apart when served. This is especially important when you’re using flaky ingredients like crab or fish.
- Flavor Layer: Cream cheese can be used to enhance the flavor of the filling. When mixed with other sauces, like spicy mayo or eel sauce, it contributes a rich depth of flavor that perfectly complements the sushi bake’s other components.
- Balancing Richness: The richness of cream cheese can help balance out the stronger flavors in the dish, like the salty nori or the umami of soy sauce, creating a harmonious taste experience.
How to Use Cream Cheese in Sushi Bake:
- Soften the Cream Cheese: To make mixing easier, let the cream cheese soften to room temperature before using it. This ensures it blends smoothly with the other ingredients, such as imitation crab or shrimp.
- Mix with Sauces: For extra flavor, mix the softened cream cheese with sauces like spicy mayo, sweet chili sauce, or soy sauce. This combination will create a creamy, flavorful filling that adds depth to the sushi bake.
- Layering: After preparing the rice and nori in your baking dish, spread the cream cheese mixture over the fillings or rice. This creates a rich layer that will melt into the bake as it cooks.
- Top Layer: For a more indulgent version, you can also spread a thin layer of cream cheese on top of the sushi bake before baking. This will create a creamy, golden crust as it bakes.
Pro Tips:
- Use Full-Fat Cream Cheese: For the best texture and flavor, opt for full-fat cream cheese rather than low-fat versions. Full-fat cream cheese has a richer, creamier texture that’s perfect for sushi bake.
- Experiment with Flavors: Add herbs, garlic powder, or a little lemon zest to the cream cheese mixture for a unique twist that enhances the overall flavor.
- Avoid Over-Mixing: When mixing cream cheese with other ingredients, be careful not to over-mix, as it can become too thin. You want it to retain a thick and creamy consistency.
Cream Cheese Alternatives:
- If you prefer a lighter version, you can substitute cream cheese with Greek yogurt or ricotta cheese. These alternatives still provide a creamy texture but with a slightly different flavor profile.
Incorporating cream cheese into your sushi bake is the secret to achieving a creamy, flavorful dish. Whether it’s used as a binding agent or a flavor enhancer, cream cheese adds the perfect richness and balance to the bake, making every bite irresistibly smooth and delicious.
Spicy Mayo: Why Spicy Mayo is Essential for the Ultimate Sushi Bake
Spicy mayo is a key ingredient in sushi bakes, adding a burst of flavor, creaminess, and a subtle kick of heat. It’s the perfect complement to the creamy, savory elements of a sushi bake, elevating the overall taste experience. Here’s why spicy mayo is an essential part of the ultimate sushi bake and how it enhances the dish.
Why Spicy Mayo Matters:
- Flavor Boost: The combination of mayonnaise and sriracha creates a rich, tangy, and slightly sweet flavor that enhances the sushi bake’s other ingredients. It adds depth and complexity, making every bite more exciting.
- Creaminess: The creamy texture of mayo helps bind the ingredients together, providing a velvety finish that works well with the rice, seafood, and other fillings. It ensures that the sushi bake maintains a smooth, luscious consistency.
- Heat and Balance: The heat from sriracha adds a subtle spicy kick that contrasts beautifully with the sweetness of the sushi rice and the rich creaminess of the other ingredients. This balance between spicy and creamy elevates the flavor profile of the bake.
How Spicy Mayo Enhances the Sushi Bake:
- Perfect for Topping: Spicy mayo is typically drizzled over the top of the sushi bake before it goes into the oven. As it bakes, the mayo becomes golden and slightly crispy around the edges, contributing a deliciously rich, flavorful layer to the dish.
- Moisture and Creaminess: Spicy mayo helps keep the sushi bake moist and creamy, preventing it from drying out during the baking process. The richness of the mayo enhances the texture, creating a satisfying contrast with the crisped edges of the nori and rice.
- Flavor Integration: When mixed with other ingredients like imitation crab, shrimp, or salmon, spicy mayo helps bind the flavors together. It adds a layer of richness and complexity that ties all the components of the sushi bake into a harmonious whole.
How to Use Spicy Mayo in Sushi Bake:
- Make Your Spicy Mayo: To make the perfect spicy mayo, combine mayonnaise with sriracha sauce in a ratio that suits your taste. If you like it spicier, add more sriracha. You can also mix in a dash of sesame oil or a squeeze of lime juice to enhance the flavor.
- Mix with Fillings: For added flavor, mix spicy mayo directly into the crab, shrimp, or fish filling. This will coat the seafood and make it extra creamy while infusing it with a spicy kick. This step also helps to evenly distribute the flavor throughout the sushi bake.
- Top the Bake with Spicy Mayo: After layering your rice, nori, and other fillings, generously drizzle the spicy mayo over the top before baking. As it bakes, the spicy mayo will melt and create a golden, slightly crispy topping that enhances the dish’s texture and flavor.
- Garnish with Extra Spicy Mayo: After the sushi bake is finished, drizzle a little more spicy mayo over the top for an extra flavor boost. You can even sprinkle sesame seeds, chopped scallions, or nori flakes for added crunch and garnish.
Pro Tips:
- Adjust the Heat Level: If you prefer a milder version, you can adjust the amount of sriracha in the mayo to your liking. You can also add a little honey or sugar to balance out the heat with sweetness.
- Experiment with Other Sauces: Add a touch of soy sauce, garlic paste, or hoisin sauce to your spicy mayo for a more complex flavor profile. This will bring additional savory or sweet elements to the dish.
- Make Ahead: You can prepare the spicy mayo in advance and store it in the fridge. This makes assembly quicker and ensures that the mayo has time to meld together for the best flavor.
Creamy Alternatives:
- If you’re looking for a dairy-free or vegan version, try using plant-based mayonnaise or an avocado-based spicy mayo for a similar creamy texture and rich flavor.
Spicy mayo is the secret ingredient that transforms a regular sushi bake into a flavorful, creamy, and satisfying dish. Whether used as a topping, mixed into the fillings, or drizzled for an extra kick, spicy mayo is essential for achieving the perfect balance of creamy and spicy in your sushi bake.
Preparing the Base: How to Get the Perfect Sushi Rice
Cooking Sushi Rice: The Process for Perfect Sticky Sushi Rice
Sushi rice is essential to a great sushi bake. It should be sticky, tender, and flavorful. Here’s a simple guide to cooking perfect sushi rice that will help bind the ingredients together and enhance the overall dish.
Why Sushi Rice is Important
- Sticky Texture: Sushi rice is sticky by design. It helps the rice hold together and stay in place, especially important for sushi bakes.
- Flavor Absorption: The rice absorbs the tangy, savory vinegar mixture, which enhances the flavor of the bake. Properly cooked rice ensures that it complements the other ingredients without overpowering them.
- Binding Agent: Sticky rice holds the nori, seafood, and other fillings together. Without it, the sushi bake would fall apart when served.
Steps for Cooking Perfect Sushi Rice
- Rinse the Rice: Begin by rinsing the sushi rice under cold water. Rinse until the water runs clear. This step removes excess starch and helps prevent the rice from becoming too gummy.
- Soak the Rice: After rinsing, soak the rice for about 30 minutes to an hour. This allows the rice grains to absorb water, ensuring even cooking.
- Cook the Rice: Use a rice cooker or stovetop to cook the rice. The rice-to-water ratio should be 1:1.2. If using a stovetop, bring the rice and water to a boil, then cover and simmer on low for 15 minutes. Remove from heat and let it steam for another 10-15 minutes.
Preparing the Vinegar Mixture
- Mix Vinegar, Sugar, and Salt: While the rice is cooking, combine rice vinegar, sugar, and salt in a saucepan. Heat until the sugar dissolves, but avoid boiling. This mixture gives sushi rice its signature tangy flavor.
- Season the Rice: Once the rice is done, transfer it to a large bowl. Pour the vinegar mixture over the rice while it’s still hot. Gently fold the rice with a paddle or flat spoon. Avoid mashing the rice; the goal is to keep it light and fluffy.
Cooling the Rice
After mixing the vinegar, allow the rice to cool to room temperature. You can spread the rice out in a thin layer to help it cool evenly. Once cooled, the rice is ready to be used in your sushi bake.
Tips for Perfect Sushi Rice
- Use Short-Grain Rice: Short-grain Japanese rice is the best choice for sushi. Its sticky, glutinous nature makes it perfect for sushi bakes. Avoid using long-grain rice.
- Don’t Rush: Patience is key to perfect sushi rice. Rinse, soak, and cook it properly to get the ideal texture.
- Use a Fan: Traditional sushi chefs use a fan to cool the rice. It helps create a shiny finish and ensures the rice cools quickly and evenly.
- Don’t Overcook: Be mindful not to overcook the rice. Overcooked rice becomes mushy, while undercooked rice is too firm to stick together.
Storing Leftover Sushi Rice
If you have leftovers, store the rice in an airtight container in the fridge for 1-2 days. To reheat, sprinkle a little water over the rice and gently microwave or steam it to restore its texture.
Perfect sushi rice is a key ingredient in a delicious sushi bake. Follow these steps and tips for sticky, flavorful rice that holds everything together and enhances your dish.
Seasoning the Rice: The Importance of Rice Vinegar and Sugar
Seasoning sushi rice is a crucial step in achieving the perfect balance of flavors in your sushi bake. The addition of rice vinegar, sugar, and salt transforms the rice from just a base into a flavorful component that complements the other ingredients. Here’s why seasoning your sushi rice is so important and how to do it just right.
Why Seasoning Matters
- Flavor Balance: The seasoning enhances the rice with a subtle tanginess and sweetness that brings out the other ingredients in the sushi bake. Without proper seasoning, the rice can taste bland and fail to complement the savory toppings like imitation crab, fish, or avocado.
- Tradition: Sushi rice has been seasoned for centuries as part of Japanese culinary tradition. The combination of rice vinegar, sugar, and salt creates a harmonious flavor profile that’s essential to authentic sushi.
- Texture and Shine: The vinegar helps preserve the rice’s texture, preventing it from becoming too dry or mushy. The sugar adds a slight gloss to the rice, giving it a shiny appearance that adds visual appeal to your sushi bake.
How to Season Sushi Rice Properly
- Rice Vinegar: Rice vinegar is the primary ingredient for seasoning sushi rice. It has a milder, less acidic taste compared to regular vinegar, which makes it ideal for sushi. It adds the signature tang that helps balance out the sweetness of the sugar and the saltiness of other ingredients.
- Sugar: Sugar is key to achieving the right sweetness in sushi rice. It counterbalances the vinegar’s acidity and gives the rice a pleasant, subtle sweetness that’s not overwhelming. The sugar also adds a glossy finish to the rice.
- Salt: A small amount of salt is added to the vinegar and sugar mixture. Salt enhances the overall flavor and helps balance the sweetness and acidity of the vinegar and sugar.
How to Make the Perfect Seasoning Mixture
- Ratio: The typical ratio for seasoning sushi rice is about 1/4 cup rice vinegar, 2 tablespoons sugar, and 1 teaspoon salt for every 2 cups of uncooked sushi rice. Adjust the proportions to your taste, but this is a good starting point for a balanced flavor.
- Heat the Mixture: Combine the rice vinegar, sugar, and salt in a small saucepan. Heat it gently over low to medium heat, stirring until the sugar and salt dissolve. Do not bring it to a boil; the goal is to dissolve the sugar and salt without evaporating the vinegar’s flavor.
- Mix with Rice: Once the rice is cooked and still hot, transfer it to a bowl and pour the seasoned vinegar mixture over it. Use a paddle or flat spoon to gently fold the rice. Be careful not to press or mash it; the goal is to coat each grain evenly without damaging its delicate structure.
- Cool the Rice: Let the seasoned rice cool to room temperature before using it for your sushi bake. Cooling helps the rice absorb the seasoning and prevents it from becoming too mushy when baked.
Tips for Perfectly Seasoned Sushi Rice
- Do Not Overdo the Sugar: While the sweetness is important, too much sugar can overpower the rice. Keep the sweetness subtle to maintain the balance of flavors in your sushi bake.
- Use Fresh Rice Vinegar: If possible, use high-quality, fresh rice vinegar. Its mild and delicate flavor is essential for achieving the proper seasoning.
- Avoid Stirring Too Much: When mixing the seasoning into the rice, use a gentle folding motion. Over-stirring can break the rice grains and create a sticky, mushy texture.
- Taste as You Go: Everyone’s preference for seasoning may differ, so always taste the rice as you go and adjust the vinegar, sugar, or salt according to your preference.
By properly seasoning your sushi rice with the perfect balance of rice vinegar, sugar, and salt, you’ll elevate your sushi bake to the next level, creating a harmonious and flavorful base that complements all the delicious toppings.
Layering the Rice: Tips on Spreading the Rice Evenly in the Baking Dish
Once your sushi rice is perfectly cooked and seasoned, the next step is to layer it in the baking dish. Spreading the rice evenly ensures a well-balanced sushi bake where each bite has the right proportion of rice to toppings. Here’s how to do it correctly for the best results.
Why Even Layering is Important
- Balanced Flavor – An even layer of rice ensures that every bite contains the perfect mix of rice, toppings, and seasonings.
- Proper Texture – Unevenly spread rice can lead to some areas being too dense and others too thin, affecting the overall consistency.
- Better Presentation – A smooth and level rice layer creates a more visually appealing sushi bake, making it easier to cut and serve.
Steps for Spreading the Rice Evenly
- Use a Lightly Greased or Wet Spoon
- Sushi rice is sticky, making it difficult to spread with a dry utensil. Lightly wet a spoon, spatula, or your hands with water to prevent the rice from sticking. You can also lightly grease the spatula with a little sesame oil for extra flavor.
- Fluff the Rice Before Spreading
- Before transferring the rice to the baking dish, gently fluff it with a rice paddle or fork to prevent clumps. This helps in distributing it more evenly.
- Spread in Small Portions
- Instead of dumping all the rice in at once, add it in small portions across the baking dish. This makes it easier to distribute without needing too much force, which can compress the rice.
- Press Gently, Not Too Firmly
- Use a flat spoon, spatula, or your hands to gently press the rice into an even layer. Avoid pressing too hard, as this can make the rice dense and chewy instead of light and fluffy.
- Check for Uneven Areas
- Before adding toppings, do a final check for any thick or thin spots. Adjust the rice layer as needed to maintain an even surface.
Bonus Tip: Add a Thin Layer of Furikake
For extra flavor, sprinkle a light layer of furikake seasoning over the rice before adding your toppings. This enhances the umami taste and adds a slight crunch.
By following these tips, you’ll achieve a perfectly even rice layer that forms the ideal foundation for your sushi bake. This ensures a consistent texture, balanced flavor, and a professional-looking final dish.
The Secret to Making the Perfect Sushi Bake Sauce
Spicy Mayo Sauce: How to Mix Sriracha, Mayonnaise, and Other Seasonings
Spicy mayo is a must-have for sushi bake, adding a creamy, tangy, and slightly spicy kick that enhances the dish’s flavor. The balance between rich mayo and fiery Sriracha creates a delicious contrast that pairs perfectly with sushi rice and seafood. Here’s how to make the perfect spicy mayo for your sushi bake.
Why Spicy Mayo is Essential
- Adds Creaminess – The mayo makes the sushi bake rich and smooth, blending all the ingredients together.
- Boosts Flavor – The combination of Sriracha and mayo creates a balance of heat and umami that elevates the dish.
- Gives a Beautiful Finish – Drizzling or spreading spicy mayo on top before baking creates a golden, slightly crispy layer.
Ingredients for the Perfect Spicy Mayo
- ½ cup Japanese mayonnaise (Kewpie recommended) – Adds a richer, slightly tangy taste compared to regular mayo.
- 1 to 2 tablespoons Sriracha sauce – Adjust based on your spice preference. More Sriracha means more heat!
- 1 teaspoon lemon juice or rice vinegar – Adds a slight tang to balance the richness.
- ½ teaspoon sesame oil (optional) – Enhances the umami flavor with a subtle nuttiness.
- ½ teaspoon sugar (optional) – Helps balance the spice and acidity.
How to Mix Spicy Mayo
- Combine Ingredients – In a small bowl, whisk together the mayonnaise, Sriracha, lemon juice (or rice vinegar), and sesame oil (if using).
- Taste and Adjust – Start with less Sriracha and add more if you want extra heat. Adjust sweetness with a bit of sugar if desired.
- Chill for Best Flavor – Let the spicy mayo sit in the refrigerator for at least 10 minutes to allow the flavors to meld.
How to Use Spicy Mayo in Sushi Bake
- Mix into the Seafood Layer – Blend spicy mayo with imitation crab, cooked salmon, or shrimp for a creamy, flavorful topping.
- Drizzle Before Baking – Spread or pipe spicy mayo over the top before baking to create a golden, slightly crispy finish.
- Final Garnish – Add a fresh drizzle of spicy mayo after baking for an extra creamy and spicy bite.
By following these steps, you’ll create a perfectly balanced spicy mayo sauce that enhances the taste and texture of your sushi bake.
Creamy Base: Adding Cream Cheese to the Sauce for a Rich Flavor
Cream cheese is the secret ingredient that takes sushi bake to the next level. It adds a smooth, velvety texture and a rich, slightly tangy flavor that complements the seafood and rice perfectly. When mixed into the sauce, it creates a luscious, creamy consistency that binds the ingredients together, making each bite incredibly satisfying.
Why Use Cream Cheese in Sushi Bake?
- Enhances Creaminess – Cream cheese adds a thick, luxurious texture to the dish, making it extra indulgent.
- Balances Flavors – The mild tang of cream cheese balances the sweetness of imitation crab and the spice of Sriracha.
- Improves Texture – When mixed into the seafood filling, it creates a smooth and cohesive mixture that’s easy to spread and bake.
How to Add Cream Cheese to the Sauce
- Soften the Cream Cheese
- Use room-temperature cream cheese for easy mixing. If it’s too firm, microwave it for 10–15 seconds to soften.
- Blend with Mayo and Spicy Sauce
- In a bowl, mix softened cream cheese with Japanese mayonnaise and Sriracha to create a creamy, flavorful base.
- Adjust Consistency
- If the mixture is too thick, add a splash of rice vinegar or a small amount of milk to make it smoother.
Ways to Use Cream Cheese in Sushi Bake
- Mix into the Seafood Layer – Blend with imitation crab, salmon, or shrimp for a creamy, flavorful filling.
- Combine with Spicy Mayo – Add to the spicy mayo sauce for extra richness before drizzling over the top.
- Create a Cheese-Topped Bake – Mix cream cheese with shredded mozzarella for a slightly cheesy crust after baking.
Adding cream cheese to sushi bake elevates the dish, making it richer, creamier, and even more delicious.
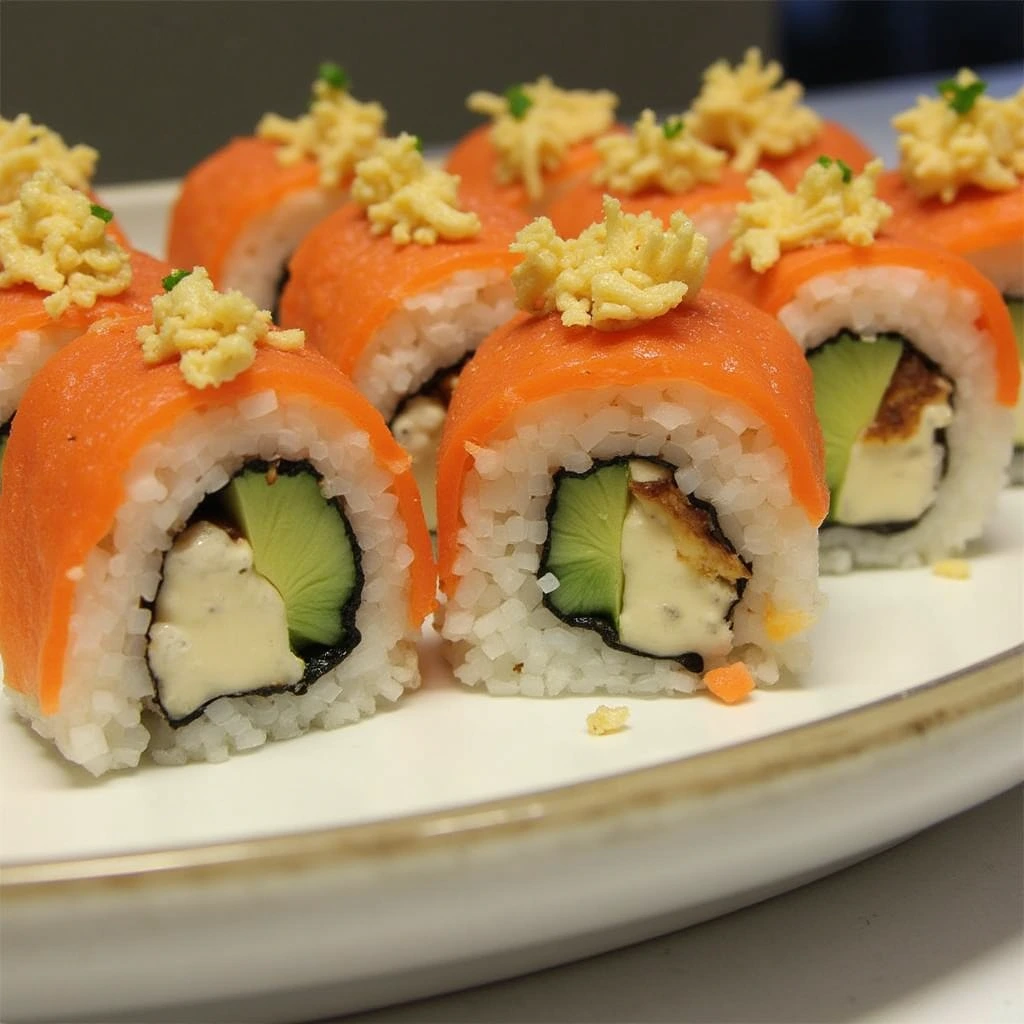
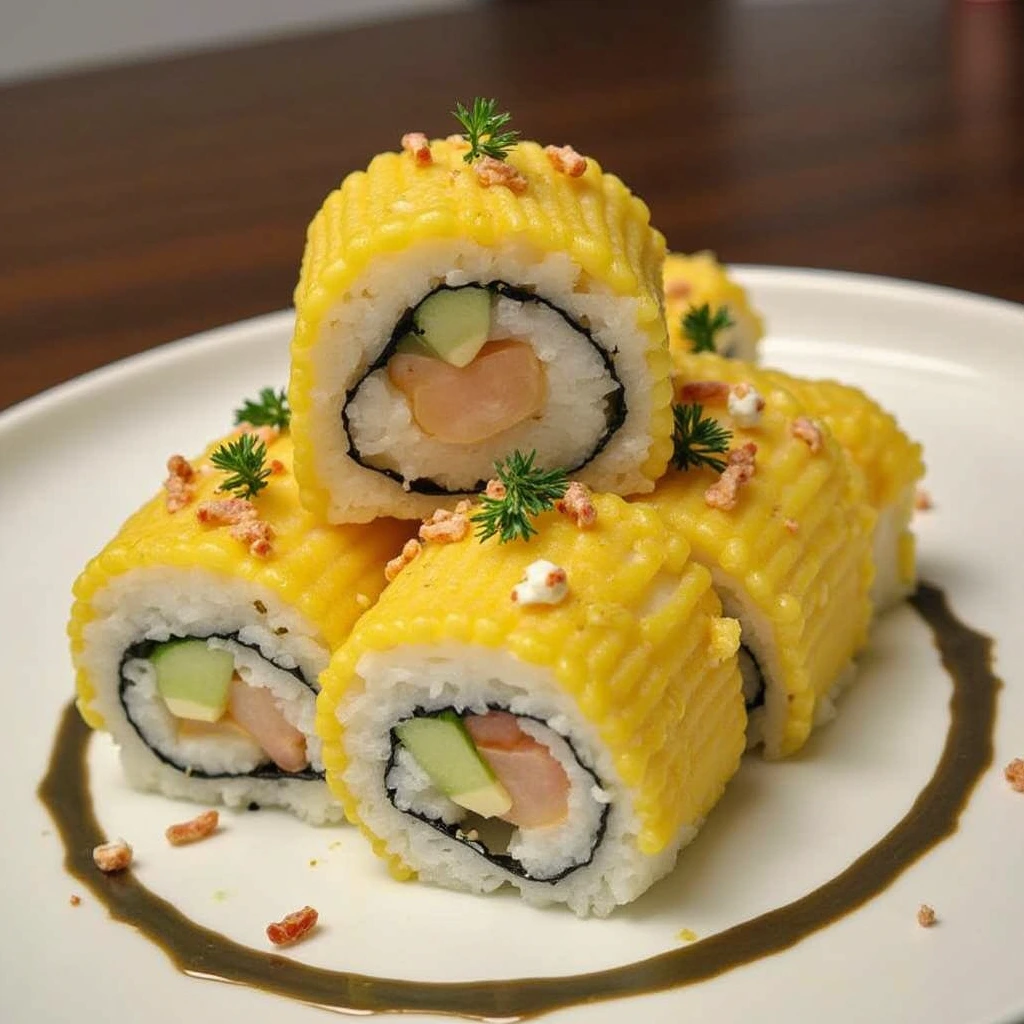
Optional Additions: Variations Like Kewpie Mayonnaise and Fish Roe for Extra Flair
While the classic sushi bake is already packed with flavor, adding a few optional ingredients can take it to the next level. Enhancing the dish with unique toppings and sauces not only improves the taste but also elevates the presentation. Here are some delicious variations to try.
1. Kewpie Mayonnaise: A Richer, Creamier Alternative
Kewpie mayonnaise is a Japanese-style mayo that is richer, slightly sweeter, and tangier than regular mayo. It contains egg yolks instead of whole eggs, giving it a smoother texture and umami boost.
- How to Use It:
- Replace regular mayo in the spicy mayo sauce for a more authentic Japanese flavor.
- Drizzle on top of the sushi bake before baking for a golden, slightly caramelized crust.
- Add a final drizzle after baking for extra creaminess.
2. Fish Roe: A Pop of Flavor and Texture
Fish roe, such as tobiko (flying fish roe) or masago (capelin roe), adds a salty, slightly sweet burst of flavor along with a crunchy texture. It also gives the dish a visually appealing touch with its vibrant orange or red color.
- How to Use It:
- Sprinkle a generous amount over the sushi bake after it comes out of the oven.
- Mix a small amount into the seafood filling for subtle bursts of flavor in every bite.
- Garnish individual servings to enhance both taste and presentation.
3. Unagi Sauce: A Sweet and Savory Glaze
Unagi sauce, also known as eel sauce, is a thick, slightly sweet soy-based sauce that adds depth to sushi bake.
- How to Use It:
- Drizzle over the top before serving for an extra layer of umami.
- Mix a little into the seafood filling to enhance its richness.
4. Furikake: A Crunchy, Savory Topping
Furikake is a Japanese seasoning blend made of seaweed, sesame seeds, dried fish, and sometimes a hint of wasabi. It adds crunch, umami, and a subtle saltiness.
- How to Use It:
- Sprinkle over the rice layer before adding the seafood mixture.
- Use it as a final garnish to enhance both flavor and texture.
5. Avocado: A Creamy, Fresh Element
For a fresh contrast to the creamy, baked sushi, adding avocado provides a buttery texture and mild flavor.
- How to Use It:
- Thinly slice and place on top after baking for a fresh, cooling contrast.
- Mash into the seafood filling for extra creaminess.
These optional additions allow you to customize your sushi bake, making it even more flavorful, visually appealing, and exciting to eat!
Layering Your Sushi Bake for the Best Flavor
First Layer: Rice and Nori – How to Ensure a Sturdy Foundation
The first layer of your sushi bake sets the stage for a flavorful and well-structured dish. Getting the rice and nori right ensures that your sushi bake holds together properly and delivers the perfect bite every time. Here’s how to create a strong foundation for your sushi bake.
1. Choosing the Right Rice
Sushi rice is the best option for sushi bake because of its sticky, slightly chewy texture. Using the wrong type of rice, like long-grain or basmati, can lead to a dry, crumbly base that doesn’t hold together well.
- How to Prepare Sushi Rice:
- Rinse the rice thoroughly to remove excess starch and prevent it from becoming too sticky.
- Cook it according to package instructions or in a rice cooker for perfect consistency.
- Season with a mix of rice vinegar, sugar, and salt for authentic sushi flavor.
2. Spreading the Rice Evenly
For a stable base, you need to ensure the rice layer is even and compact. A thick, uneven layer can lead to an inconsistent texture and difficulty in scooping.
- Tips for Spreading the Rice:
- Use wet hands or a rice paddle to prevent sticking while spreading.
- Press the rice gently but firmly into the baking dish to create a solid foundation.
- Keep the layer about ½ to ¾ inch thick to support the toppings without overpowering them.
3. Layering Nori for Structure and Flavor
Nori (seaweed) adds a layer of umami flavor and helps keep the rice together. However, using it correctly is key to avoiding sogginess.
- How to Use Nori in Sushi Bake:
- Cut the nori sheets into smaller pieces for even coverage.
- Place the nori shiny side down over the rice to enhance adhesion.
- Lightly press the nori into the rice to ensure it sticks without becoming soggy.
4. Toasting Nori for Extra Crispness
If you want a crispier texture, lightly toast the nori before layering it over the rice. This enhances its flavor and prevents it from getting too soft during baking.
- How to Toast Nori:
- Hold a sheet over low heat for a few seconds until it becomes slightly crisp.
- Let it cool before layering to maintain its texture.
By carefully preparing the rice and nori, you’ll create a sturdy base that holds the layers together while enhancing the flavor of your sushi bake.
Second Layer: Crab and Creamy Sauce – Why This Combination Works So Well
The second layer of sushi bake is where the magic happens. The rich, creamy seafood mixture provides the dish’s signature flavor and texture, making every bite indulgent and satisfying. The combination of imitation crab and a flavorful creamy sauce works so well because it balances umami, sweetness, and richness while ensuring a melt-in-your-mouth texture.
1. The Role of Imitation Crab in Sushi Bake
Imitation crab, also known as surimi, is a popular ingredient in sushi bake due to its mild sweetness, soft texture, and affordability. Unlike real crab, which can be expensive and harder to work with, imitation crab provides a consistent flavor and blends perfectly with creamy sauces.
- Why Imitation Crab Works Well:
- Its naturally sweet and savory taste complements the richness of the sauce.
- It shreds easily, allowing for better distribution in the dish.
- It absorbs flavors well, making each bite more delicious.
Tip: For extra depth, mix imitation crab with real crab meat or cooked shrimp. This adds complexity and enhances the seafood flavor.
2. The Secret Behind the Creamy Sauce
The creamy sauce binds the seafood together while adding moisture, umami, and richness. A well-balanced sauce prevents the sushi bake from being too dry or overly heavy.
- Key Ingredients for the Creamy Sauce:
- Kewpie mayonnaise – Adds a rich, tangy depth that enhances umami.
- Cream cheese – Provides a velvety smooth texture and slight tang.
- Sriracha or spicy mayo – Adds heat and enhances the overall flavor.
- Soy sauce – Brings in a salty umami balance.
- Lemon juice – Brightens up the mix and prevents it from tasting too heavy.
Tip: Adjust the amount of spicy mayo or Sriracha depending on your spice preference. If you want extra richness, increase the cream cheese portion.
3. Blending the Ingredients for a Perfect Consistency
A well-mixed, evenly distributed seafood filling ensures that each bite of sushi bake has a balanced flavor. The key is to shred the crab finely and mix it well with the creamy sauce.
- How to Mix the Crab and Sauce:
- Shred the imitation crab into thin strands using your hands or a fork.
- In a mixing bowl, combine the shredded crab with cream cheese, Kewpie mayo, Sriracha, and soy sauce.
- Stir until the mixture is creamy, well-coated, and evenly blended.
- Spread the mixture evenly over the rice and nori layer, ensuring full coverage.
4. Why This Combination Works So Well
- Creamy and Savory Balance: The richness of the sauce enhances the mild, slightly sweet flavor of imitation crab.
- Perfect Texture: The soft, creamy filling contrasts beautifully with the slightly crispy top after baking.
- Moisture Retention: The sauce keeps the dish moist, preventing the rice from drying out.
This second layer is what gives sushi bake its irresistible, creamy seafood taste. With the right balance of ingredients, it becomes the heart of the dish, making every bite flavorful and satisfying.
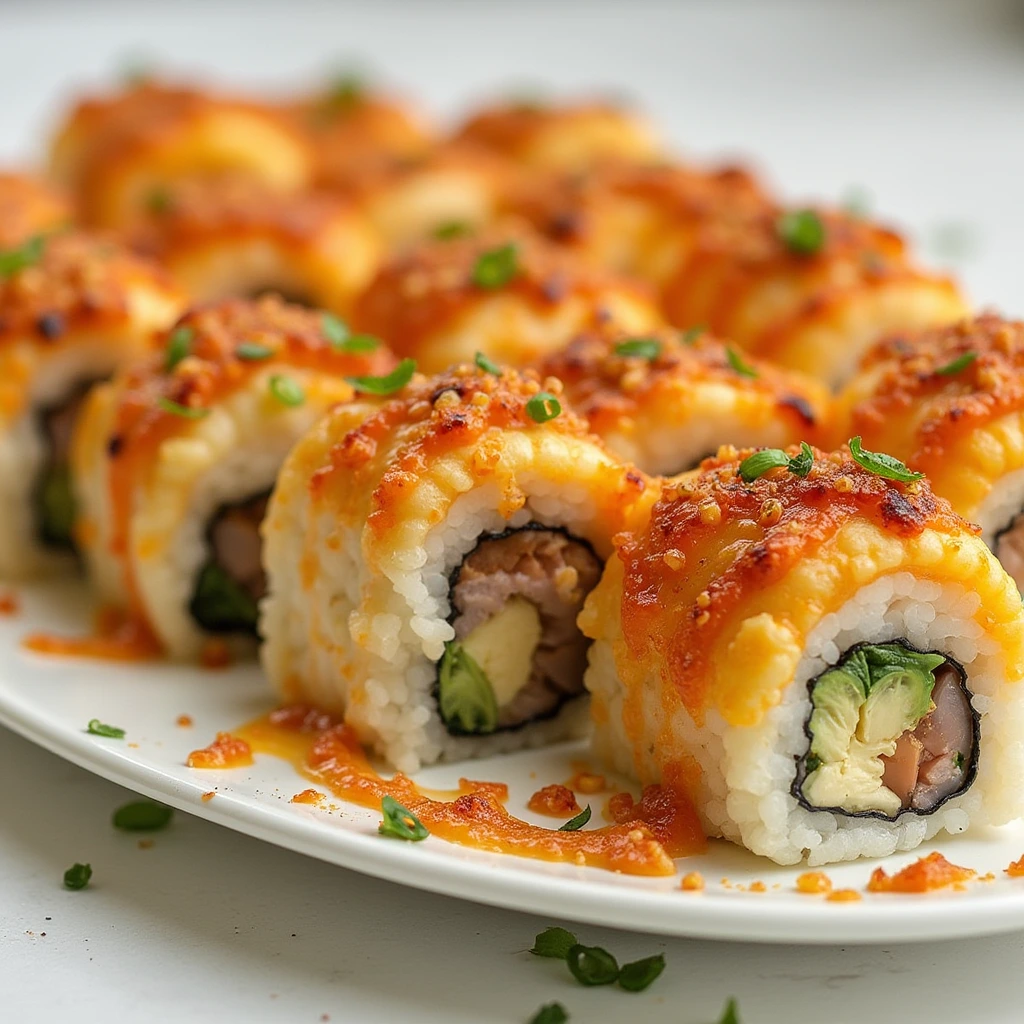
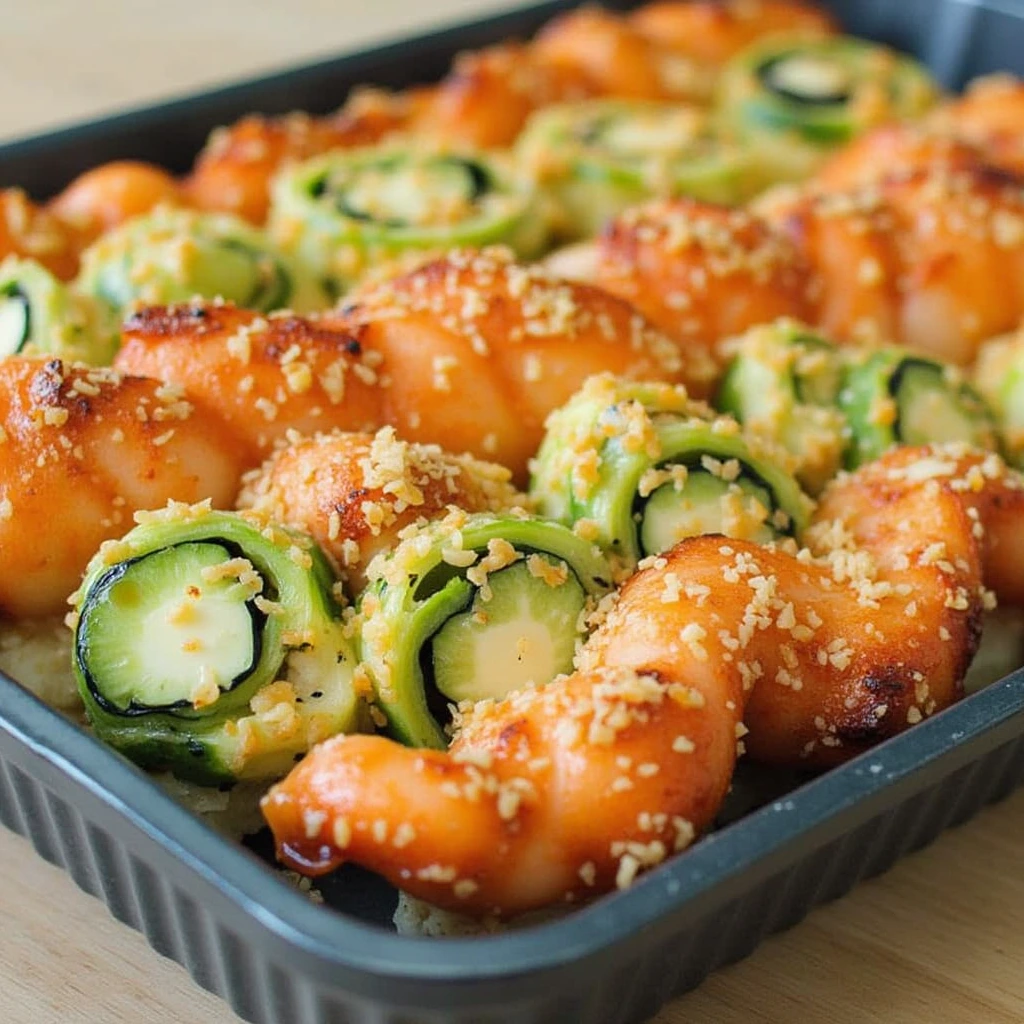
Topping: Panko Breadcrumbs and Fish Roe – How to Achieve the Perfect Crunch and Garnish
The final layer of your sushi bake is all about texture and visual appeal. A crispy, golden topping paired with vibrant garnishes elevates the dish, making it more delicious and visually stunning. Panko breadcrumbs provide the crunch, while fish roe adds bursts of salty, umami-rich flavor. Here’s how to perfect this topping for the ultimate sushi bake experience.
1. The Role of Panko Breadcrumbs for Crunch
Panko breadcrumbs are lighter and flakier than regular breadcrumbs, making them the perfect topping for sushi bake. They add a crispy texture that contrasts beautifully with the creamy seafood layer beneath.
- How to Achieve a Perfectly Crispy Topping:
- Toast the Panko Before Baking – Lightly toast the breadcrumbs in a dry pan over medium heat until golden brown. This enhances the crunch and prevents sogginess.
- Mix with Butter or Oil – Toss the panko with melted butter, sesame oil, or olive oil before sprinkling it over the sushi bake. This helps it crisp up in the oven.
- Evenly Distribute – Spread the panko evenly over the creamy seafood layer for consistent crunch in every bite.
Tip: If you want extra depth, mix in a small amount of grated Parmesan cheese or furikake (Japanese seasoning) with the breadcrumbs before baking.
2. The Magic of Fish Roe as a Garnish
Fish roe (such as tobiko or masago) is a classic sushi topping that adds a pop of color and bursts of salty, umami flavor. It enhances both the taste and presentation of your sushi bake.
- Why Fish Roe Works Well as a Garnish:
- Adds a pop of salty, briny flavor that complements the creamy filling.
- Provides a slight crunch and a fresh, oceanic taste.
- Enhances visual appeal with bright orange, red, or black specks.
- How to Use Fish Roe:
- Sprinkle it over the sushi bake just before serving to preserve its delicate texture.
- If using tobiko (flying fish roe), opt for flavored varieties like wasabi or yuzu tobiko for extra flavor.
- Use sparingly—too much can overpower the dish.
Tip: If fish roe isn’t available, finely chopped green onions or sesame seeds can add a similar visual and textural appeal.
3. Balancing Crunch and Creaminess for the Best Texture
A great sushi bake should have layers of contrasting textures: soft rice, creamy seafood filling, and a crispy topping. To achieve the perfect balance:
- Bake the dish uncovered to allow the top layer to crisp up.
- Avoid adding fish roe before baking as it can dry out and lose its fresh flavor.
- Use a kitchen torch after baking to lightly toast the top for extra crispness.
4. Garnishing for Extra Flavor and Aesthetics
Beyond panko and fish roe, additional toppings can enhance the look and taste of your sushi bake.
- Drizzle with spicy mayo or eel sauce for extra umami.
- Add thinly sliced green onions for freshness.
- Sprinkle sesame seeds for a nutty crunch.
- Top with shredded nori for an authentic sushi flavor.
By carefully layering panko and fish roe, you can create the perfect finishing touch—crispy, flavorful, and visually appealing. This final step ensures that your sushi bake isn’t just delicious but also a show-stopping dish worthy of any gathering!
Baking Tips for a Perfectly Cooked Sushi Bake
Bake Time and Temperature: The Best Temperature to Get Crispy Top Layers Without Overcooking
Getting the right bake time and temperature is crucial for a perfectly balanced sushi bake. You want a warm, creamy interior while ensuring the top layer turns golden and slightly crispy. Baking at the wrong temperature can lead to an overcooked, dry dish or an underbaked, mushy texture. Here’s how to achieve the perfect bake every time.
1. Ideal Temperature for Baking Sushi Bake
- The recommended oven temperature for sushi bake is 375°F (190°C).
- This allows the creamy seafood layer to warm through without drying out.
- A moderate temperature also helps the panko topping crisp up gradually.
Tip: If you prefer an extra crispy top, broil for the last 2–3 minutes at 450°F (230°C).
2. Optimal Bake Time for the Perfect Texture
- Bake the sushi bake for 20–25 minutes.
- The top should be golden brown, and the filling should be bubbling slightly at the edges.
- Overbaking can dry out the seafood mixture, so keep an eye on it in the last few minutes.
Tip: If using a glass or ceramic baking dish, add 2–3 extra minutes to the baking time, as these materials heat up more slowly than metal pans.
3. How to Prevent Overcooking While Achieving a Crispy Top
- Cover with foil for the first 15 minutes to keep moisture in.
- Remove the foil in the last 5–10 minutes to allow the topping to crisp up.
- For extra crunch, toast the panko breadcrumbs separately before sprinkling them on.
Bonus Tip: Use a kitchen torch after baking to lightly char the top for a flame-seared sushi effect!
By following these baking guidelines, your sushi bake will have a perfectly crispy, golden topping while keeping the inside creamy and flavorful.
Achieving Golden Perfection: How to Watch for the Perfect Crispy Top
The crispy, golden top of a sushi bake is what makes it irresistible! Achieving this perfect finish requires careful attention during the baking process. The goal is a balance between a crunchy, golden crust and a creamy, moist interior. Here’s how to ensure you get that perfect crispy top every time.
1. Watch for the Right Color
- The topping should turn golden brown in color, indicating that the panko breadcrumbs have toasted to perfection.
- If you’re using fish roe or any other toppings like sesame seeds or green onions, they should have a slight char or crispness without being burnt.
Tip: If the top is browning too quickly, cover the dish loosely with foil to prevent over-baking while still allowing the breadcrumbs to toast.
2. Check the Texture
- When done, the panko topping should be crunchy to the touch, creating a satisfying contrast with the soft, creamy filling beneath.
- A fork or spoon should easily cut through the topping, but it should crack slightly when you dig into it, revealing the golden crispiness.
Tip: If you like an extra crunchy topping, increase the amount of panko breadcrumbs and lightly toast them with butter before sprinkling them on the sushi bake.
3. Use the Broiler for Extra Crispiness
- If you want the top to be perfectly golden and crispy, broil for the last 2–3 minutes. Set your oven to 450°F (230°C) and place the baking dish under the broiler.
- Keep a close eye on it—broiling can cause the topping to go from golden to burnt very quickly.
- Broiling gives the panko a crispy, toasted finish while the filling remains warm and creamy.
Tip: Ensure the top is at least 5 inches away from the broiler to avoid burning the fish roe or delicate toppings.
4. Know When to Take It Out
- The perfect time to remove the sushi bake from the oven is when the top is golden brown, slightly bubbling around the edges, and crispy to the touch.
- Avoid overbaking as this will dry out the filling and create an overly hard crust.
- Let it sit for about 5 minutes after baking to allow the dish to settle and the flavors to meld.
By keeping a close watch on the color, texture, and temperature, you’ll achieve a perfectly golden, crispy top that’s the hallmark of an ideal sushi bake. It’ll be both a visual treat and a deliciously satisfying crunch!
Serving Suggestions: Best Sides and Garnishes to Pair with Your Sushi Bake
A sushi bake is a rich and flavorful dish, so pairing it with the right sides and garnishes can elevate the meal. The goal is to complement the creamy, savory sushi bake with fresh, light, or tangy elements that balance its richness. Here are some perfect side dishes and garnishes to serve alongside your sushi bake for a well-rounded and memorable meal.
1. Fresh Salad for Balance
A light, crisp salad is the perfect contrast to the rich, creamy layers of the sushi bake. Look for salads with a bit of acidity or bitterness to cut through the richness.
- Cucumber and Seaweed Salad – Thinly sliced cucumbers and wakame (seaweed) tossed with a light sesame dressing provide a refreshing contrast.
- Asian-Inspired Greens – A mix of arugula or baby spinach with a tangy miso vinaigrette adds a fresh touch and a slightly bitter flavor that balances the creamy dish.
- Simple Green Salad – A mix of lettuce, arugula, and fresh herbs, drizzled with a rice vinegar-based dressing. The acidity will balance the richness of the sushi bake.
Tip: For a more satisfying side, consider adding some edamame, lightly salted for a touch of umami.
2. Pickled Vegetables for Tang and Texture
Pickled vegetables are an excellent way to cut through the creaminess and add an extra layer of flavor to your meal.
- Pickled Ginger – Often served with sushi, pickled ginger adds a tangy, zesty bite that complements the richness of the bake.
- Pickled Radishes or Carrots – Quick-pickled radishes or carrots bring a crunch and a burst of acidity to balance the smooth texture of the bake.
- Japanese Pickled Vegetables (Tsukemono) – Serve traditional Japanese pickles like takuan (pickled daikon radish) for a slightly sweet and tangy contrast.
Tip: For a twist, you can prepare a batch of homemade pickled vegetables, letting them sit in a sweet-sour vinegar solution for at least a few hours before serving.
3. Sushi Rolls or Sashimi for a Full Japanese Feast
If you’re craving more sushi, consider serving the sushi bake alongside traditional sushi rolls or sashimi for a complete meal.
- California Rolls – Serve sushi bake with simple, fresh California rolls. The creamy imitation crab in both dishes will be a perfect match.
- Tuna or Salmon Sashimi – Fresh sashimi provides a light, clean flavor that pairs well with the richness of the bake.
- Vegetarian Rolls – If you want a lighter, vegetarian option, serve the sushi bake with veggie rolls, like avocado or cucumber rolls.
Tip: Be mindful of the flavors. Avoid overly heavy or strongly flavored rolls that could compete with the sushi bake’s delicate taste.
4. Sauces and Garnishes to Enhance the Dish
A few finishing touches can elevate the sushi bake even further.
- Extra Spicy Mayo – Serve with a side of spicy mayo for an extra kick. Drizzle it over the bake before serving or offer it on the side for dipping.
- Sesame Seeds – A sprinkle of toasted sesame seeds adds a nutty crunch and extra flavor.
- Thinly Sliced Green Onions – Fresh green onions or scallions provide a bit of sharpness and color, making the dish visually appealing and adding a touch of freshness.
- Furikake – This Japanese seasoning blend of dried seaweed, sesame seeds, and fish flakes adds extra umami and flavor.
Tip: If you like a bit of heat, serve the dish with a small bowl of Sriracha or chili oil on the side.
5. Light and Refreshing Beverages
Pairing your sushi bake with the right beverage can make the meal even more enjoyable.
- Green Tea – A classic choice, green tea complements the flavors of sushi bake with its earthy, slightly bitter taste.
- Chilled Sake – For a more authentic experience, serve chilled sake. Its delicate flavor pairs well with the dish’s richness.
- Sparkling Water or Lemonade – For a non-alcoholic option, sparkling water or lemonade offers a refreshing contrast. The fizz helps cleanse your palate between bites.
By pairing your sushi bake with these complementary sides and garnishes, you can enhance its flavor, texture, and presentation, making the meal an unforgettable experience!
Achieving the perfect sushi bake requires careful attention to detail during the baking process. For additional tips on perfecting your baking techniques, check out this comprehensive guide on Baking Tips for Beginners to elevate your culinary skills and create flawless dishes every time!
Conclusion
In this post, we’ve shared the 5 essential secrets to making the perfect sushi bake at home. From selecting the right sushi rice and layering it properly, to using fresh ingredients like imitation crab, creamy sauce, and crispy panko breadcrumbs, these steps will help you achieve the best sushi bake every time. By following these tips and paying attention to bake time and temperature, you can create a dish that’s both flavorful and visually stunning.
We hope you feel inspired to try making your own sushi bake! With these secrets in hand, you’re ready to create a delicious, restaurant-quality meal right in your kitchen. Whether you’re hosting a party or just treating yourself to a comforting dish, sushi bake is a crowd-pleaser that’s sure to impress.
Have you tried making sushi bake yet? We’d love to see your creations! Share your photos and experiences in the comments below, and feel free to ask any questions. Happy baking!