
A heart shaped cake is more than just dessert—it’s a symbol of love and celebration. Whether for a birthday, anniversary, or Valentine’s Day, it adds a thoughtful touch to any occasion.
These cakes come in many flavors, from classic red velvet with buttercream to rich chocolate with a ganache drip. Don’t have a heart-shaped pan? No problem! You can easily make one using a round and square pan.
In this post, we’ll explore five creative heart shaped cake ideas perfect for birthdays and anniversaries. Whether you’re a beginner or an expert, these cakes will impress your loved ones. Let’s get started! 🎂❤️
Classic Red Velvet Heart Cake
Why Red Velvet Cake Is a Popular Choice for Romantic Occasions
Red velvet cake has long been associated with love, passion, and indulgence, making it a perfect choice for romantic celebrations. Its rich red color symbolizes deep emotions, while its velvety texture and slight cocoa flavor create an irresistible treat. But what exactly makes red velvet cake stand out for romantic occasions like anniversaries, Valentine’s Day, and weddings? Let’s take a closer look.
1. The Symbolic Red Color
First and foremost, the deep red hue of red velvet cake represents love, romance, and passion. Whether topped with creamy white buttercream frosting or dusted with edible rose petals, this cake visually enhances the theme of a romantic occasion. Moreover, the striking color makes it an eye-catching centerpiece for anniversary dinners, proposals, and intimate celebrations.
2. A Luxurious and Velvety Texture
Another reason why red velvet cake is so beloved is its soft, delicate crumb. The combination of buttermilk, vinegar, and cocoa powder creates a uniquely smooth and moist texture that melts in your mouth. As a result, this luxurious quality makes it feel more special and indulgent, setting it apart from regular cakes.
3. The Perfect Balance of Sweet and Tangy
Unlike traditional chocolate or vanilla cakes, red velvet cake has a mild cocoa flavor with a hint of tanginess, thanks to buttermilk and vinegar. Consequently, this balanced flavor profile makes it appealing to a wide range of taste preferences. When paired with cream cheese frosting, it creates a rich yet slightly tangy contrast that keeps every bite exciting.
4. Versatile Decoration Options
In addition to its delicious flavor, red velvet cake pairs beautifully with various romantic decorations. For example, popular embellishments include:
- White chocolate shavings for an elegant touch
- Fresh berries like strawberries or raspberries to enhance the romance
- Heart-shaped sprinkles or edible flowers for a dreamy effect
- Personalized cake toppers with sweet messages for an anniversary or engagement
Because of these endless decorating possibilities, red velvet cake remains a top choice for those who want a visually stunning and delicious dessert.
5. A Classic Choice for Weddings and Anniversaries
Many couples choose red velvet wedding cakes due to their symbolic color and rich taste. Furthermore, the cake’s elegant appearance and delicate, flavorful layers make it a standout choice for anniversaries, romantic dinner dates, and special surprises.
Final Thoughts
In summary, red velvet cake is a perfect dessert for romantic occasions. Thanks to its bold red color, smooth texture, and indulgent flavor, it embodies romance in every bite. Whether you’re celebrating a birthday, anniversary, or a surprise date night, this cake is a timeless choice that adds a touch of elegance and love to the occasion.
How to Achieve the Perfect Buttercream Frosting or Cream Cheese Topping
A smooth, creamy frosting can take your heart-shaped cake to the next level. Whether you prefer buttercream frosting for a light and fluffy texture or cream cheese frosting for a rich and tangy flavor, getting the consistency right is essential. Here’s how to make each one perfectly.
1. Perfect Buttercream Frosting
Buttercream is a classic choice for cakes because it’s light, smooth, and easy to work with. To achieve the perfect buttercream frosting, follow these key steps:
Ingredients:
- 1 cup (2 sticks) unsalted butter, softened
- 4 cups powdered sugar, sifted
- 2 teaspoons vanilla extract
- 2–3 tablespoons heavy cream or milk
- A pinch of salt
Steps for a Fluffy and Smooth Texture:
- Whip the butter – Beat the softened butter using a hand mixer or stand mixer for 2–3 minutes until light and fluffy. This step helps create a smooth base.
- Gradually add powdered sugar – Add the sifted powdered sugar one cup at a time, mixing on low speed to avoid mess. Once combined, increase the speed to medium-high and continue beating.
- Incorporate vanilla and salt – Add vanilla extract and a pinch of salt for enhanced flavor.
- Adjust consistency – Add 1 tablespoon of heavy cream or milk at a time until you reach a spreadable consistency. The frosting should be creamy yet firm enough to hold its shape.
- Whip for extra fluffiness – Beat for another 2–3 minutes to make the frosting light and airy.
💡 Pro Tip: If the buttercream is too soft, refrigerate it for 10–15 minutes before using. If it’s too thick, add a little more cream and mix again.
2. Perfect Cream Cheese Frosting
Cream cheese frosting adds a tangy, rich flavor that pairs beautifully with red velvet and chocolate cakes. However, it can sometimes be too runny if not prepared correctly. Here’s how to get it just right.
Ingredients:
- 8 oz cream cheese, softened
- ½ cup (1 stick) unsalted butter, softened
- 3–4 cups powdered sugar, sifted
- 1 teaspoon vanilla extract
- A pinch of salt
Steps for a Smooth and Stable Texture:
- Beat cream cheese and butter together – Use a mixer to beat the softened cream cheese and butter until smooth and creamy. This ensures a lump-free frosting.
- Add powdered sugar gradually – Sift and add the powdered sugar in batches, mixing on low speed to prevent clumping.
- Mix in vanilla and salt – Add vanilla extract for flavor and a pinch of salt to balance the sweetness.
- Chill if needed – If the frosting is too soft, refrigerate it for 20–30 minutes before decorating.
💡 Pro Tip: For extra stability, add a tablespoon of cornstarch or reduce the butter slightly to keep the frosting firm, especially in warm temperatures.
Final Thoughts
A perfect frosting transforms a heart-shaped cake into a stunning and delicious masterpiece. Whether you choose buttercream for its light texture or cream cheese frosting for its rich flavor, using the right techniques ensures a smooth, spreadable, and picture-perfect topping.
How to Achieve the Perfect Buttercream Frosting or Cream Cheese Topping
The right buttercream frosting or cream cheese topping can make all the difference in your cake’s flavor and appearance. Whether you’re decorating a heart-shaped cake for a romantic occasion or just want the perfect finishing touch, here’s how to achieve the perfect consistency and flavor for each frosting.
Perfect Buttercream Frosting
Buttercream frosting is a light, fluffy, and sweet frosting that pairs beautifully with a variety of cakes. Here’s how to make it perfect every time.
Ingredients:
- 1 cup (2 sticks) unsalted butter, softened to room temperature
- 4 cups powdered sugar, sifted
- 2 teaspoons vanilla extract
- 2–4 tablespoons heavy cream or milk
- A pinch of salt (optional)
Steps to Make Perfect Buttercream Frosting:
- Beat the butter – Start by beating the softened butter using a stand mixer or hand mixer on medium speed for about 3–5 minutes until light and fluffy. This is crucial for creating the base of a smooth, airy frosting.
- Gradually add powdered sugar – Add the sifted powdered sugar one cup at a time, mixing on low speed initially to prevent a sugar cloud. Once combined, increase the speed to medium-high and mix until the sugar is fully incorporated.
- Add vanilla and salt – Add the vanilla extract and a pinch of salt (optional) to balance out the sweetness and enhance the flavor.
- Adjust the consistency – Gradually add heavy cream or milk, one tablespoon at a time, until you achieve the desired spreadable consistency. If it’s too stiff, add more cream; if it’s too soft, add more powdered sugar. Mix until smooth and creamy.
- Whip for extra fluffiness – Beat the frosting on high for an additional 2–3 minutes to make it extra light and fluffy.
Perfect Cream Cheese Frosting
Cream cheese frosting has a slightly tangy flavor that complements many cakes, especially red velvet or carrot cake. Here’s how to make it smooth and not too runny.
Ingredients:
- 8 oz cream cheese, softened
- ½ cup (1 stick) unsalted butter, softened
- 3–4 cups powdered sugar, sifted
- 1 teaspoon vanilla extract
- A pinch of salt
Steps to Make Perfect Cream Cheese Frosting:
- Cream the cream cheese and butter – Begin by beating the softened cream cheese and butter together until smooth and creamy. This helps eliminate any lumps and ensures a smooth consistency.
- Add powdered sugar – Gradually add the sifted powdered sugar, 1 cup at a time, and beat at low speed to avoid a mess. Once combined, mix on medium speed until fluffy.
- Add vanilla and salt – Stir in the vanilla extract for extra flavor and a pinch of salt to balance the sweetness.
- Chill if needed – If the frosting is too soft, refrigerate it for 20–30 minutes to firm up before using it. This helps it hold its shape when spread on cakes.
- Final adjustments – If the frosting is too stiff after chilling, allow it to come to room temperature and re-whip it to restore its creamy texture.
Tips for Both Frostings
- Room Temperature Ingredients: For both buttercream and cream cheese frosting, ensure that your butter and cream cheese are softened to room temperature. This helps achieve a smooth and creamy texture.
- Flavor Variations: You can customize both frostings by adding different flavorings like lemon zest, cocoa powder, or almond extract to complement your cake.
- Piping Tips: To decorate cakes, ensure that the frosting is at the right consistency—firm but spreadable. If you’re piping, use a piping bag with your preferred tip to create designs like rosettes, borders, or intricate flowers.
Conclusion
By following these steps, you can easily achieve the perfect buttercream frosting or cream cheese topping that will complement your heart-shaped cake beautifully. Whether you prefer the light, fluffy sweetness of buttercream or the tangy richness of cream cheese, both options add a delicious touch to any occasion.
Decoration Tips Using Fondant Hearts, Sprinkles, or Edible Flowers for a Heart-Shaped Cake
Decorating a heart-shaped cake with fondant hearts, sprinkles, or edible flowers can take your cake from simple to elegantly festive. Whether you’re preparing a cake for a romantic anniversary or a birthday celebration, these decoration ideas will add a beautiful touch and make your dessert stand out.
1. Fondant Hearts: Elegant and Customizable
Fondant allows for intricate designs and a polished, professional finish. Here’s how to use fondant hearts to enhance your heart-shaped cake:
How to Make and Use Fondant Hearts:
- Prepare the Fondant: Roll out a sheet of fondant to about 1/8 inch thick using a rolling pin. If you want a smooth finish, ensure the fondant is pliable and not too dry.
- Cut Out Heart Shapes: Use a heart-shaped cookie cutter to cut out hearts in various sizes. You can also use a sharp knife to cut custom shapes if you don’t have a cookie cutter.
- Color the Fondant (Optional): If you want a more vibrant look, you can color the fondant using gel food coloring. Simply knead the color into the fondant until it’s evenly distributed.
- Arrange on the Cake: Once you have your fondant hearts ready, gently place them on the cake in a pattern. You can arrange them in a grid pattern, along the edges of the cake, or scatter them across the top for a whimsical look.
- Add Details: For added detail, use edible glitter, piping gel, or food markers to write messages, add texture, or create small designs on the fondant hearts.
Decoration Tips:
- Use smaller fondant hearts to create a layered effect on the top of the cake.
- Dust fondant hearts with edible shimmer powder for a little extra sparkle.
2. Sprinkles: Fun and Playful Decoration
Sprinkles are an easy and fun way to add color and texture to a cake. Here’s how to decorate with sprinkles:
How to Use Sprinkles:
- Choose the Right Sprinkles: Select heart-shaped sprinkles, sugar pearls, or confetti sprinkles in colors like pink, red, or white to match the romantic theme. For a playful touch, you can mix in different shapes or colors.
- Apply the Sprinkles: Gently press the sprinkles onto the frosting while the cake is still fresh. If you’re using a smooth buttercream or cream cheese frosting, you can sprinkle them generously on top or create a more focused design along the edges.
- Decorate with Precision: For a more refined design, you can use a piping bag or small spoon to place sprinkles in specific patterns such as hearts around the edges or scattered across the top.
Decoration Tips:
- Use large sugar crystals or shimmery sprinkles to give your heart-shaped cake a touch of elegance.
- Layer different colored sprinkles for an eye-catching effect, such as a gradient from red to white.
3. Edible Flowers: Fresh and Whimsical Touch
Edible flowers bring a natural, fresh beauty to any cake, making it perfect for romantic and spring-themed occasions. Here’s how to incorporate them into your heart-shaped cake:
How to Use Edible Flowers:
- Choose Edible Flowers: Choose safe-to-eat flowers such as roses, pansies, violets, or lavender. Ensure the flowers are free of pesticides and labeled as safe for consumption. You can also use edible flower petals for a more delicate look.
- Prepare the Flowers: Wash the flowers gently, ensuring they are clean and dry. Remove any excess leaves or stems.
- Arrange the Flowers: You can place the edible flowers in clusters on top of the cake or arrange them around the edges. Fresh roses look beautiful in the center, while delicate violets or pansies can be scattered across the top.
- Use Flowers Creatively: For a whimsical look, place a few scattered petals along the cake’s edges. For a more dramatic effect, you can arrange larger flowers in a circular design or as a centerpiece in the middle of the heart.
Decoration Tips:
- Combine edible flowers with fondant hearts to create a sophisticated, natural effect. For example, place a small fondant heart beside a cluster of flowers.
- If you prefer a vibrant look, combine bright-colored flowers (like pansies) with white or pink frosting for contrast.
4. Combining Fondant, Sprinkles, and Edible Flowers: The Ultimate Look
Combining all three decoration elements—fondant hearts, sprinkles, and edible flowers—can elevate the look of your heart-shaped cake to stunning. Here’s how to mix them together:
How to Combine These Decorations:
- Layer the Decorations: Begin by covering the cake with your favorite frosting. Next, apply the fondant hearts to the cake. Afterward, sprinkle edible glitter over the fondant hearts for added sparkle.
- Sprinkle Edges: Add sprinkles around the edges of the cake, creating a colorful border that contrasts nicely with the smoother frosting surface.
- Place Edible Flowers: Finally, strategically place edible flowers on top or along the edges of the cake. For a unique touch, consider using a few small flowers and place them at the intersections of the fondant hearts.
Final Touches:
- Use edible gold leaf to highlight certain areas for a luxurious touch.
- For a rustic look, mix fresh flowers with sugar-coated sprinkles for a playful yet elegant effect.
Conclusion:
Decorating a heart-shaped cake with fondant hearts, sprinkles, and edible flowers adds a personal and creative touch to your celebration. Whether you’re aiming for a classic romantic look, a playful vibe, or a sophisticated design, these decoration tips can help you create a cake that’s as beautiful as it is delicious. Feel free to experiment with different colors, shapes, and floral combinations to make your heart-shaped cake truly unforgettable.
Chocolate Drip Heart Cake
How to Make a Rich, Decadent Chocolate Heart-Shaped Cake
A rich, decadent chocolate heart-shaped cake is more than just a treat – it’s a statement of love and affection. Whether you’re celebrating a romantic occasion like Valentine’s Day, an anniversary, or a loved one’s birthday, this cake is guaranteed to impress. Not only does it blend the rich flavors of dark chocolate with a beautifully symbolic heart shape, but it also offers a moist, velvety texture that makes every bite an indulgence.
Making this cake from scratch is easier than it sounds, and the results are far superior to any store-bought cake. The cake itself is infused with deep cocoa flavor, made even richer by the addition of a luscious chocolate ganache frosting that coats each layer and the cake’s surface, making it irresistibly smooth and decadent. The combination of flavors and textures ensures that every slice feels like a little moment of indulgence.
Why Heart-Shaped?
The heart shape isn’t just for visual appeal – it adds a special personal touch to the occasion. Whether you use heart-shaped cake pans or carve the cake into a heart shape yourself, the symbolism of love, care, and devotion is immediately clear. The shape also adds a beautiful, festive look that enhances any celebration, turning an everyday dessert into a showstopper.
The Ingredients Matter
The beauty of this cake lies not only in its shape but also in its ingredients. High-quality unsweetened cocoa powder and semi-sweet chocolate create the foundation of its rich flavor profile. The addition of whole milk or buttermilk keeps the cake moist and adds a slight tang that balances out the sweetness of the cake. Eggs contribute to the cake’s structure and fluffiness, while vegetable oil ensures that the cake is wonderfully moist.
The boiling water added to the batter helps thin the mixture, resulting in a batter that is pourable yet still produces a thick, fudgy texture once baked. This addition ensures the cake stays incredibly moist throughout. Chocolate chips, though optional, add extra chocolatey bits that melt throughout the cake, enhancing its richness.
Step-by-Step Process for Making the Cake
1. Prepare the Cake Pans
Start by greasing and flouring your heart-shaped pans, ensuring that the batter won’t stick. You can also line the pans with parchment paper for extra security. This step is critical for getting smooth, even layers that will bake to perfection.
2. Make the Chocolate Cake Batter
Sift your dry ingredients together first to ensure the flour, cocoa powder, baking powder, and baking soda are well-distributed. This ensures a uniform texture in the cake. Next, whisk the wet ingredients, including eggs, milk, and vegetable oil, until the mixture is smooth. Once combined, mix the wet and dry ingredients, and then slowly add in the boiling water to create a thin, pourable batter.
3. Baking Time
Pour the batter into the prepared pans and bake until a toothpick inserted into the center comes out clean. Don’t rush this step – be patient, as this ensures the cake is cooked through and maintains its moist texture. Once baked, allow the cakes to cool in their pans for a few minutes, then transfer them to a wire rack to cool completely.
Making the Ganache Frosting
While the cakes cool, prepare the chocolate ganache by heating heavy cream and pouring it over chopped semi-sweet chocolate. Let the mixture sit for a few minutes to allow the chocolate to melt, then stir in butter and vanilla extract for added richness. The ganache should cool slightly before you use it, so it’s spreadable yet still glossy and smooth.
Assembling the Cake
Once the cakes are cool, it’s time to level them if necessary, ensuring even layers for a professional-looking result. Begin by spreading a generous layer of ganache over the first layer, and then top it with the second cake. Cover the entire cake with the remaining ganache, smoothing it over the top and sides. This creates a rich, glossy finish.
Personalizing the Decoration
This cake is already a showstopper, but you can take it to the next level with personalized decorations. Consider adding fresh berries like strawberries or raspberries for a burst of color. You could also use edible gold leaf for an elegant touch or heart-shaped sprinkles to enhance the theme. These small details add texture and visual appeal, making the cake feel like a true work of art.
Enjoy Your Decadent Creation
This rich, decadent chocolate heart-shaped cake is not only a visually stunning dessert but also a deeply satisfying one. Every step, from the moist chocolate cake layers to the smooth ganache, is crafted with love and attention to detail. Whether you’re baking it for a special occasion or just to show someone you care, this cake is sure to be remembered for its beauty, flavor, and the effort you put into creating it. Enjoy each moment, from the preparation to the first bite, with the people who matter most.
Adding a Chocolate Ganache Drip for an Elegant Touch
Ingredients for the Ganache Drip:
- Semi-sweet or dark chocolate (about 6 oz)
- Heavy cream (about 1/2 cup)
- Butter (1-2 tablespoons, optional, for extra sheen)
Step-by-Step Instructions:
1. Prepare the Ganache Drip:
Start by heating the heavy cream in a saucepan over medium heat until it just begins to simmer. Do not let it boil. Once heated, remove it from the heat and pour it over the chopped semi-sweet chocolate in a heatproof bowl. Let it sit for 2-3 minutes to allow the chocolate to melt. Stir the mixture until smooth and glossy. If you want a shinier finish, add butter and stir until fully combined.
2. Cool the Ganache Slightly:
Let the ganache cool for a few minutes to slightly thicken. The key to a perfect drip is the right consistency. If it’s too hot or thin, the drips will be too runny and won’t hold their shape. Aim for a pourable consistency that’s thick enough to stay on the edge of the cake without running all the way down.
3. Prepare the Cake:
Before adding the ganache drip, ensure your cake is fully frosted with the regular ganache layer. It’s important that the ganache base layer is set and slightly chilled so the drips will hold their shape better.
4. Apply the Ganache Drips:
Using a spoon or a squeeze bottle, carefully drip the ganache along the edge of the cake. Start from the top edge and let the ganache naturally drip down. For a controlled drip effect, focus on applying a small amount of ganache at a time, allowing it to drip down at different lengths. You can also drizzle ganache over the top center of the cake for a beautiful cascading effect.
5. Smooth Out the Top (Optional):
If you prefer a sleek, smooth top without too much drip, gently spread the remaining ganache over the top of the cake using a spatula, being careful not to disturb the drips.
6. Finishing Touches:
For a polished look, you can decorate the dripped areas with fresh berries, edible gold leaf, or chocolate shavings to enhance the beauty and elegance of the cake further.
1. Personalized Cake Toppers
Nothing says “special occasion” like a personalized cake topper. You can have your topper customized with names, initials, or significant dates to make the cake truly unique to the celebration. These can be made from acrylic, wood, or even edible designs.
- Name & Age: For birthdays, you can personalize the topper with the celebrant’s name and age.
- Custom Message: A simple “Happy Anniversary” or “Happy Birthday” with a special font adds a personal touch.
2. Floral Cake Toppers
Floral cake toppers offer an elegant, timeless look that works for both birthdays and anniversaries. Fresh flowers like roses, peonies, or lavender can be arranged beautifully on top of the cake for a natural, sophisticated vibe. Alternatively, artificial flowers or edible sugar flowers can provide a longer-lasting solution.
- Fresh Flowers: Use flowers that match the cake’s color scheme, such as deep red roses for a romantic anniversary cake.
- Sugar Flowers: These edible flowers mimic real blooms but last longer and can be customized to any color.
3. Metallic or Glittery Cake Toppers
For an eye-catching look, metallic or glittery cake toppers are perfect for a birthday or anniversary celebration. These toppers can sparkle and shine, making your cake feel more festive and celebratory.
- Glitter Numbers: You can choose glittery number toppers for birthdays (e.g., 30, 40, 50) or anniversary milestones.
- Metallic Letters: Gold or silver letters spelling out “Love” or “Cheers” give the cake an elegant, high-end finish.
4. Themed Cake Toppers
For specific themes, whether for a birthday or anniversary, themed cake toppers can add a fun and unique touch to your dessert. Choose designs that tie into the celebrant’s interests or the event’s theme.
- For a Birthday: Fun options include superheroes, favorite characters, or hobbies like sports, music, or travel.
- For an Anniversary: Elegant, romantic toppers such as heart shapes, intertwined rings, or a cake topper in the shape of a couple holding hands can be symbolic of love.
5. Edible Cake Toppers
Edible toppers offer a fun and tasty way to decorate your cake. Whether you prefer edible images, fondant decorations, or chocolate accents, these toppers can match any occasion and are perfect for those who want to enjoy the decoration as part of the cake.
- Edible Images: Custom-designed edible prints featuring photos, logos, or messages can be a great touch for a personalized birthday or anniversary celebration.
- Chocolate Decorations: These can be molded into various shapes such as hearts, stars, or flowers, making them both a visual and edible delight.
6. Minimalist Cake Toppers
For those who prefer a clean, simple look, minimalist cake toppers can be both modern and stylish. A small yet impactful decoration like a simple wooden name plaque, or a sleek geometric design, can make your cake stand out without being too over-the-top.
- Simple Wording: Elegant text like “Love,” “Celebrate,” or “Cheers” in a minimalist font.
- Geometric Shapes: Gold or black geometric toppers, such as triangles or circles, can add sophistication.
7. Acrylic Cake Toppers
Acrylic cake toppers are highly customizable and come in various colors and designs. They can be engraved with personal messages, names, or dates, and they offer a sleek, modern look.
- Personalized Acrylic Topper: Choose a design that reflects the event, such as names, dates, or even custom shapes like hearts or stars.
- Geometric Acrylics: For a modern twist, you can opt for geometric or abstract acrylic toppers in metallic or pastel shades.
8. Whimsical Cake Toppers
For a more fun or casual vibe, whimsical cake toppers are perfect. These often feature playful elements, like animals, balloons, or fun phrases that add an extra dose of charm to the celebration.
- Balloon Toppers: Little balloon-shaped toppers made of fondant or plastic can add a colorful and cheerful touch to a birthday or anniversary cake.
- Animal Toppers: Cute animal figurines, such as lovebirds or cats, can be a playful addition to your cake.
9. Vintage Cake Toppers
For a classic or nostalgic feel, vintage cake toppers are a great choice. These can range from traditional bride and groom figurines to elegant, old-fashioned monogrammed toppers, perfect for both anniversaries and milestone birthdays.
- Bride and Groom Figures: Ideal for a wedding anniversary celebration, these toppers add a touch of romance and nostalgia.
- Monogrammed Toppers: Personalize your cake with a couple’s monogram or initials for a timeless and sophisticated look.
10. Interactive Cake Toppers
Interactive cake toppers allow guests to engage with the cake in a unique way. These can include options like candles, sparklers, or even confetti poppers that add excitement and surprise to the cake-cutting moment.
- Sparklers: Light up the birthday or anniversary celebration with a dazzling sparkler topper.
- Confetti Poppers: Create a moment of surprise when you pull a confetti popper from your cake topper during the celebration.
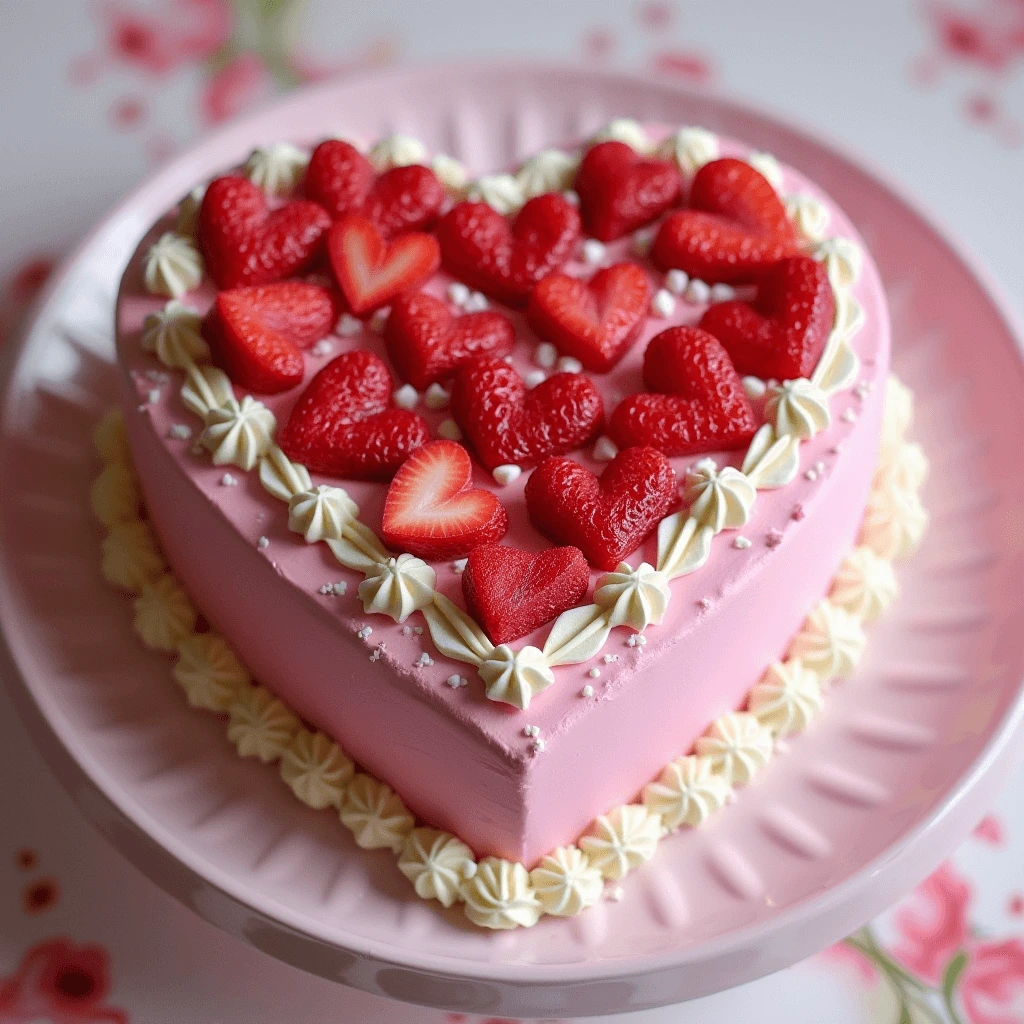
Fresh Berry Heart Cake
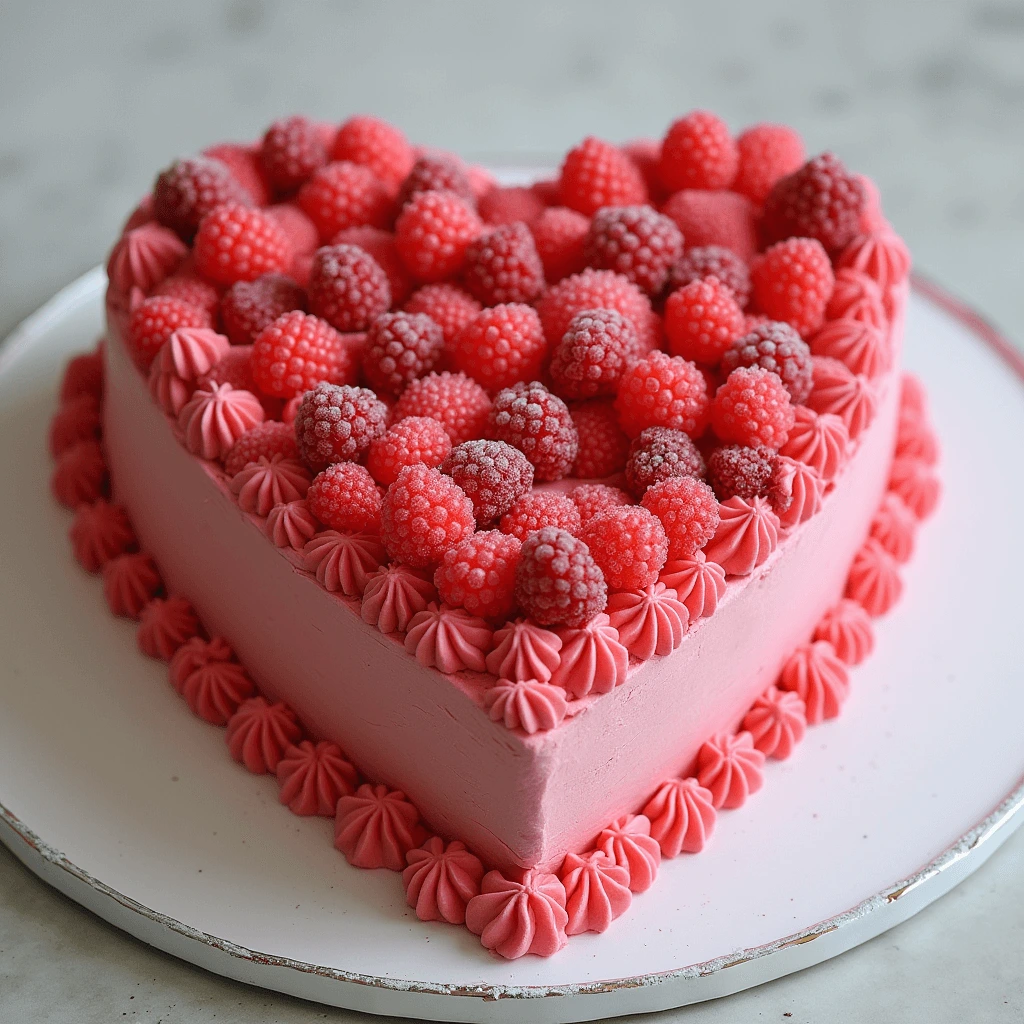
Using Strawberries, Raspberries, and Blueberries for a Fruity Twist
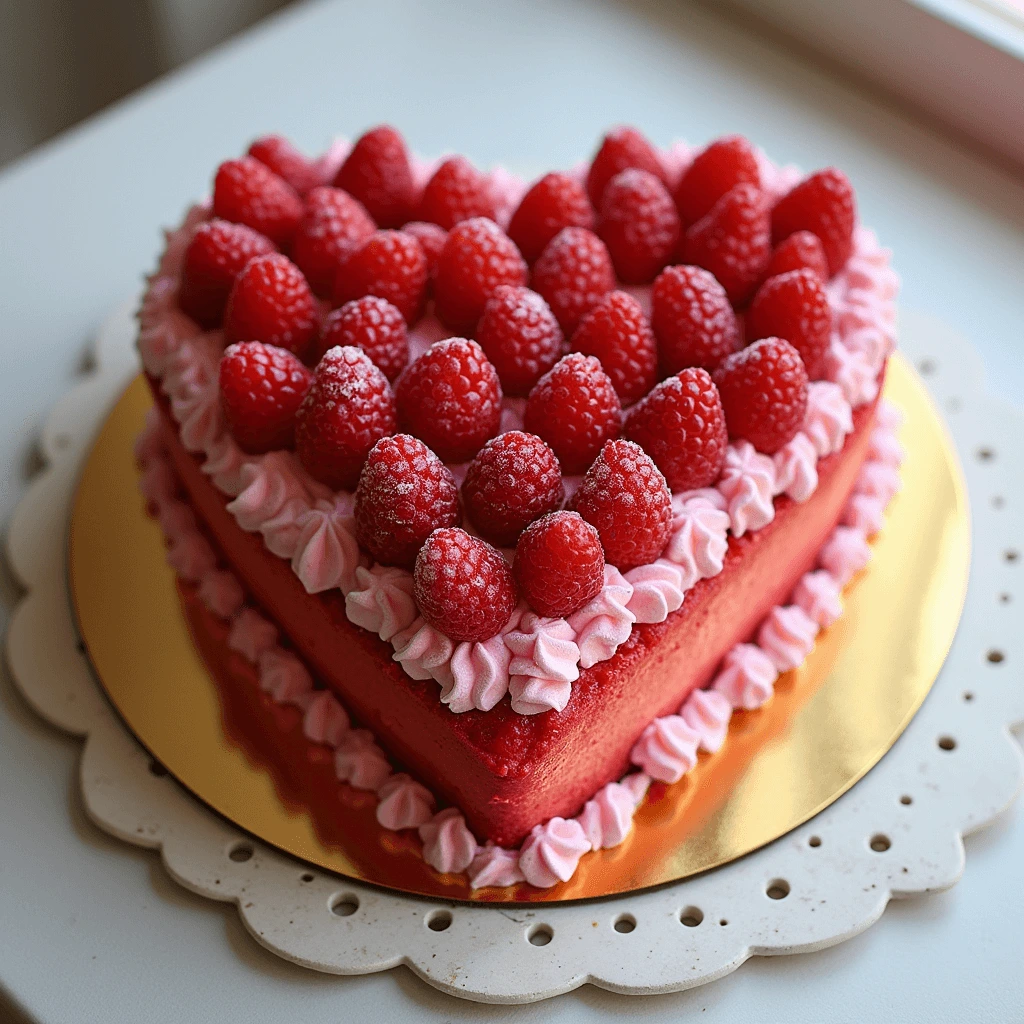
Adding fresh berries like strawberries, raspberries, and blueberries to a heart-shaped cake not only enhances its visual appeal but also brings an extra layer of flavor and freshness. These vibrant, juicy fruits create a beautiful contrast against the rich, smooth texture of the cake and frosting, turning an already stunning dessert into a showstopper.
The Appeal of Fresh Berries
Each berry brings its own unique flavor and texture to the table. Strawberries are sweet with a hint of tang, and their bright red color makes them a natural choice for a celebratory cake. Raspberries, with their delicate, tart taste, provide a wonderful balance to the sweetness of the cake, while their deep red color adds a layer of sophistication. Blueberries, on the other hand, add a slight sweetness with a pop of color that’s both refreshing and visually appealing.
The combination of these berries offers a diverse flavor profile, with the strawberries being sweet, the raspberries offering a subtle tartness, and the blueberries providing a gentle sweetness. Together, they create a perfectly balanced fruity topping that pairs beautifully with the richness of the cake and frosting.
Creative Decorating Ideas with Berries
The berries not only bring flavor but also serve as a natural decoration, making your heart-shaped cake look gorgeous and appetizing. Here are some ideas for incorporating them into your design:
- Berry Cascade: Arrange the berries in a cascade or heart shape, starting from the center and moving outward, to create a stunning, visually appealing look. The vibrant colors contrast against the cake’s chocolate ganache, making the berries pop.
- Layered Design: For a more elegant and refined appearance, you can layer the strawberries, raspberries, and blueberries in alternating rings, creating a gradient of colors from the center outward. This is perfect for a sophisticated look for special celebrations.
- Individual Placement: Scatter individual berries around the edges or place them neatly in a symmetrical pattern. This works well for a minimalist design, letting the simplicity of the berries shine through.
Why Choose Fresh Berries?
Fresh berries are a healthier alternative to traditional cake decorations like fondant or sugar sprinkles. They add a burst of antioxidants, vitamins, and natural sugars, making the cake not only more beautiful but also healthier. The fresh, juicy berries complement the sweetness of the cake without overpowering it, keeping the overall dessert balanced.
Additional Touches to Enhance the Fruity Twist
To take the fruity twist even further, you can try a few additional touches:
- Berry Sauce Drizzle: If you want to give the cake a bit more flair, make a simple berry sauce by mashing some of the berries with sugar and a bit of lemon juice. Drizzle it over the cake for an extra layer of flavor and color.
- Berry Whipped Cream: You could also incorporate a bit of berry flavor into your frosting by folding pureed berries into whipped cream. This creates a light, creamy layer that adds both flavor and texture.
- Candied Berries: If you want a bit of sparkle and added sweetness, candy your berries by gently simmering them in a sugar syrup. The sugar coating adds a glossy finish and a delightful crunch, perfect for special occasions.
Perfect for Any Occasion
The combination of fresh strawberries, raspberries, and blueberries makes this heart-shaped cake perfect for a variety of celebrations. Whether you’re celebrating a birthday, anniversary, or Valentine’s Day, this cake can be adapted to suit any event. The fresh fruit topping is especially appealing during the warmer months, when these berries are in season and their natural flavors are at their peak.
Incorporating strawberries, raspberries, and blueberries into your cake design not only adds a burst of flavor but also makes your dessert a feast for the eyes. It’s a simple yet elegant way to elevate any occasion, and it’s sure to impress both your guests and the lucky person you’re celebrating with.
How to Make a Light and Fluffy Sponge Cake
A light and fluffy sponge cake is the perfect base for many desserts, such as layered cakes, trifles, or even enjoyed on its own with a dusting of powdered sugar. The delicate, airy texture of this cake is achieved through careful preparation, a few key ingredients, and the right technique. In this article, we’ll provide a step-by-step guide on how to make a light and fluffy sponge cake that will melt in your mouth.
Ingredients for a Light and Fluffy Sponge Cake
To begin, gather the following ingredients:
- Eggs – 4 large eggs, at room temperature (separate the yolks and whites)
- Sugar – 1 cup (granulated sugar)
- Flour – 1 cup (all-purpose or cake flour works best)
- Baking powder – 1 tsp (optional, as some sponge cakes don’t require it)
- Butter – 2 tablespoons (melted, optional, to add a slight richness)
- Vanilla extract – 1 tsp
- Salt – 1/4 tsp
- Water – 2 tablespoons (optional, helps with lightness)
Step-by-Step Instructions
1. Preheat the Oven and Prepare Your Pans
First, preheat your oven to 350°F (175°C). Next, grease your cake pan with a thin layer of butter or line it with parchment paper. A round or square 8-inch pan works well, but you can adjust the size based on your preference.
2. Separate the Eggs
Now, separate the egg yolks and egg whites into two bowls, ensuring no yolk gets into the whites. This is crucial, as even a small amount of yolk can prevent the whites from whipping up properly.
3. Whip the Egg Whites
Use an electric mixer or a hand whisk to beat the egg whites with a pinch of salt. Beat on medium speed until soft peaks form. Gradually add about half of the sugar (1/2 cup), and continue to whip on high speed until stiff peaks form. The whites should hold their shape but not be dry or over-beaten.
4. Whisk the Egg Yolks and Sugar
In a separate bowl, whisk the egg yolks and the remaining sugar until pale and fluffy. This will take about 2-3 minutes of vigorous whisking or mixing on high speed. As a result, the mixture should be light in color and have a thick, ribbon-like texture when the whisk is lifted.
5. Add Vanilla and Melted Butter
Afterward, add vanilla extract to the egg yolk mixture and whisk it in. If you’re using melted butter, fold it in gently at this stage. Be careful not to deflate the egg yolks too much.
6. Sift the Flour and Baking Powder
Next, sift the flour (and baking powder, if using) directly over the egg yolk mixture to prevent lumps. Sifting helps incorporate air into the flour, contributing to the cake’s fluffiness.
7. Fold the Ingredients Together
Gently fold the dry ingredients into the egg yolk mixture using a rubber spatula or wooden spoon. It’s important to note that the key here is to incorporate the flour without deflating the air bubbles you’ve created in the eggs. This should be done gently and in stages.
8. Incorporate the Egg Whites
At this point, gently fold in the whipped egg whites into the batter. Add the whites in three parts, folding gently each time to preserve as much air as possible. Be sure to take care not to overmix or you’ll lose the fluffiness.
9. Add Water (Optional)
If you like, you can add a little bit of water (2 tablespoons) to the batter at this stage. This can help make the sponge even lighter. Gently fold it in.
10. Bake the Cake
Pour the batter into your prepared cake pan and smooth the top with a spatula. Then, bake for 20-25 minutes, or until a toothpick inserted into the center comes out clean. The cake should be golden brown and spring back when lightly pressed.
11. Cool the Cake
Allow the cake to cool in the pan for about 10 minutes before transferring it to a wire rack to cool completely. It’s crucial to let the sponge cake cool completely before frosting or slicing.
Tips for a Light and Fluffy Sponge Cake
- Room Temperature Ingredients: Make sure your eggs are at room temperature. This will help them whip up more easily, creating a lighter texture.
- Gentle Folding: The folding process is crucial to maintaining air in the batter. Therefore, be sure to fold gently and slowly, as vigorous mixing can cause the batter to deflate.
- Do Not Open the Oven: While the cake is baking, resist the urge to open the oven door. Sudden temperature changes can cause the cake to collapse.
- Don’t Overmix: Overmixing the batter or egg whites can lead to a dense, heavy cake. Instead, gently fold until just combined.
This light and fluffy sponge cake serves as an ideal base for layered cakes, trifles, or any other creations you want to try. Moreover, whether you top it with fresh fruit, whipped cream, or icing, this cake will always deliver a delicate and airy texture that’s perfect for any occasion!
Decorating Ideas with Whipped Cream and Powdered Sugar
Whipped cream and powdered sugar are classic cake decorating elements that can elevate your desserts with their light, fluffy texture and sweet finishing touch. Here are some creative ideas to decorate your cakes using these two simple ingredients:
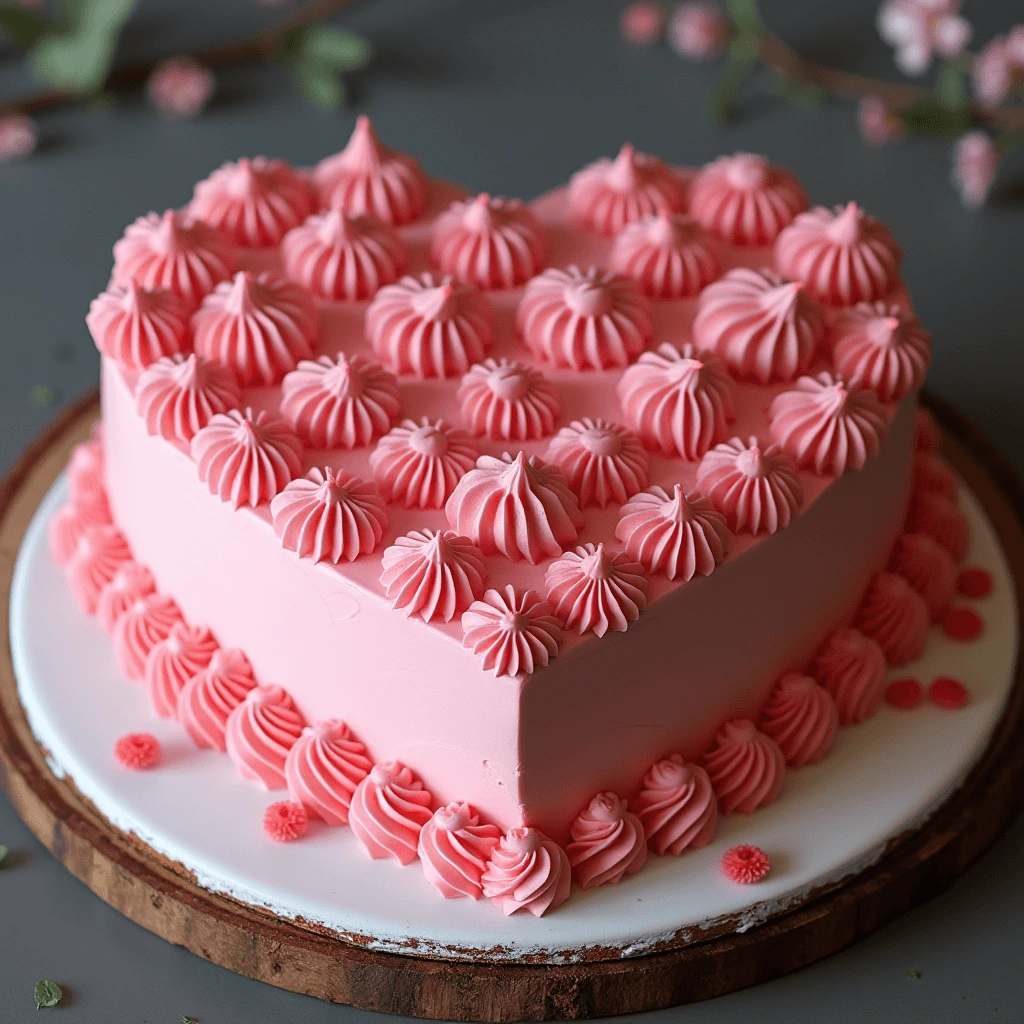
1. Swirls and Rosettes with Whipped Cream
Firstly, a popular decorating technique, whipped cream swirls and rosettes add elegance to any cake. Start by placing whipped cream in a piping bag fitted with a star or round tip. You can pipe small swirls around the edge of the cake or create larger rosettes in the center. Additionally, for an extra touch, lightly dust the edges with powdered sugar to highlight the intricate designs.
2. Dusting Powdered Sugar for a Snowy Effect
Next, a simple yet striking decoration is dusting powdered sugar over the cake. This creates a snowy or frosty look, perfect for winter-themed or holiday cakes. To do this, lightly sift powdered sugar over the top of the cake using a fine mesh sieve. If desired, you can stencil a design onto the cake’s surface, such as hearts, flowers, or holiday-themed shapes, before dusting the sugar for a more personalized look.
3. Whipped Cream and Fruit Topping
Moreover, whipped cream serves as an excellent base for fruit toppings. Consider pairing fresh berries like strawberries, raspberries, or blueberries with whipped cream to add color and texture. Simply pipe a ring of whipped cream around the edges and fill the center with a mix of fruits, then lightly sprinkle powdered sugar over the top for a fresh, sweet finishing touch.
4. Powdered Sugar and Whipped Cream Layers
Furthermore, if you’re looking for a multi-layered effect, spread a thin layer of whipped cream between each layer of cake. After stacking the layers, pipe rosettes or simple dollops of whipped cream on top. Finally, finish the decoration by sifting powdered sugar over the entire cake for a soft, cloud-like effect.
5. Piped Borders with Whipped Cream and Powdered Sugar
In addition, create a clean and polished finish by piping whipped cream along the edges of the cake, such as a delicate border along the top and bottom. Afterward, lightly dust a small amount of powdered sugar over the whipped cream to enhance the texture and give the cake a dreamy, airy feel.
6. Whipped Cream Center with Powdered Sugar Snowflakes
For a festive and seasonal look, you can pipe a small dollop of whipped cream in the center of each cake slice or on the cake’s surface. Then, sprinkle powdered sugar to create snowflakes, giving your cake a fun and wintery design. This works especially well for birthday cakes, Christmas cakes, or any celebration during the colder months.
7. Layered Ruffles with Whipped Cream
In a similar vein, for a sophisticated look, create ruffles using whipped cream. To do this, pipe a line of whipped cream, then gently press down the piping tip and pull away to form soft ruffles. Once the ruffles are in place, lightly dust powdered sugar over them to bring out their texture and make them shimmer.
8. Whipped Cream Flowers
For those looking for a delicate touch, pipe beautiful flower shapes like daisies or roses with whipped cream on your cake. Use a star tip to create the petals and a small round tip for the center. Afterward, once your flowers are piped, finish the look with a delicate dusting of powdered sugar, making the flowers appear even more ethereal.
9. Decorative Accents with Powdered Sugar
Another quick decoration idea is to simply dust powdered sugar in a design on the cake. Using stencils, you can create elegant patterns like hearts, swirls, or flowers. When the powdered sugar is sifted over the stencil, it creates a beautiful contrast against the cake’s base, giving it a polished, professional look.
10. Whipped Cream and Powdered Sugar with Edible Flowers
Finally, for a more natural look, top your cake with whipped cream and then arrange edible flowers such as pansies, violets, or nasturtiums. Once the flowers are placed, finish by sifting a small amount of powdered sugar over the whipped cream and flowers to highlight the beauty of both.
Final Touch
Overall, whipped cream and powdered sugar are versatile ingredients that can transform any cake into a work of art. By experimenting with different piping techniques, textures, and arrangements, you can create a variety of styles, from elegant and refined to fun and whimsical. Whether it’s a simple, classic decoration or a more elaborate design, these two ingredients are sure to bring sweetness and visual appeal to your cakes.
DIY Heart Shaped Cake Without a Special Pan
Step-by-Step Guide to Making a Heart Cake Using a Round and Square Pan
Creating a heart-shaped cake is a delightful way to celebrate special occasions like Valentine’s Day, birthdays, or anniversaries. By using a round and square pan, you can easily craft a heart-shaped cake that is both beautiful and delicious. Simply follow these steps to create a stunning heart-shaped cake without the need for a special heart-shaped pan.
What You’ll Need:
- 1 round cake pan (8-inch or 9-inch)
- 1 square cake pan (8-inch or 9-inch)
- Your favorite cake batter (store-bought or homemade)
- Butter or non-stick spray (for greasing the pans)
- Parchment paper (optional)
- Frosting of your choice (buttercream, whipped cream, etc.)
- Decorations (optional: fresh fruit, sprinkles, chocolate shavings)
Step 1: Prepare the Cake Pans
First, begin by preparing your cake pans. Grease both the round and square pans with butter or non-stick spray. To ensure the cakes come out easily, you can also line the bottoms with parchment paper. This extra step is especially helpful for achieving a clean, smooth finish.
- Round Pan: Grease the sides and bottom, then line the bottom with parchment paper for extra protection.
- Square Pan: Similarly, grease the sides and bottom, and optionally line the bottom with parchment paper.
Step 2: Pour the Cake Batter into the Pans
Next, prepare your cake batter. You can choose any flavor you like, such as vanilla, chocolate, or red velvet, depending on your preference. Once the batter is ready:
- Pour the batter into the round cake pan, filling it about halfway.
- Pour the remaining batter into the square pan, again filling it about halfway.
Make sure to spread the batter evenly in each pan to ensure that both cakes bake uniformly.
Step 3: Bake the Cakes
Now, it’s time to bake the cakes. Place both pans in the oven and bake according to the instructions on your cake batter recipe or box mix. Typically, cakes bake at 350°F (175°C) for 25-30 minutes. However, keep in mind that oven times can vary. Therefore, always check for doneness by inserting a toothpick into the center of the cakes. If it comes out clean, the cakes are ready.
Step 4: Let the Cakes Cool
Once the cakes are done baking, remove them from the oven and let them cool in their pans for about 10-15 minutes. Afterward, transfer the cakes to wire racks to cool completely. This cooling process is essential to prevent the frosting from melting when you start decorating.
Step 5: Shape the Heart
Now comes the fun part! You’re going to shape the heart from the round and square cakes. This step is easy and doesn’t require any special tools.
- Cut the Square Cake: Begin by cutting the square cake in half. You will only need one of the halves for the heart shape.
- Shape the Heart: Place the half of the square cake next to the round cake, aligning them like this:
- The round cake will form the top curves of the heart.
- The half of the square cake will form the bottom point of the heart.
To create a smoother heart shape, you can trim the edges of the square piece slightly, which will help define the bottom point of the heart more clearly. You may also want to trim a small section from the top of the round cake to ensure the heart’s shape is neat and precise.
Step 6: Frost the Cake
Once the heart is shaped, it’s time to frost the cake. Follow these steps for a smooth, beautiful finish:
- Frosting: Begin by applying a thin crumb coat of frosting to the entire cake. This helps lock in the crumbs and creates a smooth base for the final layer.
- Once the crumb coat is applied, allow the cake to chill in the fridge for about 15-20 minutes. This will help the crumb coat set and make frosting easier.
- After the crumb coat has set, spread a thicker layer of frosting over the entire cake. You can use any frosting you prefer, such as classic buttercream, whipped cream, or ganache, for an indulgent finish.
Step 7: Decorate the Heart Cake
Now that your heart cake is frosted, it’s time to add some personal touches. Here are a few decorating ideas:
- Sprinkles: Use heart-shaped sprinkles or colored sprinkles for a festive and fun touch.
- Fresh Fruit: Add fresh strawberries, raspberries, or blueberries on top of the cake for a fruity and fresh flavor.
- Chocolate: Drizzle melted chocolate over the top or sprinkle chocolate shavings for an extra layer of indulgence.
- Piped Designs: If you have a piping bag, create rosettes, swirls, or borders to give the cake a more refined look.
These decorative touches will make your heart cake look like a professional masterpiece.
Step 8: Serve and Enjoy
Finally, your heart-shaped cake is ready to be served! Slice it into generous portions and share it with your loved ones. The cake is not only visually stunning but also delicious and heartfelt. You can also enjoy it with a cup of tea or coffee for a complete treat.
Tips for Success:
Make Ahead: You can bake the cakes a day ahead and store them in an airtight container. Then, decorate them just before serving.
Double Layer Option: If you want a more impressive cake, you can bake two layers of each cake and stack them for a more towering heart shape.
Flavor Combinations: Feel free to experiment with different flavor combinations, like vanilla cake with chocolate frosting or strawberry cake with whipped cream frosting.
Best Cake Flavors for DIY Heart Cakes (Vanilla, Chocolate, Funfetti)
When it comes to choosing the best cake flavors for a DIY heart cake, there are several great options that suit different tastes and preferences. Below are some of the best cake flavors for heart cakes, each offering a unique twist to the classic heart-shaped design.
1. Vanilla Cake
Vanilla cake is a timeless classic and a fantastic choice for any occasion. Because it has a light and airy texture, it serves as the perfect base for pairing with various frostings and fillings. Additionally, vanilla works well with many topping choices, which makes it versatile. For example, you can easily customize it with fresh fruits or chocolate ganache for a more decadent look. Furthermore, its subtle flavor pairs wonderfully with other bold ingredients like berries or caramel.
- Classic Vanilla: A soft, light vanilla cake that can be paired with buttercream frosting for a simple yet elegant cake.
- Vanilla with Fresh Berries: Adding strawberries or raspberries to the cake elevates the flavor and gives it a colorful, festive look.
2. Chocolate Cake
For chocolate lovers, a rich and indulgent chocolate cake is a go-to choice. Chocolate cake has a dense, moist texture and pairs exceptionally well with lighter frostings like whipped cream or chocolate ganache. Moreover, you can experiment with fillings such as raspberry jam or chocolate mousse to add depth and flavor. By incorporating chocolate, your heart cake will not only taste divine but also impress visually, thanks to the contrast between the deep chocolate color and the cake’s heart shape.
- Classic Chocolate Cake: A rich, fudgy chocolate cake that’s perfect for those with a sweet tooth. It pairs well with vanilla or chocolate frosting.
- Chocolate and Peanut Butter: Combining chocolate cake with peanut butter frosting creates a deliciously indulgent treat.
3. Funfetti Cake
Funfetti cake is another fantastic option for a heart-shaped cake, especially for celebrations like birthdays or Valentine’s Day. The colorful sprinkles inside give the cake a fun, playful twist, making it an excellent choice for parties. Additionally, Funfetti cake is incredibly easy to make, and its festive appearance is sure to put a smile on everyone’s face. By pairing it with a simple buttercream frosting, you can create a colorful and cheerful cake that stands out at any gathering.
- Vanilla Funfetti: A fluffy vanilla cake with sprinkles throughout, making it a delightful and cheerful option for celebrations.
- Chocolate Funfetti: For a chocolate version, use chocolate cake batter with sprinkles mixed in, which adds a fun texture and color contrast.
4. Red Velvet Cake
Red velvet cake is perfect for adding a sophisticated touch to your heart-shaped cake. The vibrant red color makes the cake stand out, while the smooth cream cheese frosting offers a delightful contrast to the slightly cocoa-flavored cake. Furthermore, red velvet cake has a unique flavor, which makes it a favorite for special occasions like anniversaries or romantic celebrations. You can also add a twist by using chocolate ganache between the layers for extra richness.
- Classic Red Velvet: A velvety, soft cake with a slightly tangy flavor that pairs perfectly with cream cheese frosting.
- Red Velvet with a Twist: Add a layer of chocolate ganache between the cake layers for a delicious combination of flavors.
5. Strawberry Cake
For those who love fruity flavors, strawberry cake offers a fragrant, sweet option. The natural sweetness of strawberries, along with the soft pink color, makes this cake perfect for a heart-shaped design. Additionally, strawberry cake can be paired with whipped cream or a tangy cream cheese frosting for a balanced flavor. If you want to take it to the next level, add fresh strawberries as a topping to enhance the fruity flavor.
- Classic Strawberry Cake: A fluffy, fruity cake that’s perfect for romantic occasions, with a delicate taste that pairs well with whipped cream.
- Strawberry with Chocolate Ganache: Adding chocolate ganache on top of the strawberry cake gives it a decadent twist that’s sure to satisfy both fruity and chocolate lovers.
6. Lemon Cake
Lemon cake offers a refreshing and zesty flavor, making it ideal for spring and summer celebrations. The bright citrus flavor contrasts beautifully with sweeter frostings and fillings. In fact, lemon cake pairs particularly well with a smooth lemon buttercream frosting or a fresh fruit topping like blueberries or raspberries. Moreover, its light texture and tart flavor make it a great alternative to heavier, sweeter cakes.
- Classic Lemon Cake: A tangy and refreshing cake that’s perfect for a light and airy heart-shaped dessert.
- Lemon with Blueberry: Pairing lemon cake with blueberry filling or fresh berries creates a delightful, fruity combination.
7. Coconut Cake
If you enjoy tropical flavors, coconut cake is an excellent choice for a heart-shaped cake. It brings a slightly sweet flavor and a chewy texture that makes it stand out. You can incorporate shredded coconut into the cake batter or use it as a topping for added texture. Additionally, pairing coconut cake with a pineapple filling or topping it with fresh fruit can give it a tropical flair.
- Classic Coconut Cake: A light, coconut-infused cake topped with shredded coconut for a delightful texture.
- Coconut with Pineapple: Adding a layer of pineapple filling or fresh pineapple on top gives the cake a tropical twist.
Tips for Customizing Heart-Shaped Cakes:
- Layering Flavors: You can create multiple layers of different flavors, such as chocolate on the bottom and vanilla on top, for a fun and surprising flavor combination.
- Fillings and Frosting: Add unique fillings like lemon curd, raspberry jam, or even a flavored buttercream to enhance the cake’s flavor and texture.
- Decorative Elements: Top the cake with sprinkles, edible flowers, or fresh fruits to make your heart-shaped cake even more visually appealing.
By incorporating these flavors into your DIY heart cake, you’ll create a dessert that’s as delightful to eat as it is to look at. Whether you choose a classic vanilla, rich chocolate, or fun Funfetti, your heart cake will be a perfect match for any celebration!
How to Frost and Decorate for a Homemade Yet Professional Look
Achieving a professional look for your heart-shaped cake doesn’t have to mean spending hours at a bakery or investing in fancy equipment. With a little technique, some creativity, and the right tools, you can frost and decorate a cake that looks like it was made by an expert. Here are several key tips and steps to help you frost and decorate your heart-shaped cake for that homemade yet polished finish.
1. Choose the Right Frosting
The type of frosting you use plays a crucial role in how professional your cake looks. For a smooth, elegant finish, consider using buttercream, cream cheese frosting, or fondant. These frostings are not only easy to work with but also hold their shape well. Here’s a breakdown of popular choices:
- Buttercream Frosting: A classic choice for cake decoration, buttercream can be made light and fluffy or dense and smooth depending on your preference. For a professional finish, use American buttercream (which is smooth and holds its shape) or Swiss meringue buttercream (which is silky and glossy).
- Cream Cheese Frosting: Ideal for cakes with a tangy flavor (like red velvet or carrot cake), cream cheese frosting can be whipped to a smooth consistency, giving your cake a rich, creamy look.
- Fondant: If you want to create a perfectly smooth surface, fondant is an excellent option. While it requires a bit more work, it gives your cake a sleek, polished look, perfect for special occasions.
2. Prepare the Cake Layers
Before applying any frosting, it’s important to properly prepare your cake layers for decoration. If your heart-shaped cake is made from scratch, ensure the cakes have cooled completely before frosting. Warm cakes can cause the frosting to melt, leading to a messy and uneven finish.
- Trim the Layers: Use a serrated knife to level the tops of your cake layers so they are even. This prevents the cake from leaning to one side and creates a stable base for frosting. You can also use a cake leveler for precision.
- Chill the Cake: Once your cake layers are leveled, place them in the fridge for 20-30 minutes to firm up. This step, known as a “crumb coat,” helps prevent crumbs from getting mixed into the frosting and ensures a smooth application.
3. Apply a Crumb Coat
A crumb coat is a thin layer of frosting that locks in crumbs and creates a base for the final layer of frosting. This step is especially important when using buttercream or cream cheese frosting, which can be crumbly if not properly sealed. Here’s how to apply it:
- Spread a thin layer of frosting over the entire cake using an offset spatula. Don’t worry about making it perfect at this stage; just cover the cake to seal in the crumbs.
- Once the crumb coat is applied, refrigerate the cake for about 20 minutes to allow the frosting to set.
4. Frost the Cake Smoothly
After the crumb coat has chilled, it’s time to apply the final layer of frosting. For a professional finish, you’ll want to achieve a smooth, even layer. Follow these steps for a smooth finish:
- Use an Offset Spatula: An offset spatula allows you to spread the frosting evenly without disturbing the layers underneath. Start by placing a generous amount of frosting in the center of the cake.
- Smooth the Frosting: Gently spread the frosting from the center outward, working your way around the cake. For the sides, hold the spatula at a slight angle and work your way down. If you’re frosting a multi-layer cake, make sure the layers are stacked evenly to avoid a lopsided finish.
- Use a Bench Scraper: To achieve a smooth, straight finish, use a bench scraper (or a straight edge) to scrape off excess frosting and smooth the sides and top of the cake. Hold the scraper firmly against the cake while rotating it to remove the frosting’s surface imperfections.
5. Add Decorative Elements
Once the frosting is applied smoothly, it’s time to add decorative elements that will give your cake a professional and elegant touch. Here are a few ideas:
- Piping Designs: Use a piping bag fitted with different tips to create designs such as rosettes, borders, or intricate lace patterns. For a polished look, try using buttercream in complementary colors to create soft swirls or delicate flowers.
- Fondant Decorations: If you’re using fondant, roll it out and cut it into shapes like hearts, flowers, or ribbons to adorn the top of the cake. Fondant decorations give a clean, crisp look and can be used to create detailed designs.
- Fresh Fruits or Edible Flowers: Fresh berries, edible flowers, or herbs like mint can add a natural touch and elevate your cake’s appearance. Arrange them symmetrically around the top or place them in clusters for a whimsical look.
- Drips: For a trendy and elegant touch, you can add a ganache drip to the sides of your cake. Gently pour the ganache along the edges, letting it drip down to create a beautiful and glossy effect.
6. Add Finishing Touches
To complete your professional look, you can add a few finishing touches that make the cake stand out:
- Sprinkles or Edible Glitter: Lightly dust the cake with edible glitter or sprinkles for a little extra sparkle.
- Gold Leaf or Silver Pearls: These luxurious touches add an air of sophistication and can be placed delicately on the frosting for a subtle but impactful look.
- Cake Toppers: Consider adding a cake topper with a personalized message, such as a “Happy Birthday” or “Love” topper, to enhance the theme of your celebration.
7. Refrigerate and Serve
After decorating, refrigerate your cake for at least an hour to allow the frosting to set completely and the decorations to firm up. This will help ensure that your cake holds its shape when you cut into it. Before serving, let the cake sit at room temperature for about 10 minutes to soften slightly for easier slicing.
By following these steps, you can easily achieve a homemade heart-shaped cake that looks like it was made by a professional baker. The key is in the details—choosing the right frosting, using smooth techniques, and adding personal touches like fresh fruit or intricate piping. With a little practice, you’ll be able to create stunning cakes that impress everyone at your celebration.
Personalized Anniversary Cake with Custom Toppers
Using Edible Gold Leaf, Fondant Initials, or a Personalized Message for Extra Elegance
To elevate your heart-shaped cake and give it a more refined and sophisticated touch, consider incorporating edible gold leaf, fondant initials, or a personalized message. These additions not only enhance the cake’s aesthetic appeal but also add a thoughtful, customized element perfect for any celebration.
Edible Gold Leaf for a Touch of Luxury
Edible gold leaf is an excellent way to bring an element of luxury and opulence to your cake. It’s perfect for turning your cake into a statement piece, especially for special occasions like weddings, anniversaries, or milestone birthdays. Applying delicate sheets of gold leaf to the top of the cake or along the edges creates a shiny, elegant effect that catches the light and draws attention. Simply use a brush or tweezers to gently place the gold leaf on the cake, ensuring it’s applied without damaging the surface.
Fondant Initials for a Personal Touch
Using fondant initials to personalize your heart-shaped cake adds an intimate and customized detail that enhances its meaning. You can cut out the initials of the recipient or a couple using fondant to form small, crisp letters that sit perfectly atop the cake. Whether you opt for a classic font or a more whimsical style, fondant initials give your cake a polished, professional look that will impress your guests. You can also incorporate the initials into the cake’s design by arranging them with other decorative elements, such as flowers or frosting patterns, for a cohesive and personalized theme.
Personalized Message for Sentimental Appeal
A personalized message is one of the most heartfelt ways to decorate a cake. Whether it’s a simple “Happy Birthday,” “I Love You,” or a special note for an anniversary, writing a custom message on your cake adds emotional significance to the occasion. You can use royal icing, buttercream, or chocolate ganache to pipe the message on the cake. If you want a clean and professional look, using fondant to create letter shapes or even a small plaque for the message works wonderfully. Adding a meaningful phrase ensures that your cake not only delights the eyes but also tugs at the heartstrings of the recipient.
By using edible gold leaf, fondant initials, and a personalized message, you create a beautifully crafted cake that is as visually stunning as it is meaningful. These elegant touches will make your heart-shaped cake stand out, making any occasion even more memorable and special.
Romantic Themes Like “Mr. & Mrs.” or “Forever Love” for a Heart-Shaped Cake
When creating a heart-shaped cake for a romantic occasion, incorporating themed decorations like “Mr. & Mrs.” or “Forever Love” can add a sentimental and personalized touch. These romantic phrases not only express love but also serve as a visual celebration of the bond between two people, making the cake feel even more special. Here’s how you can incorporate these romantic themes into your cake design:
“Mr. & Mrs.” Theme for Weddings or Anniversaries
The “Mr. & Mrs.” theme is ideal for weddings, bridal showers, or anniversary celebrations. It’s a timeless expression of union and commitment, making it the perfect phrase to highlight on your heart-shaped cake. You can use fondant or royal icing to pipe the words “Mr.” and “Mrs.” elegantly on the cake’s surface or atop a fondant plaque. For added sophistication, consider incorporating edible lace, pearl embellishments, or even flower accents around the phrase. The Mr. & Mrs. theme can also be accompanied by decorative elements like wedding rings, hearts, or floral arrangements, all of which enhance the romantic sentiment of the cake.
“Forever Love” Theme for Romantic Celebrations
The phrase “Forever Love” adds a beautiful, poetic sentiment to your heart-shaped cake, making it perfect for anniversaries, Valentine’s Day, or a romantic date night. This theme symbolizes the enduring nature of love and can be personalized with additional elements like small heart cut-outs, roses, or a vintage script. For an added touch, you could also incorporate a couple’s initials intertwined within the design to emphasize the lifelong commitment. A cake decorated with “Forever Love” can feature elegant touches like delicate piping, gold leaf accents, or even a small cake topper that complements the theme.
Personalizing the Romantic Theme
To truly make your cake unique, personalize the romantic phrases with a few creative additions. For example, you could:
- Use gold or silver lettering to make the message pop against a contrasting cake color like white or deep red.
- Add tiny edible flowers around the words for a gentle, whimsical effect.
- Place the message on fondant ribbons or banners that drape over the cake, lending a classic, chic look.
Incorporating romantic phrases like “Mr. & Mrs.” or “Forever Love” into your heart-shaped cake not only adds a meaningful personal touch but also creates a focal point that’s sure to evoke emotions during your celebration. Whether you’re celebrating a wedding, an anniversary, or just the love you share with someone special, these themes will elevate your cake to a heartfelt masterpiece.
Where to Find the Best Custom Cake Toppers Online or DIY Options
Custom cake toppers add a unique, personal touch to any celebration cake, especially for milestones like weddings, birthdays, and anniversaries. Whether you’re looking for something elegant, quirky, or meaningful, you can find a wide variety of custom options both online and DIY. Here’s where to find the best custom cake toppers, along with some creative DIY ideas:
1. Etsy – A Hub for Custom Cake Toppers
Etsy is a fantastic platform for finding handmade, custom cake toppers. You can browse a wide range of designs, including:
- Personalized names or initials: Many sellers offer toppers that include the couple’s names, a favorite quote, or a meaningful phrase like “Mr. & Mrs.” or “Forever Love.”
- Custom characters: Some sellers specialize in creating toppers based on the couple’s appearance or theme of the event, such as bride and groom figurines or fun animal characters.
- Themed designs: Whether you’re having a tropical wedding, a fairy tale-inspired celebration, or a minimalist event, Etsy has something for every style.
Most sellers offer customization options, so you can request specific colors, materials, or even add personal touches like engraving or photos. Etsy also allows you to support small businesses, making each topper feel even more special.
2. Amazon – A One-Stop Shop for Ready-Made Custom Toppers
Amazon is another great place for both customizable and ready-made cake toppers. With a vast selection of products, you can find toppers that fit all kinds of occasions, including:
- Personalized cake toppers: You can find a variety of options that allow for adding names, dates, or messages.
- Decorative toppers: Choose from elegant metallic toppers, floral designs, or themed options like superhero cake toppers or princess crowns.
- Customization options: Many sellers allow you to personalize the toppers with your text or design. You can also filter through different materials, including acrylic, wood, and cardstock.
Many Amazon sellers offer fast shipping and customization options, so you can find the perfect topper without waiting too long.
3. Cake Topper Shop
For a more specialized selection of custom cake toppers, visit stores like The Cake Topper Shop. This site is known for:
- Laser-cut acrylic toppers: These toppers come in a variety of styles, colors, and themes, from classic monograms to more whimsical designs.
- Personalized toppers: You can request specific names, initials, or even photos to be added to your topper, ensuring it’s a perfect match for your celebration.
- Pre-designed themes: Find a vast array of designs for weddings, birthdays, and seasonal events, such as holiday-themed cake toppers.
The Cake Topper Shop is well-regarded for its attention to detail, and their custom work ensures a professional finish.
4. DIY Options
If you’re feeling creative, DIY cake toppers are an excellent way to make your cake decoration extra special. Here are some options for creating your own:
- Fondant Toppers: Use fondant to mold flowers, letters, or figures that will sit beautifully atop your cake. You can even create intricate designs like monograms, animals, or themed symbols for your celebration.
- Paper or Cardstock Toppers: If you’re looking for a simple yet elegant look, cut out shapes from cardstock and attach them to skewers or wooden sticks. Customize with glitter, paint, or personalized messages.
- Wooden Toppers: You can create rustic-style toppers using wooden cutouts. Purchase pre-cut shapes or design your own with a Cricut machine. Add paint, stains, or personal engraving for a personalized touch.
- Clay Toppers: Polymer clay can be used to create detailed custom toppers like flowers, animals, or miniature cake figurines. Once baked, they can be attached to the cake with food-safe glue or skewers.
5. Custom Cake Toppers on Social Media (Instagram & Facebook)
Social media platforms like Instagram and Facebook are great places to find local cake topper artists and businesses. Many small businesses showcase their work on these platforms, where you can directly message them to request custom designs. Use hashtags like #CustomCakeToppers or #PersonalizedToppers to find creative ideas and talented makers in your area.
By browsing Instagram and Facebook, you can discover:
- Unique, one-of-a-kind designs.
- Local artisans who can create bespoke toppers tailored to your celebration.
- Interactive posts that may help you visualize your custom topper before purchasing.
6. Local Craft Stores (for DIY Materials)
If you’re crafting your own cake topper, don’t forget to check out local craft stores like Michaels or Joann Fabrics for materials. These stores carry a wide variety of:
- Acrylic sheets for laser cutting.
- Foam, glitter, and paper for creating customized designs.
- Cake topper sticks, glue, and other crafting tools for assembling your topper.
Some stores even offer cake topper kits, which can be a great starting point for DIY projects.
Final Thoughts
Whether you’re looking for a personalized design or prefer a DIY approach, there are numerous options available online to help you find or create the perfect custom cake topper. From Etsy and Amazon for quick and easy purchases to specialized shops like The Cake Topper Shop, you’ll find a wide range of designs that will add a special touch to your celebration. If you’re feeling creative, DIY cake toppers offer a fun and personalized alternative that allows you to make your cake truly one-of-a-kind.
Personalized Anniversary Cake with Custom Toppers: Check out unique ideas for personalized anniversary cakes with custom toppers here.
Conclusion
In this post, we explored five fantastic heart-shaped cake ideas that are sure to make your next celebration extra special. To recap, here are the top 5 ideas:
- Classic Red Velvet Heart Cake – A rich, velvety cake that combines sweetness with a touch of tanginess, perfect for any romantic occasion.
- Strawberry and Chocolate Heart Cake – A decadent combination of fresh strawberries and smooth chocolate that will delight both your taste buds and your guests.
- Funfetti Heart Cake – A playful and colorful cake that’s ideal for birthdays or celebratory events with its delightful pops of color inside and out.
- Heart-Shaped Vanilla Sponge Cake – A light and fluffy cake that can be customized with different fillings and toppings, creating a delicate and elegant treat.
- Heart-Shaped Cake with Whipped Cream and Powdered Sugar – A simple yet elegant decoration idea that lets the soft, airy texture of the cake shine.
We hope these ideas inspire you to create a heart-shaped cake for your next special event, whether it’s a birthday, anniversary, or any other memorable occasion. Heart-shaped cakes add a personal and thoughtful touch that everyone will love!
We’d love to hear from you! Share your favorite heart-shaped cake idea in the comments below or tag us on social media with your creations. Let’s celebrate love, creativity, and delicious cakes together!