
A Traeger grill is a game-changer for grilling and outdoor cooking. Its wood pellet technology helps you create smoky, flavorful dishes with ease. Whether you’re a seasoned BBQ expert or just starting, Traeger recipes will elevate your cooking.
This post highlights the best Traeger recipes that will transform your grilling experience. From tender smoked meats to perfectly grilled vegetables, these dishes will impress your friends and family. Let’s fire up the grill and see how Traeger recipes can take your meals to the next level!
What Makes Traeger Recipes Stand Out?
Flavorful Smoked Dishes
One of the standout features of a Traeger grill is its ability to create flavorful, tender smoked dishes. This is especially true for meats like ribs and brisket. Thanks to the wood pellet technology, Traeger grills infuse each dish with a rich, smoky flavor that enhances the natural taste of your food.
Smoky Depth of Flavor
The key to Traeger’s incredible flavor lies in the wood pellets. Made from compressed sawdust, these pellets come in various wood types, such as hickory, mesquite, and applewood. Each type offers a unique smoky profile. For example, hickory imparts a robust, hearty flavor, while applewood provides a milder, sweeter smoke. As the pellets burn, they release smoke that slowly permeates the meat, vegetables, and even fruits. Consequently, this results in a depth of flavor that other grilling methods simply can’t match.
Moreover, Traeger grills allow you to choose the type of smoke you want. Whether you prefer bold, smoky ribs or a milder brisket, you can easily customize the flavor by switching to the right pellets.
Tender, Melt-in-Your-Mouth Meats
Another reason Traeger grills shine is their ability to produce melt-in-your-mouth meats. The low-and-slow cooking method ensures that large cuts like brisket and ribs become incredibly tender. Over hours of gentle heat, the collagen and connective tissues in tougher cuts break down, transforming the meat into a juicy, tender masterpiece. As a result, the meat is perfectly cooked, maintaining its moisture while becoming incredibly soft.
For ribs, this method works wonders. The meat becomes so tender that it pulls away from the bone effortlessly. Traeger’s precise temperature control helps to ensure the ribs stay juicy and flavorful, preventing overcooking or drying out.
A Perfect Bark with Traeger Grills
In addition, Traeger grills excel at creating the perfect “bark” on smoked meats. This bark is a flavorful, caramelized crust that forms on the outside of the meat as it cooks. The spices, sugars, and fat from the meat combine to create a crispy exterior, while the inside remains juicy and tender. Thanks to the consistent heat distribution from the Traeger, this ideal bark forms every time, making the exterior deliciously crispy and texturally satisfying.
Smoking Meats to Perfection
Whether you’re smoking brisket, ribs, or chicken, Traeger grills ensure perfect results. The wood smoke infuses deep into the meat, enhancing its flavor. Furthermore, the consistent heat distribution ensures even cooking, allowing every bite to be tender and flavorful.
In conclusion, Traeger grills are unmatched when it comes to creating flavorful, smoky dishes with incredible tenderness. Whether you’re smoking ribs or brisket, the combination of wood pellets and precise temperature control guarantees outstanding results every time. With a Traeger grill, you can easily prepare tender, flavorful dishes that will impress your guests and elevate your grilling game.
Ease of Use
Traeger grills are designed to make grilling simple, even for beginners. Whether you’re new to grilling or an experienced chef, Traeger’s easy-to-follow settings and controls ensure a smooth cooking experience every time.
User-Friendly Controls
Traeger’s controls are easy to use. The digital controller lets you set the desired cooking temperature with a few button presses. It displays both the current and target temperature clearly. This removes any guesswork and ensures your food cooks just right. Many models also include an LED display that shows the settings, so you can monitor the process without opening the grill.
Set-and-Forget Simplicity
Traeger grills offer a “set-and-forget” approach. After you set the temperature and add pellets, the grill handles the rest. The auto-feed system adds pellets automatically to maintain a steady temperature. This way, you can relax while the grill does the work. For beginners, this feature makes grilling less stressful and more enjoyable.
Precise Temperature Control
Traeger grills maintain a consistent temperature. The digital controller keeps the heat steady throughout the cooking process, preventing temperature fluctuations. This ensures even cooking, so your food comes out perfectly every time. Beginners will appreciate this feature, as it reduces the risk of overcooking or undercooking.
Versatility Without Complexity
Despite offering versatility, Traeger grills are easy to operate. You can switch between grilling, smoking, roasting, and baking with ease. The controls allow you to adjust for each cooking style without complications. Whether you’re grilling steaks or smoking brisket, switching between settings is straightforward.
Convenient Cleanup
Cleaning up after cooking is simple. The pellet hopper is easy to empty, and the grease tray collects any excess grease. This reduces mess and makes cleanup faster. Traeger makes the entire grilling process convenient, from cooking to cleaning.
App Integration for Remote Control
Many Traeger models offer app integration. You can control and monitor your grill remotely using your smartphone. Adjust the temperature, set timers, and get notifications, all from anywhere. This feature adds even more convenience, making it easier for beginners to enjoy grilling.
Conclusion
In conclusion, Traeger grills are perfect for beginners and experts alike. With simple controls, set-and-forget features, and precise temperature management, they make grilling easy. You can cook with confidence, knowing the grill will handle most of the work. With Traeger, anyone can become a grill master.
Customizing Flavor with Wood Pellets
One of the key advantages of using a Traeger grill is the ability to customize the flavor of your food through the choice of wood pellets. These pellets play a crucial role in shaping the overall taste of the dishes you prepare. By selecting different wood types, you can enhance the natural flavors of your ingredients and experiment with unique flavor profiles, making every meal a one-of-a-kind experience.
The Role of Wood Pellets in Flavor
Wood pellets are the heart of Traeger’s cooking process. Made from compressed sawdust, these pellets come in a variety of wood types, each contributing a distinct flavor to the food. The right wood can complement or enhance the flavor of your meat, vegetables, or even desserts. Unlike gas or charcoal grills, which only rely on heat, Traeger grills infuse your food with the deep, smoky flavors of the wood as it burns, giving your dishes a rich, smoky depth.
The flavor of wood pellets depends on the type of wood they are made from. Popular varieties include applewood, hickory, and mesquite, each offering a unique flavor profile. By understanding how different woods affect your food, you can elevate your cooking to a new level and tailor the taste to suit your preferences.
Applewood: A Sweet, Fruity Smoke
Applewood is one of the most versatile wood types for grilling, offering a mild, sweet, and fruity smoke. It works exceptionally well with poultry, pork, and fish. The sweetness of applewood complements the mildness of chicken and turkey, creating a delicate smoky flavor that enhances the natural taste of the meat without overpowering it. For pork, applewood’s subtle sweetness pairs beautifully with the richness of the meat, making it ideal for ribs, tenderloin, or pulled pork.
Applewood also adds a sweet touch to desserts, such as smoked apple pies or fruit crisps. It infuses the food with a gentle smokiness that pairs perfectly with the natural sweetness of the fruit. If you’re looking to create light, sweet, and flavorful dishes, applewood is an excellent choice.
Hickory: A Bold, Robust Smoke
Hickory is known for its strong, bold flavor and is often considered the king of wood pellets for grilling. It produces a robust, smoky taste that works wonderfully with hearty meats like beef, pork, and game meats. Hickory is the go-to choice for smoking brisket, ribs, and sausages, where the deep, rich smoke helps develop the signature flavor of these meats. It also works well with bacon, as the strong hickory smoke adds an irresistible savory flavor.
For a slightly milder hickory flavor, you can mix it with other wood types like applewood or cherry. This allows you to create a balanced flavor profile with a bold smokiness that doesn’t overpower the meat.
Mesquite: A Strong, Earthy Flavor
Mesquite is one of the most intense woods for grilling. It imparts a bold, earthy, and slightly sweet flavor, making it perfect for meats that benefit from a stronger smokey taste, such as beef, lamb, and game meats. Mesquite is particularly popular for grilling steaks, as the strong flavor complements the richness of the meat. It’s also ideal for barbecue, providing that distinct Texas-style flavor that’s smoky, slightly sweet, and assertive.
Because mesquite is so strong, it’s important to use it in moderation. When used too heavily, it can overwhelm the dish. For a more balanced flavor, mesquite can be combined with milder woods like oak or pecan. This combination allows you to enjoy the intensity of mesquite without it dominating the flavor.
Other Wood Options
In addition to applewood, hickory, and mesquite, Traeger offers a variety of other wood pellets that allow you to further customize your grilling experience. For example, cherrywood adds a mild, sweet flavor, making it great for poultry, pork, and even vegetables. Pecan is slightly milder than hickory but still provides a rich, nutty flavor, making it a good choice for pork and poultry.
Oak is a versatile wood that works well with almost any type of meat. It has a medium flavor that enhances the taste of beef, pork, and chicken without overpowering it. Other specialty woods like alder and maple provide unique flavors that pair well with fish, seafood, and vegetables.
Balancing Flavors and Experimenting
The beauty of using Traeger wood pellets is that you can mix and match different wood types to create your own custom flavor profile. If you want a bolder smoke with a sweet undertone, try combining hickory with applewood. For a more nuanced flavor, experiment with a blend of mesquite and cherrywood. The possibilities are endless, and every combination can lead to exciting new flavors in your dishes.
It’s also worth experimenting with different wood types depending on the recipe. For instance, a smoked salmon or trout dish would benefit from the light, mild flavor of alderwood, while a smoky brisket would be enhanced by the bold taste of hickory or mesquite.
Conclusion
Customizing flavor with wood pellets is one of the highlights of using a Traeger grill. Whether you’re grilling a tender chicken or smoking a flavorful brisket, the choice of wood pellets can dramatically affect the taste of your food. By selecting the right wood, you can enhance the natural flavors of your ingredients, add a unique smoky depth, and make each dish truly your own. The ability to experiment with different woods allows you to elevate your grilling game and bring out the best in every recipe.
Easy and Delicious Traeger BBQ Recipes to Try Today
Smoked Ribs: A Step-by-Step Guide on Preparing Tender and Flavorful Ribs on the Traeger
Smoking ribs on a Traeger grill is a rewarding experience. With its wood pellet technology, the grill ensures a tender, flavorful rack of ribs that’s full of smoky goodness. By following this simple, step-by-step guide, you can master the art of smoking ribs on your Traeger and create mouthwatering results every time.
Step 1: Choose the Right Ribs
The first step in preparing perfect smoked ribs is selecting the right cut. The two most common options are baby back ribs and spare ribs. Each type has unique characteristics that can affect your final result.
- Baby back ribs are smaller and leaner, cooking more quickly while retaining a tenderness that many prefer.
- Spare ribs, on the other hand, are meatier and have more fat, making them an excellent choice for slow smoking. They tend to take a bit longer to cook but offer a rich, hearty flavor.
For this guide, we’ll focus on baby back ribs, though you can easily apply the same method to spare ribs. The cooking time may vary slightly, so keep that in mind as you proceed.
Step 2: Prepare the Ribs
Once you’ve chosen your ribs, the next step is preparation. Here’s how to make sure they’re ready for smoking:
- Remove the membrane: Begin by removing the thin membrane on the back of the ribs. This membrane can become tough during cooking, so it’s important to peel it off. Grip it with a paper towel and gently pull until it comes off in one piece.
- Trim the ribs: Trim any excess fat or uneven pieces of meat from the ribs. It’s essential to leave some fat for flavor and moisture, but too much can result in greasy ribs.
- Season the ribs: Now, it’s time to apply your dry rub. A simple mix of brown sugar, paprika, garlic powder, onion powder, and black pepper works wonders, or you can use a pre-made seasoning. Generously coat both sides of the ribs with the rub and let it sit for at least 30 minutes to adhere to the meat. For the best flavor, consider refrigerating the ribs overnight to allow the seasoning to absorb deeply.
Step 3: Prepare the Traeger Grill
With your ribs ready, the next step is to prepare your Traeger grill. Preheat your grill to 225°F, which is the optimal temperature for slow cooking and smoking. This temperature allows the wood pellets to infuse the ribs with a subtle smokiness while the meat becomes tender.
- Add wood pellets: Choose a wood pellet flavor that pairs well with pork. Applewood, cherry, or hickory are excellent choices. Applewood and cherry impart a mild, slightly sweet flavor, while hickory adds a more robust, smoky essence.
- Set up for indirect grilling: Place the ribs on the grill with the bone side down. Ensure the ribs are spaced out to allow smoke to circulate around them. Close the lid and let the Traeger work its magic. Avoid opening the grill too often, as this can reduce the cooking efficiency and cause temperature fluctuations.
Step 4: Smoking the Ribs
Now, you can sit back and relax while the Traeger does the heavy lifting. Smoking ribs is a slow process, but the results are worth every minute.
- Smoking time: For baby back ribs, allow approximately 3 hours of smoking time. Spare ribs will require an additional hour due to their larger size. During this period, the smoke will flavor the meat, and the heat will break down the connective tissues, making the ribs tender and juicy.
- Don’t peek: It can be tempting to open the grill, but try to resist. Every time you open the lid, the heat and smoke escape, extending the cooking time. The Traeger will maintain a steady temperature, so leaving it closed allows the meat to cook properly.
Step 5: Wrap the Ribs (Optional, for Extra Tenderness)
After the initial 3 hours of smoking, you can choose to wrap your ribs for additional tenderness. While optional, this step helps lock in moisture and creates an even more succulent final product.
- Wrap the ribs: Lay a large sheet of aluminum foil on your workspace. Place the ribs in the center, bone side down, and add a bit of liquid such as apple juice, cider vinegar, or even beer. This helps steam the ribs and enhances their flavor.
- Return to the grill: Once wrapped, return the ribs to the Traeger and cook for another 1.5 hours. This steaming process will further tenderize the meat, ensuring it’s easy to pull apart.
Step 6: Finish the Ribs with Sauce (Optional)
For those who prefer a saucy finish, this step is for you. Adding barbecue sauce at the end gives the ribs a delicious glaze that adds a burst of flavor.
- Unwrap the ribs: After the steaming phase, unwrap the ribs and set them on the grill. Discard any excess liquid.
- Add sauce: Brush your favorite barbecue sauce onto both sides of the ribs. You can use a store-bought sauce or create your own, but the goal is to coat the ribs with a generous layer.
- Finish on the grill: Place the ribs back on the Traeger for an additional 15-30 minutes. This allows the sauce to caramelize and thicken, creating a sticky and flavorful glaze on the ribs.
Step 7: Rest and Slice
Once the ribs are glazed to your liking, remove them from the grill and let them rest for 10 minutes. This resting period allows the juices to redistribute within the meat, ensuring that the ribs stay moist and flavorful when you slice them.
Finally, slice the ribs between the bones, and you’re ready to serve. Pair with classic sides like coleslaw, baked beans, or cornbread for the ultimate barbecue experience.
Conclusion
By following these simple steps, you’ll be able to create mouthwatering, tender smoked ribs on your Traeger grill. From preparing the ribs to choosing the right wood pellets and smoking them low and slow, the Traeger grill’s precision ensures that every step contributes to a delicious outcome. Whether you’re cooking for a family gathering or a summer barbecue, these smoked ribs will surely be a hit. So fire up your Traeger, apply your favorite seasoning, and enjoy the magic of smoking ribs like a pro.
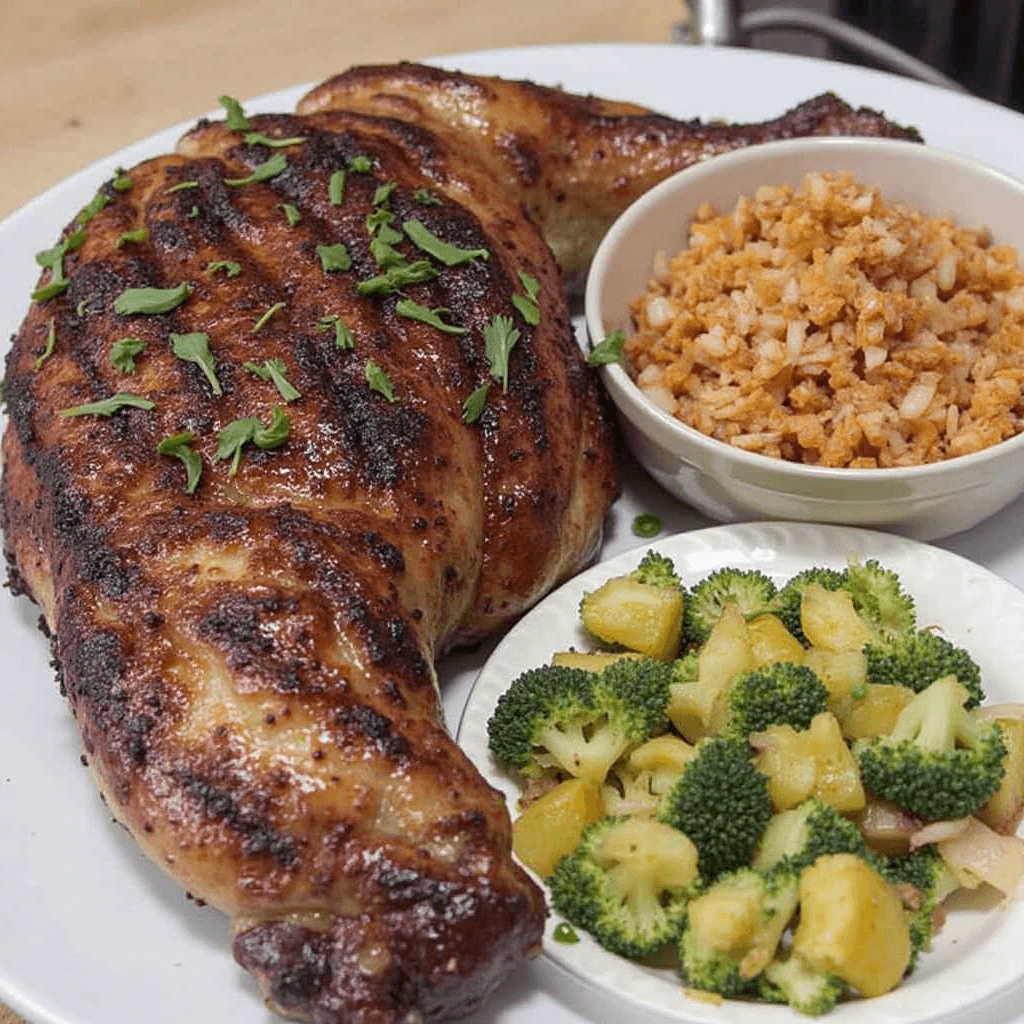
Grilled Chicken with BBQ Rub: Tips on Grilling the Juiciest Chicken with the Perfect BBQ Rub for Flavor
Grilling chicken on a Traeger grill with the perfect BBQ rub can elevate your meal to new heights. The key to achieving juicy, flavorful chicken lies in a combination of the right seasoning, proper grilling technique, and temperature control. This section will guide you through the steps to grilling the juiciest chicken, enhanced by a perfect BBQ rub that locks in flavor and tenderness.
Step 1: Choose the Right Chicken
The first step in preparing juicy grilled chicken is choosing the right cut. Depending on your preferences, you can opt for whole chickens, chicken breasts, thighs, wings, or drumsticks. Here’s a quick breakdown of each:
- Chicken Breasts: These are lean and can dry out quickly, so it’s essential to monitor them carefully while grilling. To keep them juicy, consider marinating or brining them before applying the BBQ rub.
- Chicken Thighs: These are fattier and more forgiving, making them perfect for grilling. They stay moist and tender, even when slightly overcooked.
- Chicken Drumsticks and Wings: These cuts offer a great balance of flavor and tenderness. The skin crisps up beautifully when grilled, making them a favorite for many.
While you can use any chicken cut, thighs and wings tend to yield the juiciest results, especially on a Traeger grill.
Step 2: Prep the Chicken
Before applying the BBQ rub, it’s important to prep your chicken properly for grilling.
- Brine or Marinate: Brining the chicken in a simple solution of salt and water for 30 minutes to 2 hours can help retain moisture during grilling. If you’re using chicken breasts, a marinade will work wonders for adding flavor and keeping them juicy. Marinate the chicken for at least 30 minutes or overnight for the best results.
- Pat Dry: After brining or marinating, remove the chicken from the liquid and pat it dry with paper towels. This step is crucial because a dry surface allows the BBQ rub to adhere better and creates a nice crispy skin when grilled.
- Trim Excess Fat: Trim any extra fat or skin that could cause flare-ups or uneven cooking. Leave the skin on, though, as it will help lock in the moisture while adding flavor as it crisps up on the grill.
Step 3: Apply the BBQ Rub
The BBQ rub is the star of the show when it comes to flavor. Choose a rub that complements the natural flavors of chicken. A well-balanced rub with the right combination of sweet, salty, smoky, and spicy flavors will take your grilled chicken to the next level.
- Generously Coat the Chicken: Apply a liberal amount of BBQ rub to the chicken. Don’t be shy—cover the entire surface of the chicken to ensure that every bite is flavorful. Gently pat the rub into the meat to ensure it sticks. You can use a pre-made rub or create your own with ingredients like brown sugar, paprika, garlic powder, onion powder, black pepper, salt, and cayenne for heat.
- Let the Chicken Rest: After applying the rub, let the chicken sit for at least 15-20 minutes. This allows the rub to absorb into the meat, and it gives the flavors time to meld.
Step 4: Preheat Your Traeger Grill
Preheating your Traeger grill is essential for even cooking and to get the best sear on your chicken. Set the Traeger to a temperature of 350°F. This medium-high heat will allow the chicken to cook evenly, achieving a crispy skin while keeping the meat juicy.
- Wood Pellet Choice: For chicken, mild woods like applewood, cherry, or pecan work best. They impart a subtle smoky sweetness that pairs well with the BBQ rub. Applewood and cherry, in particular, complement the flavors of the chicken without overpowering it.
- Indirect Grilling Setup: Once the grill is preheated, arrange the chicken on the grill grates, ensuring there’s enough space between each piece for even heat distribution. Close the lid to trap the smoke and heat.
Step 5: Grill the Chicken
Grilling chicken on a Traeger grill is simple, but there are some key steps to ensure you get the juiciest, most flavorful chicken possible.
- Start with Indirect Heat: Begin by grilling the chicken over indirect heat to ensure it cooks slowly and evenly. This method prevents the outside from burning while the inside remains raw. Grill the chicken for about 20-30 minutes, flipping halfway through.
- Monitor Internal Temperature: Use a meat thermometer to check the internal temperature of the chicken. For breasts, the target temperature is 165°F, while thighs and drumsticks can go up to 180°F for optimal tenderness. Be sure not to overcook the chicken, as it can dry out, especially with lean cuts like breasts.
- Sear the Chicken: After the chicken has reached the desired internal temperature, increase the grill’s heat to 400°F to sear the chicken and crisp up the skin. Grill the chicken for an additional 5-10 minutes, flipping once or twice, to get a perfectly golden, crispy exterior.
Step 6: Rest and Serve
Once the chicken is fully cooked and has reached the perfect level of crispiness, remove it from the grill and let it rest for 5-10 minutes. Resting the chicken helps the juices redistribute, ensuring each bite is moist and tender.
Slice the chicken and serve it with your favorite sides like grilled vegetables, mashed potatoes, or a fresh salad. The smoky, sweet flavor from the BBQ rub will shine through, making each bite absolutely delicious.
Conclusion
Grilling chicken with the perfect BBQ rub on a Traeger grill is a simple yet rewarding process. By following these steps, you can achieve juicy, flavorful chicken with crispy skin and a perfect balance of smoky, sweet, and savory flavors. Whether you’re grilling chicken breasts, thighs, or wings, the combination of the right rub, proper grilling technique, and the power of the Traeger grill will ensure your chicken is always a crowd-pleaser. So fire up your Traeger, get your BBQ rub ready, and prepare to savor the juiciest grilled chicken you’ve ever made.
Traeger Grilled Vegetables: Easy-to-Make Vegetable Sides That Complement Any Main Traeger Dish
Traeger grills aren’t just for meats—they’re also perfect for cooking delicious and smoky vegetables that make an ideal side dish for any main course. Whether you’re grilling a juicy steak, flavorful chicken, or tender ribs, grilled vegetables on a Traeger add a smoky, charred flavor that enhances the overall meal. The beauty of grilling vegetables on a Traeger is the ease with which you can infuse them with smoky goodness while keeping their natural flavors intact. Here’s how you can make easy, tasty, and versatile vegetable sides that complement any main Traeger dish.
Step 1: Choosing the Right Vegetables
The key to creating the perfect grilled vegetable side dish is selecting vegetables that grill well and absorb the smoky flavor of the Traeger. Some vegetables are naturally more suited for grilling than others due to their texture, size, and moisture content. Here are some of the best vegetables for grilling:
- Bell Peppers: These vegetables are rich in sweetness and color. When grilled, they soften and char beautifully, making them an excellent side for almost any main dish.
- Zucchini and Squash: These vegetables have a mild, slightly sweet flavor that takes on a fantastic smoky taste when grilled. Their soft texture makes them perfect for grilling.
- Asparagus: With its tender, crisp texture and subtle flavor, asparagus is a fantastic choice for grilling. It cooks quickly, and its smoky notes pair perfectly with grilled meats.
- Portobello Mushrooms: These meaty mushrooms are great for grilling because they have a dense texture that holds up well on the grill. Their earthy flavor is complemented by the smoky aroma from the Traeger.
- Carrots: Carrots become wonderfully sweet and tender when grilled. They also develop a nice caramelized crust, making them an excellent side dish for both chicken and beef.
- Onions: Grilled onions become soft and sweet, with a hint of smoky flavor. They can be sliced into rings or wedges and added to almost any dish.
These vegetables can be combined to create a colorful and flavorful veggie medley, or you can choose to focus on one vegetable to bring out its unique flavors.
Step 2: Preparing the Vegetables for Grilling
Before you throw your vegetables onto the Traeger grill, it’s important to prepare them properly to ensure they cook evenly and absorb the smoky flavor.
- Wash and Peel (if necessary): Start by washing your vegetables thoroughly to remove any dirt. For carrots, peel the skin. Zucchini and squash can be left with the skin on, but you can choose to peel them if preferred. Mushrooms should be wiped clean with a damp cloth to avoid washing away their natural flavor.
- Cut to Size: Cut the vegetables into uniform pieces to ensure even cooking. For example, slice bell peppers into strips, zucchini into rounds, and carrots into sticks. For mushrooms, remove the stems and leave the caps whole or cut them into thick slices, depending on your preference.
- Toss with Oil and Seasonings: Drizzle the prepared vegetables with olive oil or your choice of cooking oil. This helps them grill more evenly and prevents them from sticking to the grill. Season with salt, pepper, garlic powder, and other herbs and spices such as thyme, rosemary, or oregano. For an extra smoky flavor, try adding a dash of smoked paprika or a sprinkle of Traeger’s signature seasoning blend.
- Optional: Marinate: If you want to enhance the flavor even more, marinate the vegetables for about 30 minutes before grilling. A simple marinade made of olive oil, balsamic vinegar, and garlic can work wonders. However, marinating is optional, as the seasoning and oil alone will add plenty of flavor.
Step 3: Preheat the Traeger Grill
For the best results, preheat your Traeger to 375°F. This medium heat will allow your vegetables to cook through without drying out, and the Traeger’s wood pellet system will infuse them with a delicious smoky flavor.
- Choose the Right Wood Pellets: For grilled vegetables, mild-flavored pellets like applewood, cherry, or pecan work well. These woods impart a subtle sweetness that complements the natural flavors of vegetables without overpowering them.
Step 4: Grilling the Vegetables
Once your Traeger is preheated, it’s time to get grilling. The cooking process may vary depending on the type of vegetable, but the general principle is to cook them over indirect heat so they can absorb the smoky flavor and soften evenly.
- Arrange the Vegetables on the Grill: Lay the prepared vegetables directly on the grill grates. If you’re grilling small pieces, like diced onions or zucchini rounds, it’s helpful to use a grill basket to prevent them from falling through the grates.
- Grill with the Lid Closed: Close the lid of the Traeger to trap the heat and smoke inside. Let the vegetables cook for about 20-25 minutes, turning them halfway through to ensure even grilling. Larger vegetables like carrots and bell peppers may require a bit more time, while softer vegetables like zucchini and asparagus will cook faster.
- Check for Doneness: Vegetables should be tender with a slight char and caramelization on the edges. You can check for doneness by poking them with a fork or skewer. If they are easily pierced and have a nice golden-brown color, they’re ready to be removed.
Step 5: Finishing Touches
After grilling, remove the vegetables from the Traeger and let them rest for a couple of minutes. This brief resting period allows the flavors to settle and the vegetables to become even more tender.
- Add Garnishes: For an extra burst of flavor, consider garnishing your grilled vegetables with fresh herbs like parsley, basil, or thyme. A drizzle of balsamic glaze or a sprinkle of grated Parmesan cheese can also elevate the dish.
- Serve Immediately: Grilled vegetables are best served hot, right off the grill. They make a wonderful side dish for any Traeger main course, like ribs, steak, or chicken.
Step 6: Experiment with Grilled Vegetable Combinations
While grilling vegetables individually is delicious, combining different vegetables can create a stunning veggie medley. Try mixing and matching bell peppers, zucchini, onions, and mushrooms for a colorful and flavorful side dish. For a more hearty option, add grilled sweet potatoes or corn on the cob to the mix. The possibilities are endless when you get creative with your vegetable combinations!
Conclusion
Grilled vegetables on a Traeger are the perfect way to enhance any main dish. With just a few simple ingredients and a bit of time on the grill, you can create delicious, smoky vegetable sides that complement your meal while adding variety and flavor. Whether you’re grilling vegetables to pair with juicy steaks or tender chicken, the Traeger’s wood pellet system brings out the best in every vegetable. So, fire up your Traeger, prep your vegetables, and enjoy a flavorful, healthy side dish that everyone will love.
Perfect Traeger Steak: Tips on Getting the Best Sear and Smoky Flavor on a Steak Using Your Pellet Grill
There’s nothing quite like the rich, smoky flavor of a perfectly cooked steak, and Traeger grills make it incredibly easy to achieve steakhouse-quality results in your own backyard. By using Traeger’s wood pellet technology, you can achieve a perfect balance of a crispy sear on the outside and a juicy, tender interior, all while infusing the steak with the signature smoky flavor that only a pellet grill can provide. Whether you’re grilling a thick ribeye, a tender filet mignon, or a flavorful New York strip, there are a few key tips to keep in mind to ensure you get the best results.
Step 1: Selecting the Right Cut of Steak
The foundation of a perfect steak starts with choosing the right cut. Each cut of steak offers a unique texture and flavor, and some are better suited for grilling than others. Here are a few cuts of steak that work exceptionally well on the Traeger:
- Ribeye: Known for its marbling, ribeye steaks are incredibly flavorful and tender. The fat content ensures that they stay juicy during grilling, and their bold beefy flavor pairs wonderfully with the smoky wood flavors from the Traeger.
- New York Strip: A popular choice for grilling, this steak has a slightly firmer texture with a rich beef flavor. It has less marbling than a ribeye, but still delivers great tenderness.
- Filet Mignon: Known for its delicate texture and mild flavor, filet mignon is a lean cut with minimal fat. It’s ideal for those who prefer a more tender steak with less chew.
- T-Bone/Porterhouse: These cuts offer both a tenderloin and a strip steak in one, giving you the best of both worlds. They’re perfect for grilling and benefit from the Traeger’s smoky flavor infusion.
- Flank or Skirt Steak: While these cuts are leaner, they still grill up beautifully on the Traeger when cooked quickly over high heat, resulting in juicy, flavorful steaks.
Step 2: Preparing the Steak
Before cooking your steak on the Traeger, you want to ensure it’s perfectly seasoned and ready to absorb the smoky flavors that come from the pellet grill.
- Let It Rest at Room Temperature: Remove your steak from the fridge at least 30 minutes before grilling. This allows the meat to come to room temperature, which helps it cook more evenly and results in a better sear.
- Pat It Dry: Use paper towels to pat the steak dry before seasoning. This removes excess moisture from the surface, which is important for achieving a good sear. Excess moisture can cause the steak to steam instead of sear, which can affect texture.
- Season Generously: Season your steak with salt and pepper, ensuring an even coating on both sides. For additional flavor, consider adding garlic powder, onion powder, smoked paprika, or fresh herbs like thyme or rosemary. For those who enjoy a bit of spice, a steak rub with chili powder, brown sugar, and cumin can add a delightful depth of flavor.
- Optional: Marinate: If you prefer a deeper flavor profile, marinate your steak for a few hours in a simple marinade of olive oil, balsamic vinegar, and a few herbs. This adds flavor while also helping to tenderize the meat.
Step 3: Preheating the Traeger Grill
To achieve the perfect sear and smoky flavor, preheating the Traeger grill is crucial. Set your Traeger to 450°F-500°F for high-heat searing. The Traeger’s consistent temperature helps create that crispy, caramelized outer crust, while the wood pellets infuse the steak with rich smoky notes.
- Choose the Right Wood Pellets: For steak, hickory and oak are the best choices for a bold smoky flavor that complements the richness of the meat. If you want a milder, sweeter smoke, try cherry or applewood pellets.
Step 4: Searing the Steak
To get a great sear, you’ll want to use a two-zone cooking method. This method involves searing the steak over direct heat and finishing it over indirect heat for even cooking.
- Place the Steak on the Grill: Once the grill reaches the desired temperature, place the steak directly on the grill grates over the direct heat zone. Let it sear for 2-4 minutes on each side. You should hear a satisfying sizzle as the steak makes contact with the grill, creating that perfect crispy crust.
- Use the Grill’s Lid: Always keep the lid closed while searing to trap the heat and allow the steak to cook evenly. This also ensures that the smoky flavors from the wood pellets are absorbed into the meat.
- Create Grill Marks: For a beautiful, professional look, rotate the steak 90 degrees halfway through searing each side. This creates crosshatch grill marks that are visually appealing and add to the crispy crust.
- Check for Doneness: For the best results, use an instant-read thermometer to check the internal temperature. For a medium-rare steak, aim for 130°F, and for medium, 140°F. Remember that the steak will continue to cook slightly after you remove it from the grill.
Step 5: Resting and Serving
Once your steak reaches the desired doneness, remove it from the Traeger and let it rest for about 5-10 minutes. Resting is essential as it allows the juices to redistribute throughout the meat, ensuring a juicy and tender steak. If you cut into the steak immediately after grilling, the juices will run out, resulting in a less flavorful steak.
- Serve with a Garnish: After resting, slice the steak against the grain to maximize tenderness. For an extra touch, you can garnish your steak with a pat of herb butter or a sprinkle of fresh herbs like parsley or thyme.
Step 6: Optional Flavor Enhancements
While Traeger grills already impart fantastic flavor to your steak, there are additional ways to elevate the taste:
- Smoked Salt: For an added layer of smoky flavor, finish your steak with a light sprinkle of smoked sea salt just before serving.
- Compound Butters: Serve the steak with a compound butter made from herbs, garlic, and even a little bit of lemon zest. The richness of the butter complements the smoky, charred steak beautifully.
- Wood Chip Planks: If you prefer a milder, wood-infused flavor, you can also cook your steak on a wooden grilling plank, which further enhances the smoky essence of your Traeger.
Conclusion
Grilling the perfect steak on a Traeger involves a few simple yet essential steps: selecting the right cut, preparing the meat, preheating the grill, searing it properly, and letting it rest. With the help of Traeger’s advanced wood pellet technology, you can achieve a perfectly seared, tender, and smoky steak that rivals any steakhouse. By following these tips and experimenting with different flavor-enhancing techniques, you can take your grilling game to the next level and impress your family and friends with a mouthwatering steak cooked to perfection.
Mastering the Art of Traeger Smoking
Slow-Cooked Brisket: A Deep Dive into Smoking Brisket on a Traeger Grill for That Melt-in-Your-Mouth Texture
Smoking brisket is an art form, and with the Traeger grill, you can achieve the melt-in-your-mouth tenderness and smoky flavor that makes this cut of meat a crowd favorite. Brisket, known for its rich marbling and tough fibers, requires low and slow cooking to break down the connective tissues and fat, transforming it into a juicy, tender piece of meat. Traeger’s pellet grill technology is perfect for this slow cooking method, as it provides consistent heat and infuses the brisket with a smoky flavor that takes it to the next level.
Step 1: Choosing the Right Brisket
The first step in smoking a perfect brisket is selecting the right cut. Brisket comes in two main parts: the flat and the point. While both parts can be used, many prefer the whole brisket (also known as a packer brisket) for smoking. This includes both the flat and the point, offering a combination of lean meat and flavorful marbled fat.
- Flat: The flat is leaner and cooks more evenly, but it can dry out if not cooked properly. It’s ideal for slicing and serves as the more traditional choice for brisket.
- Point: The point has more fat and is often considered more flavorful and juicy. It is great for shredding or making burnt ends.
- Packer Brisket: This is the entire brisket, which includes both the flat and the point, and it’s the best choice for those who want a mix of both texture and flavor.
Step 2: Preparing the Brisket
Before smoking your brisket, you’ll need to prepare it to ensure maximum flavor and tenderness. Here’s how you can do that:
- Trim the Brisket: Begin by trimming the brisket to remove any excessive fat or silver skin. Leave about ¼ inch of fat on the surface, as this will render down during cooking and keep the meat moist.
- Apply a Rub: Once trimmed, it’s time to season the brisket. A simple rub of salt and black pepper is traditional, but you can add additional spices to create a more complex flavor profile. Consider adding garlic powder, onion powder, paprika, brown sugar, or a chipotle powder for a smoky, spicy kick. Rub the seasoning all over the brisket, ensuring it covers the entire surface.
- Let It Rest: After applying the rub, let the brisket sit at room temperature for 30 to 60 minutes. This allows the seasoning to penetrate the meat and helps it cook more evenly.
Step 3: Setting Up the Traeger Grill
The Traeger pellet grill is ideal for smoking brisket because of its ability to maintain consistent low temperatures and distribute heat evenly. Here’s how to set up the Traeger for a slow-cooked brisket:
- Preheat the Grill: Set your Traeger to 225°F. This low temperature is perfect for breaking down the tough fibers in the brisket without drying it out. Let the grill preheat for about 15-20 minutes before placing the brisket inside.
- Choose the Right Wood Pellets: The type of wood you use will significantly impact the flavor of your brisket. Hickory, oak, and mesquite are all excellent choices for a bold, smoky flavor. For a slightly milder taste, applewood or cherry pellets can add a sweeter, fruitier touch. You can also experiment with different wood blends to find the flavor that suits your taste best.
Step 4: Smoking the Brisket
- Place the Brisket on the Grill: Once the grill is preheated, place the brisket fat-side-up on the grill grates. The fat will melt down during cooking, helping to keep the meat moist. Position the brisket in the center of the grill to allow for even heat distribution.
- Low and Slow Cooking: Smoke the brisket at 225°F for approximately 1 to 1.5 hours per pound of meat. For a 12-pound brisket, this could take anywhere from 12 to 18 hours, depending on the size and thickness. This extended cooking time allows the collagen in the brisket to break down, resulting in a tender, melt-in-your-mouth texture.
- Maintain Consistent Temperature: During the cooking process, it’s important to keep the Traeger grill at a stable temperature. Use a grill thermometer to monitor the internal temperature of the brisket. You’re aiming for an internal temperature of 195°F to 205°F when it’s finished.
- Use the Texas Crutch (Optional): Once the brisket reaches around 160°F to 170°F, it may hit a plateau in the cooking process, where the internal temperature stops rising. This is a natural part of the cooking process. To speed up the cooking and keep the brisket moist, you can wrap it in butcher paper or foil, a technique known as the “Texas Crutch.” This helps trap moisture and allows the brisket to finish cooking more quickly.
Step 5: Resting the Brisket
Once the brisket reaches the desired internal temperature, remove it from the Traeger grill and let it rest for at least 30 minutes to 1 hour. Resting is crucial because it allows the juices to redistribute throughout the meat, ensuring a juicy and tender final product. The brisket will continue to cook slightly during the resting period, so don’t cut into it too soon.
Step 6: Slicing and Serving
When the brisket is fully rested, it’s time to slice. Always slice the brisket against the grain to ensure maximum tenderness. If you’re working with a whole brisket (packer brisket), separate the flat from the point before slicing. The flat can be sliced into thinner pieces, while the point can be cut into thicker slices or shredded for added texture.
For an extra boost of flavor, you can drizzle the brisket with some of the juices that accumulated during the resting period or serve it with a side of barbecue sauce.
Conclusion
Smoking a brisket on a Traeger grill results in a rich, flavorful piece of meat that is tender and juicy with the perfect amount of smoky goodness. By following these simple steps—selecting the right brisket, preparing it with care, setting up the Traeger, smoking it low and slow, and allowing it to rest—you can create a melt-in-your-mouth brisket that will impress your guests and elevate your grilling skills. Whether you’re smoking it for a special occasion or simply for a delicious weekend meal, the Traeger grill ensures that your brisket will turn out perfect every time.
Smoking Salmon with Citrus Glaze: A Unique and Fresh Traeger Recipe for Salmon with a Zesty Citrus Twist
Smoking salmon on a Traeger grill infuses the fish with a delicate, smoky flavor while maintaining its natural tenderness and moisture. When combined with a zesty citrus glaze, this dish becomes a refreshing and flavorful masterpiece. The bright citrus notes from ingredients like lemon, orange, and lime elevate the richness of the salmon, making it a perfect choice for a light yet satisfying meal. Let’s dive into how to create this perfect balance of smoky and citrusy flavors.
Step 1: Selecting the Right Salmon
To start, choose a fresh fillet of salmon with a bright, vibrant color. You can use different cuts, but the king salmon or sockeye salmon are particularly well-suited for smoking due to their rich, firm texture and excellent flavor. Opt for skin-on fillets, as the skin helps to retain moisture while smoking and gives the fish a slight crispiness when grilled. Fresh or thawed salmon is always a good choice over frozen, as it will provide the best flavor and texture.
Step 2: Preparing the Salmon
The preparation of the salmon for smoking is simple yet important to achieve the perfect flavor balance with the citrus glaze. Here’s how to prepare your fish:
- Pat the Salmon Dry: Start by patting the salmon fillet dry with a paper towel. This removes any excess moisture, which helps the seasoning and glaze adhere better during smoking.
- Season the Salmon: You can season the salmon with a light sprinkle of salt and pepper to enhance its natural flavor. If you prefer, you can also add a simple garlic powder, onion powder, or smoked paprika for a slight depth of flavor without overpowering the citrus glaze.
- Create the Citrus Glaze: The highlight of this recipe is the citrus glaze, which will add a bright and zesty contrast to the rich smokiness of the salmon. To make the glaze:
- In a small saucepan, combine freshly squeezed lemon juice, orange juice, and lime juice for a tangy flavor base.
- Add honey or maple syrup to balance the acidity with a touch of sweetness.
- For an aromatic depth, stir in fresh minced garlic, ginger, and chopped cilantro. You can also add a pinch of cayenne pepper or chili flakes for a bit of heat if you like.
- Simmer the glaze on low heat until it thickens slightly, about 5-7 minutes.
Step 3: Setting Up the Traeger Grill
To get the best results when smoking salmon, the Traeger grill’s wood pellet technology is key. The slow, consistent heat helps the fish cook evenly while infusing it with the perfect amount of smokiness. Here’s how to set up the Traeger for smoking salmon:
- Preheat the Traeger Grill: Set your Traeger to 225°F to start the smoking process at a lower temperature, which is ideal for gently cooking the fish without drying it out.
- Wood Pellet Selection: The type of wood pellets you use plays a significant role in the final flavor of the salmon. For a citrusy glaze, applewood or cherrywood pellets are ideal as they provide a mild, slightly sweet smokiness that complements the citrus glaze without overpowering it. If you prefer a more intense smokiness, hickory or mesquite could be used, but be cautious not to overwhelm the fresh flavors of the fish.
- Prepare the Grill Grates: Lightly oil the grill grates to prevent the salmon from sticking. You can use a paper towel dipped in olive oil and a pair of tongs to quickly rub the oil on the grates. This will ensure the salmon cooks evenly and doesn’t tear when flipped.
Step 4: Smoking the Salmon
Now that your salmon and grill are ready, it’s time to smoke the fish:
- Place the Salmon on the Grill: Lay the salmon fillet skin-side down on the grill grates. The skin helps to protect the fish while it cooks, preventing it from drying out. Place the fillet in the center of the grill to ensure even heat distribution.
- Apply the Citrus Glaze: After about 20-30 minutes of smoking, brush the salmon generously with your citrus glaze. The glaze will begin to caramelize on the surface, creating a glossy, flavorful coating. You can continue to baste the salmon every 20 minutes to build up layers of the citrus glaze and intensify the flavor.
- Monitor the Temperature: Smoke the salmon for 45 to 60 minutes, depending on the thickness of the fillet. The internal temperature of the salmon should reach 140°F to 145°F for perfectly cooked fish. The flesh should be opaque and easily flake with a fork.
- Optional: Add a Final Sear: If you like a crispy texture on the skin, increase the grill temperature to 400°F for the last 5-10 minutes of cooking. This will give the skin a crispy texture while still allowing the fish to stay moist inside.
Step 5: Resting and Serving the Salmon
Once the salmon reaches the desired temperature, remove it from the Traeger grill and allow it to rest for 5-10 minutes. This resting period lets the juices redistribute throughout the fish, keeping it moist and flavorful.
When ready to serve, slice the salmon into individual portions. You can drizzle additional citrus glaze on top or serve with a sprinkle of fresh herbs like parsley or dill. The salmon pairs beautifully with roasted vegetables, a fresh salad, or even a light quinoa or couscous dish to complete the meal.
Step 6: Enjoying Your Citrus-Glazed Smoked Salmon
The result is a beautifully smoked salmon fillet, tender and flaky with a burst of citrus flavor from the glaze. The delicate smokiness from the wood pellets enhances the freshness of the citrus, creating a well-rounded and unique dish that’s perfect for any occasion. Whether you’re serving it as a main course or incorporating it into a salad or appetizer, this Traeger smoked salmon with citrus glaze will elevate your grilling experience and leave a lasting impression on your guests.
Conclusion
Smoking salmon with a citrus glaze on the Traeger grill combines the best of both worlds: smoky, tender fish with a refreshing citrus twist. By selecting the right type of salmon, carefully preparing the citrus glaze, and utilizing the Traeger grill’s wood pellet technology, you’ll create a dish that’s not only full of flavor but also impressively easy to make. This is a perfect recipe for anyone looking to try something unique and delicious on their Traeger grill, and it’s sure to become a favorite at your next cookout or family meal.
Traeger Pulled Pork: Step-by-Step Instructions for Making Tender Pulled Pork on Your Traeger
Pulled pork is one of the most beloved barbecue dishes, known for its juicy, tender texture and smoky flavor. With the power of a Traeger pellet grill, making pulled pork becomes easier and more flavorful than ever. The combination of slow, low-temperature smoking and wood pellet technology allows you to create that melt-in-your-mouth goodness, resulting in the perfect pulled pork for sandwiches, tacos, or as a standalone dish. Here’s your step-by-step guide to making perfect Traeger pulled pork.
Step 1: Selecting the Right Cut of Meat
The key to perfect pulled pork is choosing the right cut of meat. Pork shoulder is the most commonly used cut for pulled pork, and there are two main types: pork butt (also known as Boston butt) and picnic roast. Both cuts have a good amount of fat, which helps keep the meat moist and tender as it cooks low and slow.
- Pork Butt (Boston Butt): This cut comes from the upper part of the shoulder and has a higher fat content, making it perfect for pulling apart once it’s cooked.
- Picnic Roast: This cut is from the lower part of the shoulder and contains more bone, but it can still be used to make pulled pork if you prefer a slightly leaner option.
Regardless of which cut you choose, make sure it’s bone-in for the best flavor and moisture. You’ll need around 6-8 pounds of pork to feed a small group or family.
Step 2: Preparing the Pork for Smoking
Once you’ve selected your pork, it’s time to prepare it for smoking:
- Trim Excess Fat: While some fat is necessary to keep the pork moist, it’s important to trim off any excess fat or silver skin from the outside of the meat. This will prevent the fat from becoming too greasy during the smoking process. Leave a thin layer of fat on top to help with flavor.
- Apply a Rub: The flavor of the pulled pork is significantly influenced by the seasoning. A dry rub adds a depth of flavor to the meat before it hits the grill. You can either use a pre-made rub or create your own by combining spices like brown sugar, paprika, garlic powder, onion powder, cayenne pepper, and black pepper.Rub the seasoning generously all over the pork, making sure to coat every part of the meat evenly. Let the pork sit with the rub for at least 30 minutes, or ideally overnight in the refrigerator for maximum flavor absorption.
- Inject (Optional): For extra moisture and flavor, some people opt to inject their pork with a flavorful marinade. You can create an injection solution using apple juice, cider vinegar, and a pinch of salt. This step is optional but can help achieve a juicy result.
Step 3: Setting Up the Traeger Grill
Now that your pork is seasoned and ready, it’s time to set up the Traeger grill for a long smoking session. Here’s how to get the grill ready:
- Preheat the Traeger: Set your Traeger to 225°F for slow and low cooking. The key to tender pulled pork is low, consistent heat over an extended period, which helps break down the connective tissues and renders the fat, resulting in a pull-apart texture.
- Wood Pellet Selection: The type of wood pellets you choose will greatly influence the flavor profile of your pulled pork. Hickory, applewood, oak, or mesquite are popular choices for pulled pork. Hickory gives a strong, smoky flavor, while applewood and oak provide a milder, sweeter smoke that pairs well with pork.
- Prepare the Grill Grates: Clean your grill grates if needed and lightly oil them with a paper towel dipped in oil. This helps prevent the pork from sticking during the smoking process.
Step 4: Smoking the Pork
Now, it’s time to smoke the pork:
- Place the Pork on the Grill: Put the pork shoulder on the preheated grill grate. Ideally, position it fat-side-up so that the fat renders and drips down into the meat during the cooking process, helping to keep the meat moist.
- Monitor the Smoking Process: Keep the lid closed and allow the pork to cook undisturbed. Smoking times will vary based on the size of your pork shoulder, but generally, you can expect it to take anywhere from 8 to 12 hours to cook thoroughly at 225°F.Throughout the smoking process, make sure the temperature of the meat is monitored. The pork is done when it reaches an internal temperature of 195°F to 205°F. This is the sweet spot for achieving that melt-in-your-mouth texture where the collagen and fat break down, making the meat easy to shred.
- Spritzing (Optional): For additional moisture and flavor, you can spritz the pork every couple of hours with a mixture of apple cider vinegar and water or your favorite marinade. This step is optional, but it can help maintain moisture and enhance the flavor during the long cooking time.
Step 5: Resting the Pork
Once the pork has reached the desired internal temperature, remove it from the grill and let it rest for at least 30 minutes. This resting time is crucial for allowing the juices to redistribute throughout the meat. If you cut into the pork too early, you may lose all the delicious juices, leaving the meat dry.
Step 6: Pulling the Pork
After resting, it’s time to pull the pork apart:
- Shred the Meat: Use a pair of meat claws or two forks to shred the pork. The meat should pull apart easily and be tender, juicy, and full of smoky flavor. Discard any large chunks of fat or the bone (if present), and keep the pulled pork as fine or coarse as you like.
- Add Sauce (Optional): While the pork is delicious on its own, you can also mix in some barbecue sauce to add a bit more flavor. Whether you prefer a sweet, tangy, or spicy sauce, adding it will help enhance the overall taste of the pulled pork.
- Serve and Enjoy: Serve the pulled pork on buns for sandwiches, in tacos, or over a bed of coleslaw for a delicious, smoky meal. It also works great as a topping for pizza, in a salad, or as a main dish with sides like baked beans, cornbread, or grilled vegetables.
Step 7: Storing Leftovers
If you have any leftover pulled pork, store it in an airtight container in the refrigerator for up to 3-4 days. You can also freeze it for longer storage, up to 3 months. When reheating, add a bit of moisture with some apple cider vinegar or a small splash of barbecue sauce to keep the pulled pork juicy.
Conclusion
Making pulled pork on your Traeger grill is an easy and rewarding process. The low-and-slow smoking method, combined with the wood pellet technology, results in juicy, tender, and flavorful pork every time. By following these step-by-step instructions, you’ll be able to create the perfect pulled pork for any occasion, whether it’s a family dinner, a summer barbecue, or a special celebration. The best part? You’ll impress your friends and family with the rich, smoky flavor that only a Traeger can deliver!
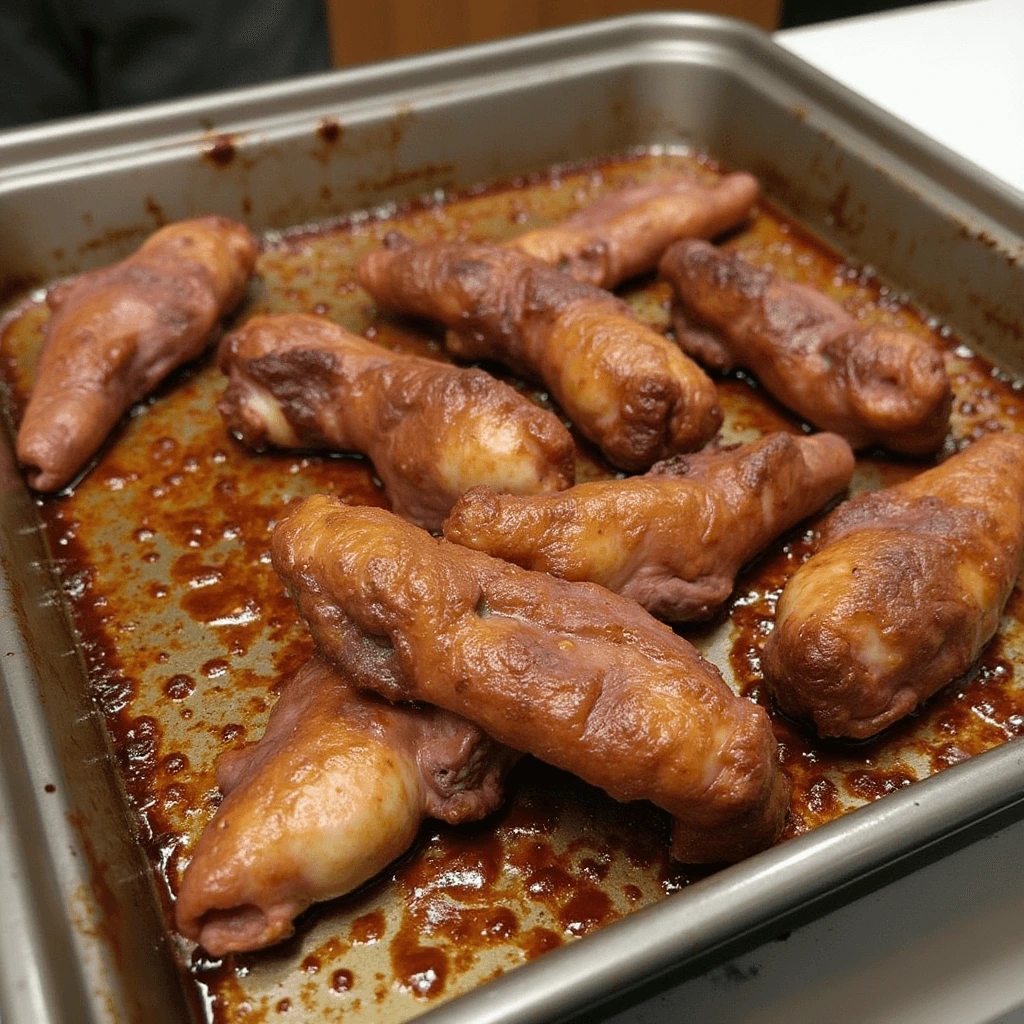
Smoked Sausages: The Perfect Way to Prepare Sausages That Are Juicy on the Inside with a Crispy Outer Layer
Sausages are a grilling staple loved for their rich, savory flavors and satisfying texture. When cooked on a traditional grill, sausages can often become dry on the inside and charred on the outside. However, with a Traeger pellet grill, you can take your sausages to the next level, achieving the perfect balance between a juicy interior and a crispy, flavorful exterior. Smoking sausages on a Traeger allows the heat to infuse the meat with that signature wood-fired flavor, while the low-and-slow cooking method helps maintain their moisture. Here’s how you can master smoked sausages on your Traeger grill.
Step 1: Choose the Right Sausages
The first step in preparing the perfect smoked sausages is selecting the right type of sausage. There is a wide variety of sausages available, each with its own unique flavor profile. You can choose from:
- Fresh Sausages: These include pork, beef, or chicken sausages that have not been pre-cooked. They are often seasoned with herbs, spices, and other flavorings. Popular options include Italian sausage, bratwurst, and chorizo.
- Pre-Smoked Sausages: These sausages have already been smoked but can still benefit from a second smoking to enhance their flavor and texture.
Make sure the sausages are of good quality, whether you’re buying them from your local butcher or the grocery store. High-quality sausages will deliver the best results when smoked on a Traeger grill.
Step 2: Preheat the Traeger Grill
Preheating your Traeger grill is essential to achieving the best smoked sausages. Set your Traeger to 225°F to start the smoking process. This low and slow method allows the sausages to cook thoroughly without drying out, ensuring they stay juicy inside. Be sure to let the grill fully preheat before placing the sausages on the grate.
Step 3: Choosing the Right Wood Pellets
Wood pellets play a crucial role in infusing your sausages with that distinct, smoky flavor. When smoking sausages, the wood you choose will complement the meat and add depth to the flavor profile. Consider these popular wood pellet options for smoking sausages:
- Applewood: This wood is slightly sweet and mild, making it a perfect choice for pork sausages like bratwurst or Italian sausage. Applewood provides a delicate smoky flavor without overpowering the sausage.
- Hickory: Hickory is a classic wood used for smoking, known for its bold, smoky flavor. It works particularly well with beef or bratwurst sausages, as it enhances the richness of the meat.
- Cherrywood: Cherrywood offers a fruity, slightly sweet flavor that pairs wonderfully with chicken or turkey sausages, giving them a subtle but appealing taste.
You can even experiment with blending different wood pellets to create your own unique flavor profile.
Step 4: Place the Sausages on the Grill
Once your grill is preheated, it’s time to place the sausages on the grill grate. Here are a few tips to ensure an even cook:
- Arrange the Sausages Evenly: Make sure the sausages are spaced out on the grate, so the smoke circulates evenly around each one. Overcrowding the sausages can result in uneven cooking.
- Use a Meat Probe: If your Traeger grill is equipped with a meat probe, insert it into the thickest part of one of the sausages. This will allow you to monitor the internal temperature and ensure that they cook to the perfect doneness.
- Close the Lid: Keep the lid closed during the smoking process to trap the smoke and heat, which will impart flavor to the sausages. Avoid opening the lid frequently to check, as this can cause heat loss and prolong cooking time.
Step 5: Smoke the Sausages
The smoking process for sausages typically takes between 1.5 to 2.5 hours, depending on the size and type of sausage you are cooking. During this time, the sausages will absorb the smoky flavor, and the fats will slowly render, keeping the inside juicy. You don’t need to flip the sausages during smoking, but you can rotate them occasionally if you want to ensure that they brown evenly.
Monitor the sausages’ internal temperature with your meat probe. The sausages should reach an internal temperature of about 160°F for fully cooked pork or beef sausages. If you’re smoking chicken or turkey sausages, aim for an internal temperature of 165°F.
Step 6: Achieving the Perfect Crispy Exterior
After the sausages have reached their desired internal temperature, you’ll want to ensure they have a crispy, golden exterior. To achieve this, increase the Traeger’s temperature to around 375°F for the last 10-15 minutes of cooking. This higher heat will help crisp up the skin and give the sausages that satisfying snap when bitten into.
Alternatively, you can briefly sear the sausages on a grill pan or cast-iron skillet on the stovetop to achieve a crispy crust. Just make sure not to overdo it, as the sausages are already cooked through and don’t need too much additional heat.
Step 7: Let the Sausages Rest
Once the sausages are done, remove them from the grill and let them rest for a few minutes. This allows the juices to redistribute inside the sausage, ensuring that each bite is juicy and flavorful. Cutting into them right away could cause the juices to escape, leaving the sausages dry.
Step 8: Serve and Enjoy
Smoked sausages are delicious on their own, but you can also get creative with your serving options. Serve them on buns with your favorite condiments, or slice them into rounds and toss them into a hearty vegetable dish or pasta. Smoked sausages also pair wonderfully with sides like grilled vegetables, coleslaw, or potato salad. Don’t forget to add a squeeze of mustard, sauerkraut, or pickles to complement the smoky flavor.
Pro Tips for Smoked Sausages:
- Test for Doneness: If you’re unsure whether the sausages are fully cooked, always use a thermometer to check their internal temperature.
- Experiment with Flavor: Add a little extra flavor by stuffing sausages with different seasonings, herbs, or even cheese before smoking. Try adding garlic, fennel, or smoked paprika to enhance the flavor further.
- Resting Is Key: Always let your sausages rest for a few minutes after removing them from the grill. This ensures the juices stay locked inside, making them more flavorful.
Conclusion
Smoking sausages on a Traeger grill offers a unique and easy way to achieve that perfect balance of smoky flavor, juicy interior, and crispy exterior. Whether you’re smoking bratwurst, Italian sausage, or chorizo, the Traeger grill makes the process simple and enjoyable, even for beginners. The key lies in choosing the right sausages, selecting the perfect wood pellets, smoking at a low temperature, and then finishing with a quick burst of heat to crisp up the skin. Once you’ve mastered the art of smoking sausages on your Traeger, you’ll be able to impress your friends and family with your newfound grilling expertise!
Tips and Tricks for Grilling with Traeger
Maintaining Temperature Consistency: How to Ensure Your Traeger Grill Stays at the Perfect Temperature for Even Cooking
One of the biggest advantages of using a Traeger pellet grill is its ability to maintain a consistent temperature over long periods of time, ensuring your food is cooked evenly and perfectly every time. However, to achieve the best results, it’s important to understand how to monitor and manage the grill’s temperature. Maintaining temperature consistency is key to unlocking the full potential of your Traeger, whether you’re smoking, grilling, or roasting.
Here’s a deeper dive into how to ensure your Traeger grill maintains the perfect cooking temperature throughout your cooking session.
1. Use the Right Temperature Settings for the Recipe
One of the most important steps in maintaining temperature consistency is ensuring that you’ve set the right cooking temperature on your Traeger grill. Traeger grills offer a range of temperature settings, which are controlled via the digital controller. The grill’s digital thermostat helps you set and maintain your desired temperature, but the key is to choose the right one for the type of cooking you’re doing:
- Low & Slow Smoking: For slow-cooked dishes like brisket or pulled pork, set the temperature to around 180°F – 225°F. This allows the food to cook slowly, infusing the meat with rich, smoky flavors without overcooking it.
- Grilling & Roasting: For quicker meals like burgers, steaks, or vegetables, set the temperature to 350°F – 400°F. This high temperature will sear the food quickly, locking in moisture and flavor.
Make sure to check the recipe you’re following to determine the appropriate temperature for the desired outcome.
2. Preheat the Grill Properly
Before you start cooking, preheating your Traeger grill is crucial to ensure temperature consistency from the very beginning. When you turn on your Traeger, let it run on your desired temperature setting for 10-15 minutes before placing your food on the grill. This gives the grill time to stabilize and reach a consistent cooking temperature, ensuring your food cooks evenly from start to finish.
Skipping this step can result in uneven cooking, as the grill may fluctuate in temperature as it tries to stabilize.
3. Regularly Monitor the Temperature
Even though Traeger grills are designed to maintain a consistent temperature, it’s important to regularly monitor the temperature to ensure that the grill is maintaining your desired settings. Traeger grills come equipped with a built-in temperature probe that tracks the internal temperature of the grill. However, it’s also a good idea to use a separate remote meat thermometer or an ambient thermometer to measure the temperature inside the grill. This ensures that there’s no temperature fluctuation and that your food is cooking evenly.
If you notice significant temperature variation, the following tips can help you maintain a more consistent heat:
- Add Pellets as Needed: Traeger pellet grills rely on the fuel provided by wood pellets. If the pellets are running low, the grill might not be able to maintain a steady temperature. Always keep an eye on your pellet supply and add more as needed, especially for long cooks.
- Close the Lid as Much as Possible: Every time you open the lid of the grill, you let heat escape, which can cause the temperature to drop. Minimize lid openings to keep the temperature steady. If you do need to check on your food, do so quickly to avoid significant temperature loss.
4. Positioning Your Food Correctly
The placement of your food on the grill can impact how evenly it cooks. Traeger grills feature direct and indirect heat zones, meaning certain areas of the grill will be hotter than others. To maintain temperature consistency, consider the following:
- Indirect Heat: For longer cooking times (like smoking), place the food in the area of the grill with indirect heat. This will ensure the food cooks evenly without burning.
- Direct Heat: For quick-searing dishes like steaks or chicken, position the food over the area with direct heat, but make sure to move it around as needed to avoid burning.
By strategically placing your food, you can ensure it cooks more evenly, even if the temperature varies slightly in different parts of the grill.
5. Keep the Grill Clean
A clean grill is a more efficient grill. Ash buildup in the firepot or grease accumulation in the grease trap can obstruct airflow and negatively impact the grill’s performance. This can lead to fluctuations in temperature and inefficient cooking.
Here are a few tips to keep your Traeger grill clean:
- Empty the Ash: After each cook, especially after a long smoking session, be sure to clean out the ash from the firepot. Excess ash can block airflow, which can cause temperature inconsistencies.
- Clean the Grill Grates: Use a grill brush to clean the grates of any leftover food particles. This ensures proper heat transfer and even cooking.
- Check and Empty the Grease Trap: Grease buildup can cause flare-ups and temperature fluctuations. Regularly empty the grease trap to maintain proper heat circulation.
6. Weather Considerations
The weather can have a significant impact on how your Traeger grill maintains its temperature. Extremely cold or windy conditions can cause the grill to work harder to maintain consistent heat, while heatwaves or high humidity can cause the temperature to rise uncontrollably. To minimize the impact of the weather on your grill:
- Use a Grill Cover: A grill cover can protect your Traeger from extreme weather, such as wind or rain, which could affect temperature regulation.
- Consider a Wind Shield: If you’re grilling in a particularly windy area, consider setting up a temporary wind shield around your Traeger to help maintain the internal temperature.
7. Adjusting the Grill’s Settings
One of the most important features of a Traeger grill is its digital controller, which allows you to fine-tune the temperature settings to achieve the perfect cooking conditions. If you’re noticing slight temperature fluctuations during cooking, try adjusting the controller slightly.
- Use the “P” Setting: The Traeger grill has an advanced “P” setting (Pellet Mode), which allows for more precise temperature control. Adjusting the P setting can help manage fluctuations in temperature by regulating how quickly the auger feeds pellets into the firepot.
- Increase or Decrease the Temperature: If the grill is running too hot or too cold, increase or decrease the temperature in small increments. This helps you gradually bring the grill back to the desired cooking temperature without disrupting the cooking process.
8. Calibrate Your Traeger Grill (If Necessary)
If your grill has been consistently running hot or cold, it may need to be calibrated. Over time, the digital controller may lose accuracy, causing temperature inconsistencies. To calibrate your Traeger grill, consult the user manual or contact customer support for guidance on how to reset or calibrate the temperature controls.
Conclusion
Maintaining temperature consistency on your Traeger grill is essential for achieving the best cooking results. Whether you’re smoking, grilling, or roasting, keeping the temperature stable ensures your food cooks evenly, flavors develop properly, and you avoid any unpleasant surprises. By following these tips—such as using the right temperature settings, monitoring the grill, keeping it clean, and factoring in weather conditions—you can guarantee that your Traeger grill stays at the perfect temperature for every cook. With a little practice, you’ll become a pro at managing temperature consistency, delivering perfectly cooked dishes every time.
Choosing the Right Wood Pellets: Best Wood Pellet Options for Different Types of Meat and Recipes
When using a Traeger pellet grill, the wood pellets you choose play a crucial role in the flavor of your food. Traeger grills use wood pellets as their primary fuel source. The type of wood you select will enhance or complement the natural taste of your meat, vegetables, or other ingredients. Understanding which wood pellets work best for various recipes will elevate your grilling and smoking game. Here’s how to pick the right wood for your dish.
1. For Beef: Bold and Smoky Flavors
Beef dishes, like steaks or brisket, thrive with strong wood flavors. The right pellets add a smoky richness that enhances the beef’s natural taste.
- Hickory: Hickory pellets create a deep, smoky flavor perfect for beef. This strong wood is ideal for slow-cooking brisket or ribs.
- Mesquite: Mesquite gives a robust, spicy smoke. It’s great for beef steaks and burgers. But be cautious; it can overpower more delicate cuts.
- Oak: Oak provides a milder smoke. It works well with almost any beef cut and offers a subtle smoky flavor.
2. For Poultry: Light, Fruity, and Sweet Flavors
Poultry, such as chicken or turkey, is delicate and needs a lighter, sweeter smoke. These woods will enhance the juiciness without overshadowing the meat’s flavor.
- Applewood: Applewood adds a light, fruity sweetness that pairs beautifully with poultry. It’s great for smoking or grilling chicken and turkey.
- Cherrywood: Cherrywood provides a slightly sweet, mild smoke. It’s a perfect complement to chicken and turkey, bringing a balanced flavor.
- Pecan: Pecan offers a nutty sweetness that’s great for poultry. It enhances the tenderness of chicken, especially during slow cooking.
3. For Pork: Sweet, Rich, and Balanced Flavors
Pork dishes, like ribs or pulled pork, benefit from wood pellets that bring out the meat’s natural sweetness.
- Applewood: Applewood pellets add a sweet, fruity smoke that enhances pork’s natural flavors. It’s perfect for slow-smoking pulled pork or ribs.
- Maple: Maple pellets bring a mild, sweet smokiness to pork. It works well with pork chops and tenderloin, balancing savory and sweet.
- Hickory: Hickory adds a bold, smoky flavor. It’s great for slow-cooked pork, such as ribs or pork shoulder.
4. For Fish: Light and Clean Flavors
Fish, especially delicate types like salmon, requires a subtle, light wood flavor that complements its natural taste.
- Alderwood: Alderwood pellets are perfect for fish, especially salmon. The mild, sweet flavor enhances the fish without overpowering it.
- Applewood: Applewood works well with fish. It adds a gentle, sweet smokiness that complements delicate flavors like salmon or trout.
- Cherrywood: Cherrywood offers a mild, fruity smoke. It’s a great choice for grilling fish like trout or halibut.
5. For Vegetables: Versatile and Subtle Smoky Notes
Vegetables need a lighter, versatile smoky flavor. These woods add the perfect touch without overpowering the fresh flavors.
- Pecan: Pecan is a mild, nutty option. It pairs well with roasted vegetables like carrots or sweet potatoes.
- Maple: Maple pellets add a sweet and balanced smoke. They work wonderfully with root vegetables, such as squash or beets.
- Oak: Oak pellets are neutral, making them a great choice for a wide variety of vegetables. They add just the right amount of smoke without overwhelming the dish.
6. Blended Wood Pellets: A Fusion of Flavors
Blended wood pellets combine various wood types for a unique flavor profile. These blends offer balanced, complex flavors suitable for multiple dishes.
- Traeger Signature Blend: This popular blend of maple, oak, and cherry offers a versatile flavor. It works well with any type of meat or vegetable, adding depth and complexity to your dish.
- Competition Blend: The hickory, cherry, and apple blend offers a smoky flavor that’s perfect for slow-cooking meats like brisket and ribs.
Conclusion
Choosing the right wood pellets is essential for the perfect Traeger recipe. The right wood enhances the natural flavors of meats and vegetables, making your grilling experience even better. Whether you choose the boldness of hickory, the sweetness of applewood, or a blend of flavors, the possibilities are endless. Experiment with different wood pellets and find the combinations that elevate your favorite dishes to new heights.
Cleaning and Maintaining Your Traeger Grill: Simple Steps to Keep Your Grill in Top Condition for Consistent Performance
Maintaining your Traeger grill is key to ensuring it performs at its best, providing consistently delicious meals every time you fire it up. By following a regular cleaning and maintenance routine, you can prolong the life of your grill and improve your cooking experience. A well-maintained Traeger grill not only produces better-tasting food but also operates more efficiently, saving you time and energy. Let’s dive into a few simple steps that will keep your Traeger in top condition.
1. Clean the Grill Grates After Every Use
The grill grates are where your food is cooked, so it’s important to clean them after every use to remove any grease, char, or food residue. This helps to prevent flavor transfer between meals and ensures that your grill maintains optimal cooking conditions.
- Use a Wire Brush: After grilling, once the grates are cool, scrub them with a stiff wire brush. This will remove food particles and residue that may have stuck to the surface.
- Soak and Scrub: For a deeper clean, remove the grates from the grill, soak them in warm soapy water, and scrub away stubborn grime. If you have a degreaser, apply it to the grates, let it sit, and then use a brush to remove the build-up.
2. Regularly Empty and Clean the Drip Tray
The drip tray catches grease and other drippings that fall during cooking. Over time, grease can accumulate, leading to a potential fire hazard and poor grill performance.
- Check the Drip Tray After Every Cook: Once your grill has cooled down, remove the drip tray and wipe it clean. You can use paper towels to soak up excess grease or degreasers for tougher spots.
- Deep Clean Every Few Weeks: Every few weeks, it’s a good idea to remove the tray and give it a thorough clean using warm water and soap. Scrub the tray with a sponge to remove any residual grease and charred bits.
3. Empty and Clean the Grease Bucket
The grease bucket collects the oils and fats that drip down during cooking. If this bucket is left unchecked, it can overflow, causing grease to spill over or even create a fire risk.
- Check and Empty the Bucket: Make sure to check the grease bucket regularly and empty it when it’s getting full. Be sure to dispose of the grease properly.
- Clean the Bucket: If the bucket has any grease or residue buildup, wash it with hot, soapy water. You can also use a degreaser to ensure it’s thoroughly clean before reinstalling it.
4. Maintain the Firepot and Clean the Ashes
The firepot is where the magic happens—this is where the wood pellets are ignited and burned to create the smoke and heat that cooks your food. Keeping it clean is essential for smooth operation.
- Vacuum the Ashes: After several cooking sessions, your firepot will accumulate ashes. Turn off and unplug the grill before cleaning the firepot. Use a vacuum designed for ashes to carefully clean out the firepot and remove any leftover debris.
- Check for Blockages: While you’re cleaning, take the time to check for any blockages in the auger or firepot that could cause pellet feeding issues. Removing any debris will help maintain consistent heat and smoke during grilling.
5. Clean and Inspect the Pellet Hopper and Auger
The pellet hopper stores your wood pellets, and the auger feeds them into the firepot. Keeping these components clean is vital for smooth pellet feeding and efficient combustion.
- Empty the Pellet Hopper: If you’re not using your grill for an extended period, empty the pellet hopper to prevent pellets from absorbing moisture, which can clog the auger and affect combustion.
- Clean the Auger: Occasionally, inspect the auger for any stuck pellets or debris. Use a vacuum or blower to clear any clogs to ensure that the pellets flow freely.
6. Inspect the Traeger’s Exterior
Don’t forget about the exterior of your Traeger grill. Keeping the outside clean helps prevent rust and keeps your grill looking brand new.
- Wipe Down the Surface: Use a damp cloth and mild soap to wipe down the grill’s exterior after each use. This will help remove dust, grease, and any other residue that may accumulate.
- Check for Rust: Inspect the exterior for any signs of rust or wear. If you notice any, use a wire brush to scrub it off and then apply a protective coating to prevent further damage.
7. Perform Regular Maintenance on the Grill’s Electronics
The electronics of your Traeger grill, such as the digital controller and igniter, should be checked regularly to ensure proper function.
- Check the Digital Controller: Ensure the digital controller is working properly and displaying accurate temperatures. Clean the controller’s vents to avoid clogging.
- Test the Igniter: Periodically, check the igniter to make sure it’s functioning correctly. If the igniter is dirty or damaged, replace it to prevent ignition issues.
8. Protect Your Grill During the Off-Season
If you live in a region with harsh weather, it’s important to protect your Traeger grill during the off-season.
- Use a Grill Cover: Invest in a durable grill cover to protect your Traeger from the elements. This will prevent rust, dust, and debris from collecting on your grill.
- Store Indoors if Possible: If possible, store your Traeger grill in a dry, sheltered area during the off-season to keep it in optimal condition.
Conclusion
Regular cleaning and maintenance are essential for ensuring that your Traeger grill continues to perform at its best. By following these simple steps, you can extend the life of your grill, improve cooking results, and ensure that your grill is always ready to go when you are. Whether you’re smoking meats, grilling vegetables, or baking pizzas, a well-maintained Traeger will provide consistently great results every time. Keep these tips in mind to ensure your grill is always ready for your next culinary adventure.
Using Traeger Accessories: Must-Have Accessories (Grill Mats, Smoke Boxes) to Enhance Your Cooking Experience
Traeger grills are already known for their exceptional cooking performance, but when paired with the right accessories, you can take your grilling experience to the next level. Traeger offers a range of must-have accessories designed to enhance your cooking, improve food quality, and simplify the grilling process. Whether you’re smoking meats, grilling vegetables, or even baking pizzas, these accessories provide more versatility and convenience in your cooking.
1. Grill Mats: Keep Your Grill Clean and Your Food Perfectly Cooked
Grill mats are a game-changer when it comes to cooking on your Traeger. These non-stick mats provide a protective layer between your food and the grill grates, making it easier to cook delicate items and preventing food from sticking.
- Ease of Use: With grill mats, you no longer have to worry about fish fillets, vegetables, or small items slipping through the grates. Simply place the mat on the grill, and you’ll have a non-stick surface that allows you to cook foods evenly without the mess.
- Protects the Grill: Grill mats also help protect your Traeger’s grill grates from burnt-on grease and food residue. They can easily be removed and cleaned, which saves you time on post-cook cleaning.
- Better Heat Distribution: Grill mats help distribute heat evenly, ensuring consistent cooking, even for fragile or small food items like shrimp, veggies, and even grilled sandwiches.
2. Smoke Boxes: Infuse Extra Flavor Into Your Dishes
A smoke box is an excellent accessory for those who want to intensify the smoky flavor of their dishes. These boxes are designed to hold wood chips and allow them to smolder while they’re being heated by the grill. The result is a more robust smoke infusion that enhances your cooking.
- Flavor Customization: The beauty of using a smoke box is that you can customize the flavor profile of your meals. Whether you prefer hickory, applewood, mesquite, or any other type of wood, the smoke box gives you the flexibility to experiment with different wood chips to match the specific flavors of your dishes.
- Ideal for Smaller Foods: A smoke box is perfect for items like vegetables, cheeses, and fish that are more delicate and require a lighter touch. It allows these foods to absorb smoke without being overwhelmed by direct heat.
- Longer Smoking Sessions: Using a smoke box allows for a longer and more controlled smoking session. The wood chips inside the box smolder slowly, providing a consistent level of smoke throughout the cooking process without the need for constant reloading.
3. Traeger Grill Covers: Protect Your Investment
Protecting your Traeger grill from the elements is crucial to maintaining its appearance and performance over time. A grill cover is a simple yet essential accessory to keep your grill in pristine condition.
- Weather Protection: Whether it’s rain, snow, or intense sun, a grill cover will shield your Traeger from the elements and prevent rusting, fading, or dirt accumulation.
- Long-Term Durability: A durable, high-quality cover can also help prevent the build-up of grease and grime, which makes your grill easier to clean and maintain.
- Easy to Use: Most Traeger grill covers are designed to be quick and easy to put on and take off. They offer secure coverage and can be folded neatly when not in use.
4. Traeger Thermometer: Precision Cooking at Its Best
For grilling enthusiasts who love precision, a Traeger thermometer is an indispensable accessory. Whether you’re smoking a brisket, grilling a steak, or roasting chicken, a digital thermometer will help you monitor the internal temperature of your food with accuracy.
- Consistent Results: A thermometer ensures your meats are cooked to the perfect doneness every time. With precise temperature readings, you can avoid overcooking or undercooking your dishes, which is essential for perfect results.
- Convenient Remote Monitoring: Many Traeger thermometers come with wireless capabilities, allowing you to monitor your food’s temperature remotely. This is especially useful for long smoking sessions when you need to check temperatures without opening the grill lid.
5. Cast Iron Skillet: Versatile Cooking for Searing and Baking
A cast iron skillet is one of the most versatile accessories you can add to your Traeger grill. It can be used for searing, sautéing, or even baking, making it an essential tool for any grilling enthusiast.
- Perfect for Searing: The cast iron skillet’s ability to retain heat makes it perfect for searing meats like steaks, burgers, or pork chops. The high heat creates a delicious crust on the outside while locking in the juiciness of your meats.
- Baking and Roasting: Cast iron skillets are also great for baking cornbread, pizza, or roasted vegetables on your Traeger. The even heat distribution ensures that your food bakes uniformly.
- Durable and Long-Lasting: Cast iron is known for its durability and ability to withstand high temperatures. It’s a great addition for anyone looking to elevate their cooking game.
6. Traeger Grill Tools: Essential Utensils for Grilling Perfection
Having the right grill tools makes cooking on your Traeger much easier and more enjoyable. From tongs and spatulas to meat claws, the proper tools will help you handle food safely and with ease.
- Tongs and Spatulas: Long tongs and sturdy spatulas are essential for flipping delicate foods like fish and flipping burgers without ruining their shape. A long handle keeps your hands safely away from the heat, preventing burns and making the grilling process more comfortable.
- Meat Claws: These are perfect for pulling apart smoked meats like pulled pork. Meat claws allow you to easily shred meat without the mess or hassle of using forks.
7. Traeger Pellet Storage Containers: Keep Your Pellets Dry and Ready
The quality of your wood pellets directly impacts the flavor of your food, so it’s essential to keep them in top condition. Pellet storage containers help keep your wood pellets dry and free from moisture, which is key for maintaining optimal performance.
- Moisture Prevention: Moisture can cause pellets to swell or break apart, which can clog the auger and affect the pellet flow. A well-sealed pellet container keeps the wood pellets dry, allowing them to burn efficiently and produce consistent heat and smoke.
- Convenient Storage: Traeger pellet storage containers come in various sizes, allowing you to store enough pellets for extended cooking sessions without having to worry about running out.
form more Tips and Tricks for Grilling with Traeger
Conclusion
Incorporating Traeger accessories into your grilling routine enhances both the convenience and quality of your cooking. Whether you’re looking to add more flavor with a smoke box, protect your grill with a grill cover, or improve your precision with a Traeger thermometer, these accessories can help you get the most out of your grilling experience. Equip your Traeger with these essential tools, and enjoy a more efficient, versatile, and enjoyable cooking process.
Conclusion – Transform Your Grilling Game with These Traeger Recipes
A Traeger grill is more than just a cooking tool—it’s a game-changer for anyone looking to take their grilling experience to the next level. With its advanced pellet grill technology, Traeger offers unparalleled versatility, allowing you to cook everything from smoked meats to grilled vegetables with ease. Whether you’re a seasoned grill master or a beginner, the simplicity of its settings and the precision of its temperature control make it accessible for all skill levels.
These 10 Traeger recipes and tips have the power to elevate your grilling game, providing you with the tools and techniques to create perfectly smoked meats, juicy steaks, and flavorful sides. From slow-cooked brisket to grilled chicken with BBQ rub, each recipe is designed to bring out the best in your food, while the grill does the hard work for you.
So, why not dive in and give these recipes a try? Don’t be afraid to experiment with your own creative twists and flavors. With a Traeger grill, the possibilities are endless. Fire up your grill, gather your ingredients, and start transforming your cooking today!