
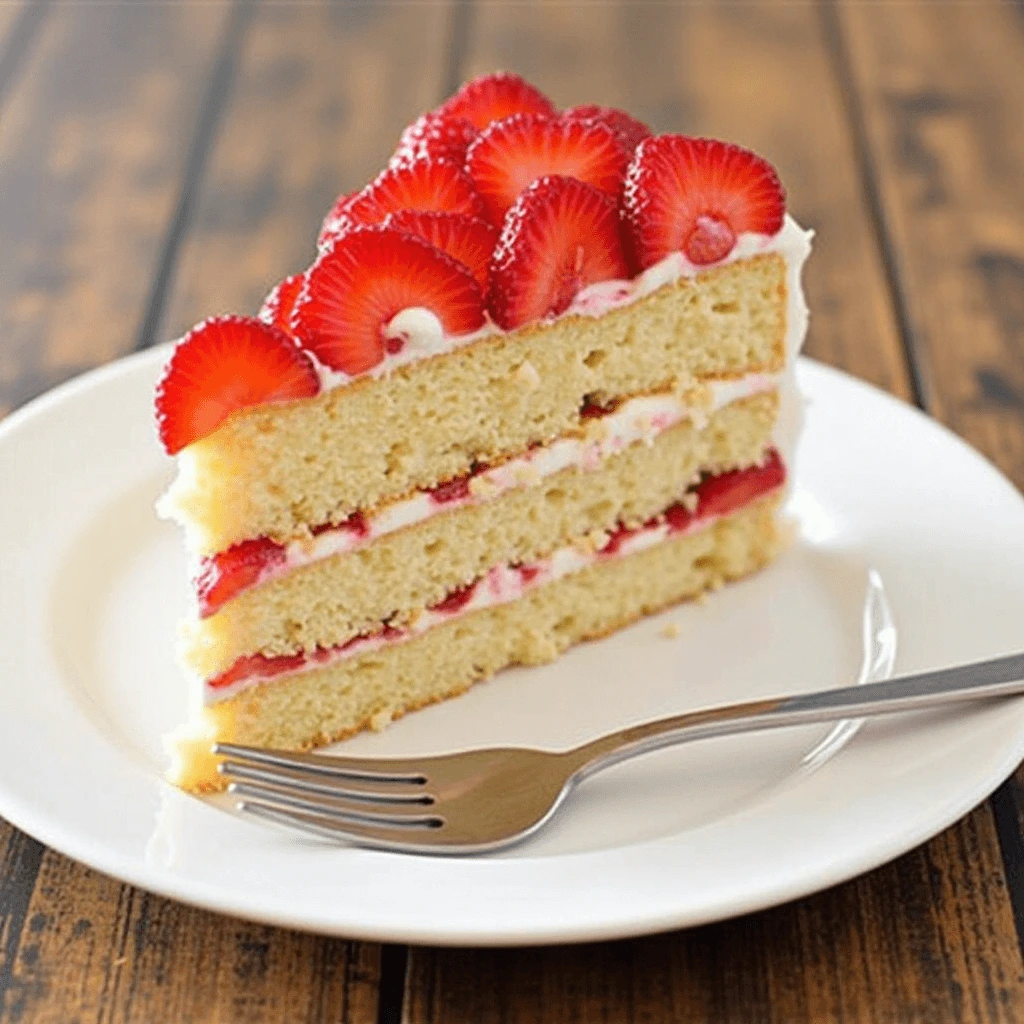
There’s nothing quite as delightful as a homemade strawberry cake—soft, fluffy, and bursting with fresh berry flavor. Whether for birthdays, special occasions, or just a weekend treat, this cake never fails to impress.
One of the biggest challenges when baking a strawberry cake is achieving that perfect moist and fluffy texture. A dry cake can ruin the experience, while a too-dense cake may feel heavy. The secret lies in using the right balance of ingredients, including buttermilk, cake flour, and fresh strawberries, to ensure every bite is light, soft, and delicious.
This recipe uses real strawberries instead of artificial flavoring, enhancing the natural sweetness and color. By choosing high-quality ingredients like fresh berries, real butter, and the perfect leavening agents, you’ll get a cake that’s not just visually appealing but also incredibly flavorful. Get ready to bake the best homemade strawberry cake with this easy-to-follow recipe!
Why This Strawberry Cake Recipe is the Best
Uses Fresh Strawberries – No Artificial Flavors, Only Real Fruit
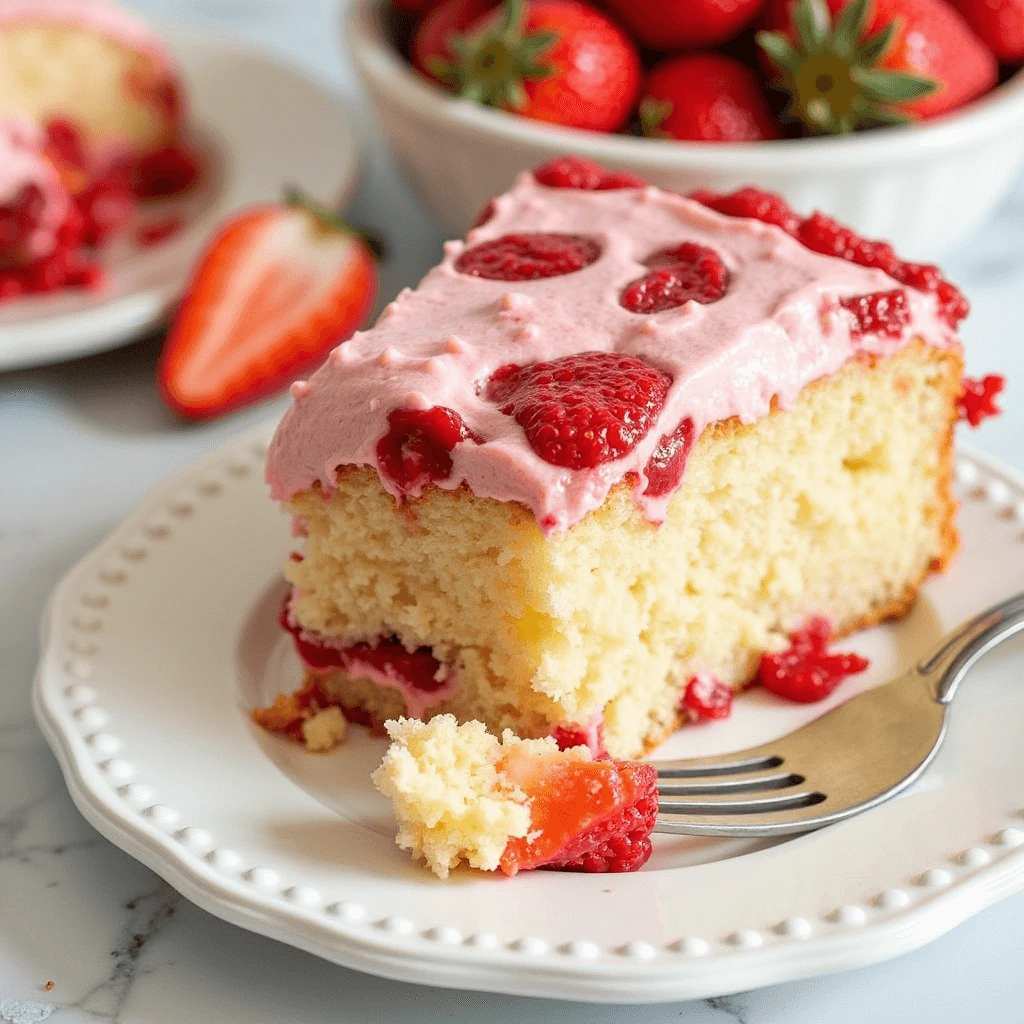
This strawberry cake recipe stands out because it uses fresh strawberries instead of artificial flavors. Many store-bought cakes rely on flavored gelatin or strawberry extract. This recipe gets its sweetness and vibrant color from real fruit.
Why Use Fresh Strawberries?
Fresh strawberries improve both flavor and texture. Their natural juiciness keeps the cake moist, while their mild acidity balances sweetness. Using real fruit also gives the cake a light pink hue without artificial coloring.
How to Prepare Fresh Strawberries for the Cake
To bring out the best flavor, try these methods:
- Strawberry Puree – Blending strawberries creates a smooth, evenly distributed flavor.
- Strawberry Reduction – Simmering puree concentrates the taste and removes excess moisture.
- Chopped Fresh Strawberries – Folding small pieces into the batter adds fruity bursts in every bite.
Best Strawberries to Use
Choose ripe, sweet strawberries with a deep red color. Avoid underripe ones, as they can be too tart. Overripe strawberries may contain too much water. If fresh berries aren’t available, frozen ones work too. Just thaw and drain them first to prevent excess moisture.
Using real strawberries creates an authentic, homemade taste. This recipe avoids processed ingredients, making it a healthier and more natural choice.
Perfectly Moist & Fluffy Texture – Achieved with Buttermilk and Cake Flour
A great strawberry cake should be soft, moist, and airy, not dry or dense. The key to achieving this perfect texture lies in buttermilk and cake flour. These two ingredients work together to create a light, tender crumb that makes each bite irresistible.
Why Use Buttermilk?
Buttermilk plays a crucial role in keeping the cake moist and tender. Its natural acidity helps break down gluten, resulting in a softer texture. It also reacts with baking powder or baking soda, adding extra lift and fluffiness. If you don’t have buttermilk, you can easily make a substitute by mixing one cup of milk with one tablespoon of lemon juice or vinegar. Let it sit for 5–10 minutes before using.
The Role of Cake Flour
Cake flour has a lower protein content than all-purpose flour, which reduces gluten formation. This makes the cake lighter, softer, and less dense. If you only have all-purpose flour, you can make a substitute by replacing 2 tablespoons of flour with cornstarch for every cup used. Sifting the flour several times also helps keep the cake extra fluffy.
Other Tips for a Moist & Fluffy Cake
- Don’t overmix the batter – Overmixing can make the cake dense by developing too much gluten.
- Use room-temperature ingredients – Butter, eggs, and buttermilk blend more smoothly, creating a better texture.
- Avoid overbaking – Check for doneness by inserting a toothpick. It should come out with a few moist crumbs, not wet batter.
By using buttermilk and cake flour, you’ll get a light, fluffy, and incredibly moist strawberry cake every time. These simple tweaks can make all the difference in achieving a bakery-quality dessert at home!
Easy-to-Follow Recipe – Simple Steps for a Beginner-Friendly Experience
Baking a homemade strawberry cake might seem challenging, but this recipe is designed to be easy and foolproof. With simple steps and basic ingredients, even beginners can create a moist, fluffy, and delicious cake.
Step-by-Step Guide
- Prepare the Strawberries
- First, wash, hull, and puree the strawberries.
- For a more intense flavor, simmer the puree until it thickens slightly, then let it cool.
- Mix the Dry Ingredients
- Next, sift cake flour, baking powder, and salt together. This step ensures a smooth, lump-free mixture and a light texture.
- Cream the Butter and Sugar
- Now, beat the butter and sugar together until the mixture becomes pale and fluffy. This will add air to the batter, making the cake light and airy.
- Add the Eggs and Vanilla
- Gradually mix in the eggs one at a time, ensuring each one is fully incorporated.
- Then, add vanilla extract to give the cake extra flavor depth.
- Combine Wet and Dry Ingredients
- Now, alternate adding the dry ingredients and buttermilk, mixing gently each time. Overmixing can cause the cake to become dense, so be careful.
- Afterward, fold in the strawberry puree for a burst of natural sweetness and vibrant color.
- Bake to Perfection
- Pour the batter into prepared cake pans and smooth the tops evenly.
- Bake at 350°F (175°C) until a toothpick inserted into the center comes out clean.
- Cool and Frost
- Let the cake cool completely before frosting.
- Finally, top the cake with a strawberry cream cheese frosting or whipped cream for a perfect finish.
Why This Recipe Works for Beginners
- First, it uses simple ingredients that are easy to find.
- Additionally, the step-by-step instructions ensure there’s no guesswork at any point.
- Finally, baking tips guide you to avoid common mistakes like overmixing or overbaking.
By following this easy-to-follow recipe, you’ll achieve a bakery-quality strawberry cake that’s soft, fluffy, and bursting with real strawberry flavor. Even if it’s your first time baking, success is guaranteed!
Essential Ingredients for a Moist & Fluffy Strawberry Cake
Strawberries – Fresh or Frozen, and How to Prepare Them
Strawberries are the star of this strawberry cake recipe, and their quality can make or break the cake’s flavor. Whether you use fresh or frozen strawberries, proper preparation is key to achieving the best taste and texture.
Fresh Strawberries
Fresh strawberries are ideal because they provide a vibrant color, natural sweetness, and moisture. To prepare fresh strawberries:
- Wash thoroughly – Rinse under cold water to remove any dirt or pesticides.
- Hull them – Remove the green tops and leaves by using a hull tool or simply slicing off the tops.
- Puree or chop – Depending on the recipe, you can either puree the strawberries for a smooth consistency or chop them into small pieces to fold into the batter for bursts of flavor.
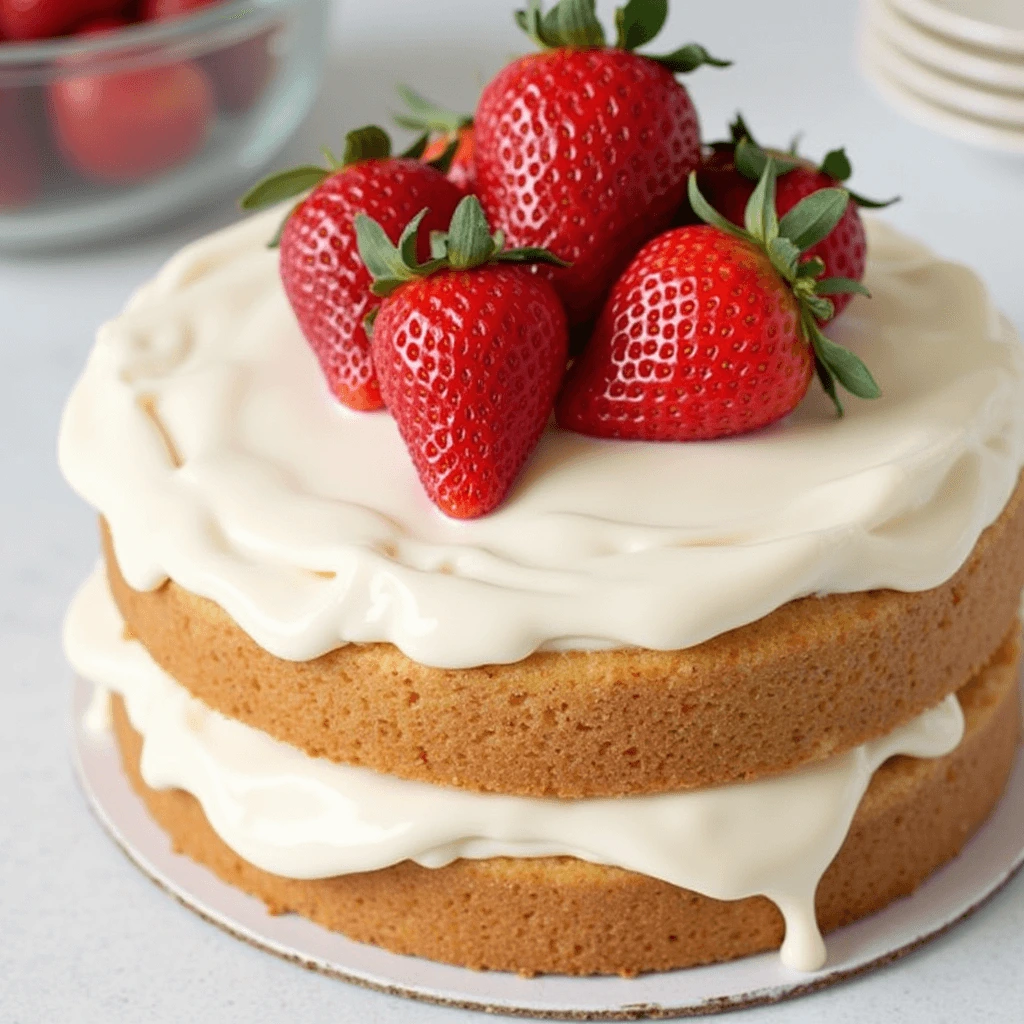
Fresh strawberries also provide a more natural texture that makes the cake moist and soft. They can be mixed into the batter or used as a garnish on top of the cake for extra flair.
Frozen Strawberries
While fresh strawberries are great, frozen strawberries can be a convenient and equally delicious option, especially when fresh strawberries are out of season. To use frozen strawberries in your cake:
- Thaw them first – Allow the frozen strawberries to thaw in the refrigerator or at room temperature.
- Drain excess liquid – After thawing, frozen strawberries release water, so be sure to drain them thoroughly to prevent excess moisture from affecting the cake’s texture.
- Puree or chop – Once thawed and drained, puree the strawberries for an even consistency, or chop them as you would fresh berries.
Although frozen strawberries may be slightly softer than fresh, they still pack a punch of flavor and are perfect for making a moist cake. Just remember to drain any extra liquid to maintain the right cake consistency.
Choosing Between Fresh or Frozen Strawberries
Both fresh and frozen strawberries have their advantages. Fresh strawberries are preferred for their vibrant appearance and firmer texture. However, frozen strawberries are a great alternative when fresh ones are unavailable or more expensive. Both options work well in the cake, so choose based on availability and personal preference.
By properly preparing the strawberries—whether fresh or frozen—you can ensure your cake has the best flavor and texture, elevating it to perfection!
Cake Flour vs. All-Purpose Flour – Why Cake Flour Makes a Difference
Choosing the right type of flour is essential for achieving the perfect strawberry cake texture. While all-purpose flour is commonly used in many baked goods, cake flour makes a significant difference when you’re aiming for a moist, soft, and tender crumb. Here’s why cake flour works best for this strawberry cake recipe.
What Is Cake Flour?
Cake flour is made from soft wheat and has a lower protein content compared to all-purpose flour. This low-protein content helps to reduce gluten formation, resulting in a fluffier, more delicate texture. Because cake flour creates a tender crumb, it’s ideal for cakes that should be light and airy, like a strawberry cake.
Cake Flour vs. All-Purpose Flour
While all-purpose flour is versatile and suitable for most recipes, it contains more protein, which can lead to more gluten development when mixed. This results in a denser, chewier texture. For cakes, you want to avoid this and instead aim for a soft, tender texture, which is where cake flour excels.
In fact, using all-purpose flour in a cake recipe can make it too heavy and thick, whereas cake flour ensures the cake is light and fluffy without sacrificing structure.
Why Cake Flour Makes a Difference in Strawberry Cake
The goal of a strawberry cake is to achieve the perfect balance between moisture, softness, and structure. Cake flour helps create the ideal balance by giving the cake a delicate texture that’s not too heavy or dense. When combined with other ingredients like buttermilk and strawberry puree, cake flour helps absorb moisture without making the cake soggy or overly rich.
Can You Substitute All-Purpose Flour for Cake Flour?
If you don’t have cake flour on hand, you can make a substitute using all-purpose flour and cornstarch:
- For every cup of cake flour, measure out 1 cup of all-purpose flour and remove 2 tablespoons.
- Add 2 tablespoons of cornstarch to replace the removed flour and sift it all together.
This substitution helps lower the protein content of all-purpose flour, mimicking the effects of cake flour. However, if you can find cake flour, it’s always the best choice for the softest, most tender cake!
By using cake flour, you’ll achieve a fluffy, soft texture in your strawberry cake, making it a standout dessert that’s both light and flavorful.
Buttermilk & Baking Powder – The Secret to a Light, Airy Texture
When it comes to achieving the perfect strawberry cake, two ingredients play a pivotal role in ensuring a light, airy texture: buttermilk and baking powder. These ingredients not only enhance the flavor but also contribute to the moistness and fluffiness of the cake. Here’s how they work their magic.
The Role of Buttermilk
Buttermilk is a key ingredient that adds both tenderness and moisture to your strawberry cake. Its acidity helps to break down gluten, which prevents the cake from becoming too dense. This results in a softer, more delicate crumb.
Additionally, buttermilk reacts with baking powder and baking soda to create bubbles of air within the batter, which causes the cake to rise. This reaction leads to a fluffier texture that’s essential for making a cake light and airy.
Buttermilk also adds a slight tanginess that balances the sweetness of the strawberries, making the cake more flavorful and less overly sweet.
The Power of Baking Powder
Baking powder is a leavening agent that helps the cake rise while baking. It contains both an acid (cream of tartar) and a base (baking soda), which react when moistened to produce carbon dioxide gas. These gas bubbles get trapped in the batter, causing the cake to rise and giving it that light, airy texture we all love.
In combination with buttermilk, baking powder works to ensure that the cake rises evenly and becomes soft and fluffy without being too heavy.
How Buttermilk and Baking Powder Work Together
The acidic nature of buttermilk activates the baking powder, causing it to produce gas more effectively. This creates air pockets throughout the batter, which gives the cake its fluffiness. The extra moisture from the buttermilk also keeps the cake moist without being soggy.
Together, buttermilk and baking powder are a powerhouse duo for achieving that perfect, tender, and airy texture in your strawberry cake. Without them, the cake could turn out dense and heavy, making it difficult to achieve that melt-in-your-mouth feel.
Tips for Using Buttermilk and Baking Powder
- Don’t overmix the batter – Once the buttermilk and baking powder react, the gases start forming. Overmixing can deflate these bubbles, leading to a denser cake.
- Room temperature ingredients – Make sure your buttermilk is at room temperature for an even batter texture. Cold ingredients can cause uneven mixing.
- Double-check the baking powder – Ensure your baking powder is fresh. Expired baking powder won’t create the same rise, resulting in a flatter cake.
By incorporating buttermilk and baking powder into your strawberry cake recipe, you’ll achieve a fluffy, light texture that makes every bite melt in your mouth. These simple ingredients are the key to a perfect cake every time!
Butter, Eggs & Sugar – Creating a Rich and Flavorful Cake
The key to a rich, flavorful strawberry cake lies in the combination of butter, eggs, and sugar. These three ingredients work together to create a cake that is not only moist and tender but also bursting with flavor. Here’s how each of them contributes to the perfect cake.
The Importance of Butter
Butter is essential for adding richness and flavor to your cake. It’s the primary fat source in many cake recipes, and for good reason:
- Tenderizes the crumb – Butter coats the flour particles and limits gluten formation, resulting in a soft and tender texture.
- Flavor enhancer – Butter imparts a creamy, savory flavor that balances the sweetness of the cake, making each bite more indulgent.
- Moisture – Butter helps lock in moisture, ensuring that the cake doesn’t dry out, even after baking.
For the best results, use unsalted butter so you can control the amount of salt in your recipe, especially since baking powder and other ingredients may already contribute some salt.
Why Eggs Matter
Eggs play a crucial role in the structure and texture of your strawberry cake. They provide binding and structure while adding moisture and richness. Here’s how eggs contribute:
- Binding and structure – The proteins in eggs help hold the cake together, allowing it to rise and set properly as it bakes.
- Moisture – Eggs help maintain the cake’s moisture content by holding liquid within the batter, contributing to a soft crumb.
- Color and flavor – Eggs add a yellow hue and richness, enhancing the flavor and appearance of your strawberry cake.
Be sure to room-temperature eggs for easier incorporation into the batter, which ensures a smoother and more even mixture.
The Sweetness of Sugar
Sugar is not only responsible for the sweetness of your cake but also for its texture and moisture retention. Here’s how sugar contributes to your cake’s final result:
- Sweetness – Of course, sugar is the main ingredient that sweetens your cake, balancing out the tartness of the strawberries.
- Moisture retention – Sugar attracts and holds moisture, which keeps your cake moist and soft for days.
- Airiness – When sugar is creamed with butter, it helps trap air, giving the cake a light, fluffy texture. This process is known as creaming and is essential for creating an airy crumb.
You can adjust the amount of sugar based on your desired sweetness and the natural sweetness of the strawberries. If you prefer a less sweet cake, you can reduce the sugar slightly without compromising the texture.
The Perfect Balance
Using the right ratio of butter, eggs, and sugar is essential for creating a perfectly balanced strawberry cake. Too much butter can make the cake greasy, while too little sugar may result in a bland flavor. The eggs help tie everything together, providing structure and richness without making the cake too heavy.
When these ingredients are combined properly and creamed together, you’ll end up with a rich, flavorful, and moist cake that serves as the perfect base for your strawberry filling and frosting.
By carefully measuring and mixing butter, eggs, and sugar, you ensure your strawberry cake is the perfect balance of moisture, flavor, and texture. This combination is truly the foundation of any great cake!
Step-by-Step Guide to Making the Best Strawberry Cake
Step 1: Prepare the Strawberries – Puree or Chop for Maximum Flavor
The strawberries are the star ingredient in this cake, so it’s essential to prepare them in a way that maximizes their flavor and freshness. Whether you choose to puree or chop the strawberries depends on the texture and consistency you’re aiming for in your cake. Here’s how to prepare your strawberries for the best result:
Using Fresh Strawberries
Fresh strawberries offer the best flavor, but they need to be properly prepared before incorporating them into the cake. First, rinse the strawberries under cold water and pat them dry with a paper towel. Remove the green stems and hull (the white core) before preparing them for the next steps.
Option 1: Strawberry Puree
If you’re looking for a smooth, moist texture and want the strawberry flavor to be evenly distributed throughout the cake, pureeing the strawberries is the way to go.
- How to Puree: Simply blend the fresh strawberries in a food processor or blender until they reach a smooth consistency.
- Tip: You can strain the puree to remove excess seeds, but this step is optional. If you prefer a more pronounced texture in the cake, keep some seeds in the puree.
Pureeing the strawberries not only enhances the flavor but also helps keep the cake moist, as the liquid from the puree contributes to the batter’s overall consistency.
Option 2: Chopping the Strawberries
If you prefer chunks of strawberry in the cake for a bit of texture, then chopping the strawberries into small pieces is a great choice.
- How to Chop: Slice the strawberries lengthwise into halves or quarters, then chop them into small bite-sized pieces.
- Tip: After chopping, sprinkle a small amount of flour on the strawberries to prevent them from sinking to the bottom of the batter while baking. This also helps to keep the strawberries evenly distributed throughout the cake.
Chopped strawberries create a burst of fruitiness in every bite, making the cake feel more like a fruit-filled treat.
Maximizing Strawberry Flavor
- Macerating Strawberries: To intensify the flavor of fresh strawberries, sprinkle them with a little sugar and let them sit for 15-30 minutes. This will draw out their natural juices and create a juicy mixture that adds depth to the flavor of the cake.
- Roasting or Baking Strawberries: For a more concentrated flavor, consider lightly roasting or baking the strawberries before adding them to the cake batter. This deepens the strawberry flavor, adding a caramelized richness.
Why Preparation Matters
Whether you choose to puree or chop the strawberries, proper preparation ensures that the cake is flavorful, moist, and perfectly balanced. The strawberries add not only flavor but also contribute to the texture and moisture of the cake.
Start with fresh, high-quality strawberries for the best flavor, and prepare them according to your desired texture for a delicious, strawberry-packed cake.
Step 2: Mix the Dry and Wet Ingredients – Tips for the Perfect Batter
Now that your strawberries are prepared, it’s time to move on to the next important step: mixing the dry and wet ingredients. This stage is crucial for creating the perfect batter that will result in a moist, fluffy, and perfectly textured strawberry cake. Here’s how to do it right:
Step 1: Combine Dry Ingredients
Start by mixing all your dry ingredients together. This typically includes cake flour, baking powder, baking soda, salt, and any spices or flavorings (such as vanilla or cinnamon) that are part of the recipe. Here’s why this step is essential:
- Even distribution of leavening agents: Mixing the baking powder and baking soda with the dry ingredients ensures that they are evenly distributed throughout the batter. This helps the cake rise properly while baking.
- Prevents clumps: Sifting or whisking the dry ingredients together prevents any clumps of flour or baking powder, ensuring a smooth batter.
Step 2: Mix the Wet Ingredients
In a separate bowl, mix your wet ingredients. This includes butter, eggs, buttermilk, vanilla extract, and sugar. Here’s how to combine them:
- Cream the butter and sugar: Start by beating the butter and sugar together until the mixture is light and fluffy. This process is called “creaming” and is essential for incorporating air into the batter, which contributes to a light and fluffy cake.
- Add eggs one at a time: After creaming the butter and sugar, add the eggs one at a time, ensuring each egg is fully incorporated before adding the next. This helps create a smooth batter and prevents curdling.
- Add buttermilk and vanilla: Once the eggs are fully mixed in, add the buttermilk and vanilla extract. Mixing in the buttermilk adds the moisture needed for a tender crumb, while the vanilla adds flavor depth.
Step 3: Combine Wet and Dry Ingredients
Now it’s time to bring everything together. It’s important to combine the dry and wet ingredients carefully:
- Alternate wet and dry ingredients: Begin by adding a small portion of your dry mixture to the wet ingredients. Mix gently until just combined, then add a portion of the buttermilk. Continue alternating between dry and wet ingredients, mixing only until everything is incorporated. This prevents over-mixing, which could lead to a dense cake.
- Don’t overmix: The key to a fluffy and light cake is to avoid over-mixing the batter. Once the ingredients are combined, stop mixing! Over-mixing can lead to the development of too much gluten, making the cake tough and chewy instead of light and tender.
Step 4: Add the Strawberries
Finally, add the prepared strawberries to the batter. If you’re using chopped strawberries, fold them in gently using a spatula. If you’re using pureed strawberries, incorporate them carefully to ensure even distribution throughout the batter. Here are some additional tips:
- Don’t overmix the strawberries into the batter, as you don’t want to break them down too much.
- Coat chopped strawberries in flour before adding them to the batter to help them distribute evenly and prevent them from sinking to the bottom of the cake.
Tips for the Perfect Batter
- Room-temperature ingredients: Using room-temperature butter, eggs, and buttermilk helps everything come together smoothly and evenly. Cold ingredients can cause the batter to curdle or separate.
- Use a gentle folding motion: When combining wet and dry ingredients, use a gentle folding motion with a spatula or spoon to avoid overmixing. This preserves the air you’ve incorporated into the batter, leading to a fluffier cake.
- Check the consistency: The batter should be thick but spreadable. If it’s too runny, the cake may turn out too dense. If it’s too thick, add a tiny bit more buttermilk to achieve the right consistency.
Why This Step Is Crucial
Properly mixing the dry and wet ingredients ensures that the cake batter is smooth and even, with no lumps or streaks. The key to a light and fluffy strawberry cake lies in the balance between the dry and wet ingredients, the gentle incorporation of air, and the careful mixing. Follow these tips to create a batter that’s perfectly textured and ready for the oven.
Step 3: Bake to Perfection – Best Oven Temperature and Baking Time
Now that your strawberry cake batter is ready, it’s time to bake it to perfection. The baking process plays a crucial role in achieving that light, fluffy, and moist texture that makes this cake a true standout. Here are the key steps to ensure your cake bakes beautifully:
Step 1: Preheat the Oven
Before you place the cake in the oven, make sure it’s preheated to the right temperature. This ensures that your cake starts baking immediately and evenly. For a moist and fluffy strawberry cake, the ideal temperature is:
- Bake at 350°F (175°C) – This temperature is perfect for a cake that rises evenly without browning too quickly or becoming dry. It allows the cake to bake slowly, keeping it moist and fluffy throughout.
Tip: Always preheat your oven for at least 10-15 minutes before placing the cake inside to ensure the temperature is stable.
Step 2: Prepare the Cake Pans
Before baking, make sure your cake pans are properly prepared:
- Grease the pans: Lightly grease the bottom and sides of your cake pans with butter or oil. This prevents the cake from sticking.
- Line the pans with parchment paper: For extra assurance that your cake will come out easily, line the bottom of the pans with parchment paper.
- Flour the pans: After greasing, lightly flour the pans, shaking off any excess flour. This provides an additional layer of protection to help the cake release from the pan smoothly.
Step 3: Pour the Batter into the Pans
Once your pans are prepped, divide the cake batter evenly between the pans. Use a spatula to smooth the tops and ensure the batter is evenly distributed. This helps the cake rise evenly during baking.
Step 4: Bake the Cake
Place the prepared cake pans in the preheated oven. Bake the cakes for about 25-30 minutes for a standard round cake or until a toothpick or cake tester inserted into the center comes out clean.
- Monitor the cake: Check the cake around 25 minutes. If the top of the cake is golden brown and the edges are pulling away from the pan, it’s likely done.
- Do the toothpick test: Insert a toothpick or cake tester into the center of the cake. If it comes out clean or with just a few crumbs, the cake is done. If the toothpick comes out with wet batter, continue baking for an additional 5-7 minutes and check again.
Tip: If you’re baking a larger cake, or multiple layers, you may need to adjust the baking time. Larger cakes often take 5-10 minutes longer to bake through. You can test doneness with the toothpick method.
Step 5: Allow the Cake to Cool
Once the cake is fully baked, remove it from the oven and allow it to cool in the pans for about 10 minutes. This resting time helps the cake firm up and makes it easier to remove from the pans without falling apart.
- After 10 minutes, carefully invert the pans onto a cooling rack to remove the cakes.
- Let the cakes cool completely before frosting them. A warm cake can cause frosting to melt, affecting both the look and texture.
Troubleshooting Common Baking Issues
- Uneven rising: If your cake rises unevenly, ensure your oven temperature is accurate. Using an oven thermometer can help, as ovens sometimes run hot or cold.
- Dry cake: Overbaking is a common cause of dry cakes. If your cake is dry, try checking it a few minutes earlier next time, as every oven is different.
- Sinking in the middle: If your cake sinks in the middle, it may have been underbaked, or the oven temperature may have been too low. Always use the toothpick test to verify doneness.
Why Temperature and Time Matter
Getting the right oven temperature and baking time is essential for achieving a light, fluffy, and perfectly baked strawberry cake. Baking at 350°F allows the cake to rise evenly without becoming too dry or overbaked. The baking time ensures that the cake has enough time to bake all the way through while retaining its moistness. Proper cooling allows you to handle the cake without risking breaking or tearing.
Step 4: Cooling and Frosting – How to Avoid a Soggy Cake
Once your strawberry cake is baked to perfection, it’s time to let it cool and get it ready for frosting. Cooling and frosting are critical steps in ensuring that your cake maintains its moisture, fluffiness, and delicious texture without becoming soggy. Here’s how to cool and frost your cake to ensure the best results:
Step 1: Let the Cake Cool in the Pans
After taking your cake out of the oven, let it cool in the cake pans for about 10 minutes. This gives the cake time to set slightly and firm up a bit, making it easier to remove from the pans.
- Why it matters: Allowing the cake to cool slightly before removing it from the pans helps prevent it from falling apart or crumbling. If you try to remove a cake too soon, it may be too soft and may break or become misshapen.
Step 2: Remove from Pans Carefully
Once your cake has cooled in the pans for 10 minutes, carefully invert the pans onto a cooling rack. Gently tap the sides of the pan to release the cake. If you’ve lined the pans with parchment paper, this should be an easy step.
- Tip: If the cake is stuck, run a butter knife around the edge of the pan to loosen it before flipping it out. Be gentle to avoid tearing the edges.
Step 3: Cool Completely Before Frosting
After removing the cakes from the pans, let them cool completely on the cooling rack. This is a crucial step, as frosting a warm cake can cause the frosting to melt and become too runny.
- Why cooling is important: When the cake is warm, the frosting will melt and seep into the cake, making it soggy. Allow the cake to cool for at least 30 minutes to an hour, or longer if needed. Make sure the cake layers are cool to the touch before applying the frosting.
Step 4: Prepare the Frosting
While the cake is cooling, it’s a good time to prepare your frosting. A common frosting for strawberry cake is cream cheese frosting, buttercream, or a whipped cream frosting. Here’s how to avoid soggy frosting:
- Use a firm frosting: Frosting that is too soft can make your cake soggy. Opt for a thicker, more stable frosting, such as buttercream, which holds its structure well and won’t melt into the cake.
- Chill the frosting: If you’re using a frosting that’s prone to melting, such as cream cheese frosting, chill it in the fridge for about 10 minutes before applying. This helps it firm up and makes it easier to spread.
Step 5: Apply the Frosting Carefully
Once the cake is completely cooled and your frosting is ready, it’s time to frost your cake. Follow these tips to avoid a soggy or overly messy frosting application:
- Crumb coat first: If you’re using a delicate frosting or want to prevent crumbs from getting mixed into the frosting, apply a thin crumb coat first. This is a light layer of frosting that seals in the crumbs. After applying the crumb coat, chill the cake for about 20 minutes before applying the final layer of frosting.
- Spread evenly: When applying the final coat of frosting, use a spatula or butter knife to spread it evenly over the top and sides of the cake. For a smooth finish, use a bench scraper or offset spatula. If you prefer a textured look, you can swirl the frosting for a more rustic appearance.
Step 6: Refrigerate the Cake (If Necessary)
If you’re planning to store the cake for a while before serving or transporting it, place the frosted cake in the fridge to help set the frosting and keep it from becoming too soft. Refrigerating also helps preserve the freshness of the cake.
- Why refrigeration helps: The cooler temperature will allow the frosting to firm up, preventing it from melting into the cake. It will also keep the cake fresh for longer.
Common Mistakes to Avoid
- Frosting too soon: Don’t frost the cake when it’s still warm. Always wait until the cake has completely cooled to room temperature.
- Overloading the frosting: While it’s tempting to load up on frosting, too much can make the cake feel heavy and overly sweet. Apply a thin, even layer to highlight the moistness of the cake.
- Not refrigerating: If your cake is decorated with a frosting like cream cheese frosting or a whipped topping, refrigerating the cake helps preserve its structure and taste.
Why This Step Matters
Cooling and frosting your cake properly are key to achieving a moist, fluffy, and perfectly frosted strawberry cake. Allowing the cake to cool completely before frosting prevents a soggy mess, while using stable frosting ensures that your cake doesn’t get weighed down. Additionally, refrigerating your cake helps it stay fresh and keeps the frosting in place for a beautiful finish.
Now that your strawberry cake is frosted and cooled, it’s time to slice and serve. Whether you add some fresh strawberry slices on top or garnish with sprinkles, your cake is now ready to be enjoyed.
Frosting & Toppings: The Perfect Pairings for Your Cake
Classic Cream Cheese Frosting – Rich and Tangy Balance
One of the most popular frostings for a strawberry cake is cream cheese frosting. Its rich, creamy texture and tangy flavor perfectly complement the sweetness of the strawberry cake, creating a delicious balance. Here’s how to make the perfect classic cream cheese frosting for your cake:
Step 1: Gather Your Ingredients
To make this frosting, you’ll need a few key ingredients that contribute to its smooth, tangy taste:
- 8 oz (225g) cream cheese – Make sure it’s softened to room temperature. Cold cream cheese can result in a lumpy frosting.
- 1/2 cup (115g) unsalted butter – Softened to room temperature. This gives the frosting its smooth texture.
- 4 cups powdered sugar (icing sugar) – Sifted to avoid lumps and ensure smoothness in the frosting.
- 1 tsp vanilla extract – For a hint of vanilla flavor.
- 1-2 tbsp heavy cream or milk – To adjust the consistency if needed.
Step 2: Beat the Cream Cheese and Butter
- In a large mixing bowl, combine the softened cream cheese and butter.
- Use an electric mixer or stand mixer to beat them together on medium speed for about 2-3 minutes until the mixture is smooth and creamy. This step is essential to ensure the base of the frosting is light and fluffy.
Tip: If the cream cheese or butter isn’t softened, it will result in clumps and make it harder to achieve a smooth frosting.
Step 3: Gradually Add the Powdered Sugar
- Gradually add in the powdered sugar, about 1/2 cup at a time, beating on low speed to prevent the sugar from flying out of the bowl.
- Once all the sugar is incorporated, increase the mixer speed to medium-high and continue beating for an additional 2-3 minutes. This helps the frosting become light and fluffy.
Tip: Be sure to sift the powdered sugar before adding it to the bowl to prevent any clumps from forming in your frosting.
Step 4: Add Vanilla Extract
- Add 1 tsp of vanilla extract and beat until fully combined. The vanilla adds an extra layer of flavor that balances the tanginess of the cream cheese.
Step 5: Adjust the Consistency
- If the frosting is too thick, add 1 tablespoon of heavy cream or milk at a time until you reach the desired consistency. The frosting should be thick enough to spread but smooth enough to pipe onto the cake.
Tip: If you’re planning to pipe the frosting onto your cake, keep it slightly thicker. If you’re spreading it with a spatula, a slightly softer consistency works best.
Step 6: Frost the Cake
- Once the cream cheese frosting is ready, it’s time to apply it to your cooled strawberry cake. Start by spreading a crumb coat (a thin layer of frosting) over the entire cake to seal in any crumbs. Chill the cake for about 20 minutes before applying a final, thicker layer of frosting.
- After the crumb coat has set, generously spread the frosting over the top and sides of the cake. You can use an offset spatula for a smooth finish, or leave the frosting textured for a more rustic look.
Step 7: Garnish (Optional)
For extra flavor and decoration, top the frosted cake with fresh strawberry slices, a sprinkle of strawberry syrup, or even some crushed graham crackers for a crunchy element.
Why Classic Cream Cheese Frosting Works for Strawberry Cake
The cream cheese frosting perfectly complements the sweet and tart flavor of fresh strawberries, creating a balanced contrast. The richness of the butter adds depth, while the tanginess of the cream cheese enhances the sweetness of the cake without overpowering it. Plus, the texture of the frosting is smooth and velvety, making each bite of cake feel indulgent and luxurious.
This classic frosting not only makes the cake taste amazing, but it also provides a beautiful, silky finish for your strawberry cake, elevating its appearance and flavor.
Enjoy decorating and serving your moist strawberry cake with this creamy, tangy frosting. Whether it’s for a special occasion or a simple treat, this combination is sure to impress your guests!
Strawberry Buttercream – Enhancing the Strawberry Flavor
If you’re looking to really bring out the strawberry flavor in your cake, strawberry buttercream is the perfect frosting. Combining the creamy texture of buttercream with the natural sweetness of fresh strawberries, this frosting enhances every bite of your cake. Here’s how to make a fluffy strawberry buttercream that will complement your moist strawberry cake perfectly:
Step 1: Gather Your Ingredients
You will need the following ingredients:
- 1 cup (2 sticks) unsalted butter – Softened to room temperature. This creates a smooth, creamy base for the buttercream.
- 4-5 cups powdered sugar – Sifted to prevent lumps.
- 2-3 tbsp heavy cream or milk – To adjust the frosting consistency.
- 1/2 cup fresh strawberries – Pureed for an authentic strawberry flavor.
- 1 tsp vanilla extract – To add depth to the overall flavor.
- Pinch of salt – Helps balance the sweetness.
Step 2: Prepare the Strawberries
Start by washing, hulling, and chopping 1/2 cup of fresh strawberries. Blend them in a food processor or blender until smooth. If you want a stronger flavor, reduce the puree on the stove for a few minutes.
- Tip: Be mindful of the consistency. Avoid too much liquid in the puree as it can alter the frosting’s texture.
Step 3: Beat the Butter
In a large mixing bowl, beat the softened butter using a mixer on medium speed for about 2-3 minutes, or until creamy and smooth.
- Tip: Room temperature butter is crucial to achieving a smooth frosting without any lumps.
Step 4: Gradually Add Powdered Sugar
Slowly add the sifted powdered sugar, one cup at a time, while mixing on low speed to avoid a sugar cloud. After all sugar is incorporated, increase the mixer speed to medium and continue beating for another 3-4 minutes, until the mixture is light and fluffy.
- Tip: Ensure that each addition of powdered sugar is fully incorporated before adding more.
Step 5: Add Strawberry Puree, Vanilla, and Salt
Add the strawberry puree, vanilla extract, and a pinch of salt. Mix until well combined. Taste the frosting and adjust by adding more strawberry puree if needed to enhance the flavor.
- Tip: You can add a little strawberry jam or freeze-dried strawberry powder for a stronger flavor.
Step 6: Adjust Consistency
If the frosting is too thick, add heavy cream or milk, one tablespoon at a time, to achieve the perfect consistency. It should be spreadable but firm enough to hold its shape when piped.
- Tip: For spreading, a slightly softer consistency works best, while piping may require a firmer texture.
Step 7: Frost the Cake
Now it’s time to apply the strawberry buttercream to your cooled cake. Spread the frosting evenly over the top and sides of the cake. For a more decorative look, try piping it with a piping bag.
- Tip: If you prefer a decorative touch, use a star tip or rosette technique for a beautiful finish.
Why Strawberry Buttercream is Ideal for Strawberry Cake
The rich creaminess of buttercream pairs perfectly with the tartness of fresh strawberries, creating a delightful balance. The sweetness of the strawberry puree enhances the cake’s flavor without overwhelming it, while the butter’s richness helps smooth out the tanginess of the strawberries. Plus, the pink hue of the frosting adds a lovely touch to the presentation.
Additional Tips for Strawberry Buttercream
- Flavor Boost: For an added twist, try incorporating lemon zest for a citrusy note, or use freeze-dried strawberries for an even more concentrated strawberry flavor.
- Perfect Consistency: Keep adjusting the cream and powdered sugar as needed to ensure the frosting is easy to spread or pipe.
Why Choose Strawberry Buttercream?
- Enhanced strawberry flavor: The addition of fresh strawberry puree really intensifies the flavor, making each bite of frosting even more flavorful.
- Perfect for all occasions: Whether spreading or piping, strawberry buttercream works beautifully for any cake decorating style.
- Balanced and creamy: The combination of buttery richness and fresh strawberry sweetness creates an ideal frosting for your moist strawberry cake.
With this delicious strawberry buttercream, your cake is bound to be a hit at any gathering. Whether you’re making it for a special occasion or just because, this frosting will elevate your cake to the next level!
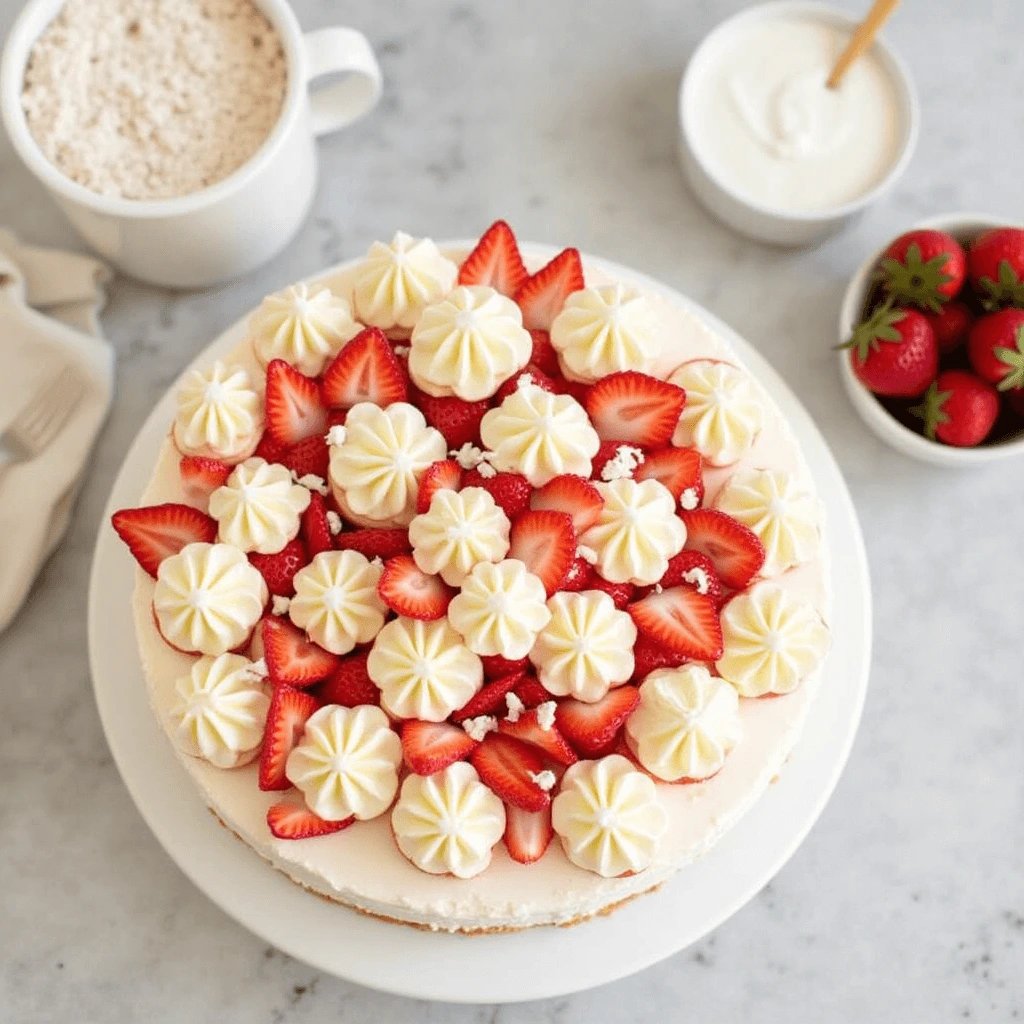
Whipped Cream & Fresh Berries – A Light and Fresh Topping Option
For those who prefer a lighter topping to accompany their strawberry cake, whipped cream paired with fresh berries is a fantastic choice. It provides a refreshing contrast to the rich and moist cake while enhancing the natural flavors of the strawberries. Here’s why this topping works so well and how to make it:
Step 1: Prepare the Whipped Cream
To make the whipped cream, start by chilling your mixing bowl and beaters in the freezer for about 10-15 minutes. This helps the cream whip up faster and achieve a fluffier texture.
- Ingredients:
- 1 cup heavy cream – Chilled.
- 2 tbsp powdered sugar – To sweeten the cream without making it too heavy.
- 1 tsp vanilla extract – For extra flavor.
In a chilled bowl, beat the heavy cream on medium-high speed until it begins to thicken. Gradually add the powdered sugar and vanilla extract, then continue to beat until stiff peaks form. The whipped cream should be airy, soft, and hold its shape.
- Tip: Be careful not to overwhip, as it can turn into butter.
Step 2: Prepare the Fresh Berries
Fresh berries are the perfect topping for strawberry cake. While strawberries are the natural choice, you can also mix in other berries such as blueberries, raspberries, or blackberries for a more colorful and flavorful presentation.
- Tip: Gently rinse the berries and remove any stems. Pat them dry to avoid adding excess moisture to the cake.
Step 3: Assemble the Cake
Once your cake is frosted or served as is, top it with a generous dollop of whipped cream. Arrange the fresh berries on top, either whole or sliced, for a beautiful and refreshing look.
- Tip: For a more elegant finish, you can create a border of whipped cream around the edges of the cake and place the berries in the center.
Why Whipped Cream and Fresh Berries Work So Well
The lightness of the whipped cream contrasts with the dense, rich texture of the strawberry cake, while the fresh berries enhance the cake’s flavor without overwhelming it. The natural sweetness of the berries and the creamy texture of the whipped cream make this topping feel indulgent yet light at the same time.
Additional Tips for a Perfect Topping
- Flavor variations: You can add a splash of lemon zest or a bit of mint extract to the whipped cream to add a refreshing twist.
- Chill the cake: For an extra cool treat, refrigerate the cake for a short time before serving, allowing the whipped cream to set and the berries to stay fresh.
- Serving suggestion: Serve the cake immediately after adding the whipped cream and berries for the best texture and flavor.
Why Choose Whipped Cream and Fresh Berries?
- Light and refreshing: This topping is perfect for those who want a lighter, less sweet alternative to traditional frostings.
- Versatile: You can experiment with different berries and even add some chocolate shavings or crushed nuts for extra texture and flavor.
- Quick and easy: Making whipped cream is a simple and fast process, and fresh berries require no preparation, making this a time-saving option.
This whipped cream and fresh berries topping adds the perfect finishing touch to your strawberry cake. It’s a light, fresh, and delightful option that enhances the cake’s flavors and offers a beautiful presentation.
Pro Tips for the Perfect Strawberry Cake Every Time
Avoid Overmixing the Batter – Keeps the Cake Light and Fluffy
One of the keys to achieving a moist, fluffy strawberry cake is to avoid overmixing the batter. Overmixing can lead to a dense cake that doesn’t rise properly and loses its light, airy texture. Here’s why it matters and how to avoid overmixing:
Why Overmixing is a Problem
When you overmix the cake batter, you cause the gluten in the flour to develop too much. This results in a tougher, denser texture instead of a light and fluffy cake. Overmixing can also introduce excess air into the batter, causing it to collapse during baking, leading to an uneven texture.
How to Avoid Overmixing
- Mix dry and wet ingredients separately:
Before combining the wet and dry ingredients, ensure they’re well mixed in their own bowls. This reduces the amount of mixing needed later. - Add the dry ingredients gradually:
When incorporating the flour mixture into the wet ingredients, add it in increments instead of all at once. This way, you’ll have better control over the mixing process. - Mix until just combined:
Stir the batter gently and only until the flour is just incorporated. You should still see small streaks of flour in the batter, but don’t worry; this is normal. The batter will continue to come together as you finish stirring. - Use a spatula:
For the final mix, use a rubber spatula to gently fold in the flour mixture. This helps keep the batter light and reduces the risk of overmixing.
Tips for a Fluffier Cake
- Use cake flour: Cake flour has a lower protein content than all-purpose flour, which helps create a softer, fluffier texture with less gluten formation.
- Room temperature ingredients: Ensure that your butter, eggs, and milk are at room temperature before mixing. This helps the ingredients combine more evenly and prevents overmixing.
- Don’t rush the process: Take your time when mixing. Mixing too quickly or with too much force can lead to overdeveloped gluten.
The Result of Proper Mixing
When you follow these tips and avoid overmixing, the result will be a moist, light, and fluffy strawberry cake with a tender crumb. The cake will rise beautifully and have a delightful texture that melts in your mouth with every bite.
By practicing these gentle mixing techniques, you’ll ensure that your cake is as light and fluffy as possible—perfect for showcasing the fresh strawberry flavor in your recipe.
Use Room Temperature Ingredients – Helps Everything Blend Smoothly
For the best results when making your strawberry cake, it’s essential to use room temperature ingredients. This simple step can make a significant difference in the final texture and consistency of your cake. Here’s why and how to do it:
Why Room Temperature Ingredients Matter
When ingredients like butter, eggs, and milk are at room temperature, they blend together more smoothly. Cold ingredients can cause the batter to become lumpy, making it harder to mix and leading to an uneven texture. Room temperature ingredients, on the other hand, incorporate more easily, resulting in a smooth batter that will bake evenly and rise beautifully.
- Butter: Cold butter doesn’t blend well with sugar, causing the mixture to look clumpy instead of creamy. Room temperature butter is soft and easy to beat with sugar, which helps incorporate air into the batter, creating a light and fluffy cake.
- Eggs: Cold eggs can cause the batter to curdle when mixed with other ingredients. Room temperature eggs mix smoothly with other ingredients, helping create a consistent, well-blended batter.
- Milk: Cold milk can cause the fat in the batter to seize up, creating a lumpy texture. Warm milk (but not too hot!) allows for a smoother batter consistency.
How to Bring Ingredients to Room Temperature
- Butter: Take the butter out of the fridge about 30 minutes to 1 hour before starting your recipe. If you’re in a rush, you can cut the butter into smaller pieces to help it soften faster.
- Eggs: To bring eggs to room temperature quickly, place them in a bowl of warm water for about 5-10 minutes. This will warm them up without cooking them.
- Milk: Let the milk sit out for about 15-20 minutes before using. If you’re in a hurry, microwave the milk in 10-second intervals, stirring in between, until it’s just slightly warm.
The Benefits of Using Room Temperature Ingredients
- Smoother batter: The ingredients will blend seamlessly without clumps, making for a more uniform batter.
- Better texture: Room temperature ingredients help create a light, airy, and tender cake with a perfect crumb.
- Even mixing: Using room temperature ingredients makes it easier to incorporate air into the batter, leading to a fluffier cake once baked.
The End Result
Using room temperature ingredients ensures that the strawberry cake batter mixes smoothly, giving you the perfect texture and consistency. The final result will be a fluffy, light cake with a perfectly even crumb and a beautiful rise.
Taking this extra step may seem small, but it plays a big role in creating a moist, tender, and flavorful cake.
Let the Cake Cool Before Frosting – Prevents Melting and Sliding
One of the most important steps in making a perfect strawberry cake is allowing it to cool completely before frosting. It might be tempting to slather frosting on a warm cake, but doing so can lead to several issues that affect both the appearance and texture of your cake. Here’s why cooling the cake before frosting is crucial:
Why Cooling is Essential
- Prevents Melting Frosting: When you apply frosting to a warm cake, the heat from the cake can cause the frosting to melt, resulting in a sloppy, uneven layer. This can cause the frosting to slide off or pool around the edges of the cake. By waiting for the cake to cool, you ensure the frosting holds its shape and stays in place.
- Avoids a Soggy Cake: A warm cake releases steam, which can make the frosting soggy and prevent it from setting properly. Allowing the cake to cool ensures that the frosting adheres correctly and maintains its texture.
- Improves the Overall Look: When a cake cools, it firms up slightly, making it easier to frost. The frosting will go on smoother and more evenly, giving your strawberry cake a clean, polished appearance.
How to Cool the Cake Properly
- Remove the Cake from the Pan: Once the cake is baked, let it rest in the pan for about 10-15 minutes. After that, carefully transfer the cake to a cooling rack to allow air to circulate around it. This helps it cool evenly and prevents moisture buildup at the bottom.
- Cool Completely: Let the cake cool at room temperature for at least 1 hour. You want the cake to be completely cool to the touch, as frosting a still-warm cake can compromise both the frosting and texture.
- Don’t Rush: Avoid the temptation to speed up the cooling process by placing the cake in the fridge or freezer. This can cause the cake to contract or dry out. Instead, be patient and let it cool naturally.
Why It’s Worth the Wait
- Neater frosting application: Once the cake is cool, the frosting will spread evenly without melting, creating a smooth, beautiful finish.
- Better texture: The cake will be less fragile and easier to handle, reducing the risk of tearing or crumbling when you apply the frosting.
- Preventing the cake from sliding: By allowing the cake to cool, the structure firms up, making it easier to cut, frost, and serve without pieces of the cake slipping or falling apart.
The Final Result
When you let your cake cool completely before frosting, you’ll achieve a clean, perfect finish. Your strawberry cake will look professionally made, with frosting that stays in place and enhances the cake’s natural beauty. This small step ensures that your cake will not only taste amazing but also look stunning at any celebration or gathering.
Store Properly for Freshness – Best Ways to Keep Leftovers Moist
Properly storing your strawberry cake is crucial for keeping it fresh and moist. If not stored correctly, leftover cake can quickly become dry and lose its delicious texture. Here are some tips on how to store your strawberry cake to maintain its moist, fluffy texture and prevent it from drying out:
1. Let the Cake Cool Completely
Before storing the cake, make sure it is completely cooled. Storing warm cake can trap moisture and create condensation, which can affect the texture and lead to sogginess. Allow the cake to cool at room temperature for at least 1 hour before wrapping or storing.
2. Wrap in Plastic Wrap or Foil
Once the cake has cooled, wrap it tightly in plastic wrap or aluminum foil to keep it from drying out. This helps seal in the moisture and prevents the cake from absorbing any odors from other foods in the fridge or pantry. If the cake is frosted, carefully cover the frosting with plastic wrap to avoid smearing.
3. Store in an Airtight Container
For added protection, you can place the wrapped cake in an airtight container. This will further help retain moisture and keep the cake fresh for longer. Make sure the container is large enough so the cake isn’t squished.
4. Refrigerate if Necessary
If your cake is topped with a perishable frosting like cream cheese or buttercream, it’s best to store the cake in the refrigerator. However, keep in mind that refrigerating the cake can cause the cake to dry out over time. To prevent this, ensure it is tightly wrapped and kept in an airtight container. When ready to serve, let it sit at room temperature for a bit to soften and regain its moist texture.
5. Freezing Leftover Cake
If you don’t plan to eat all the cake within a few days, you can freeze it for later. To freeze your strawberry cake:
- Slice the cake into individual portions if you want to take out only a piece at a time.
- Wrap each piece tightly in plastic wrap and then foil to prevent freezer burn.
- Store the wrapped pieces in a freezer-safe bag or container. When ready to enjoy, allow the cake to thaw in the fridge overnight, and then bring it to room temperature before serving.
6. Avoid Storing on the Counter for Too Long
While storing your strawberry cake on the counter can be fine for a day or two, it’s best to store it in the fridge or freezer for longer freshness. Storing it at room temperature for extended periods can cause it to dry out, especially if the cake is cut and exposed to air.
For expert tips and additional baking techniques, check out this guide on creating the perfect cake texture from a trusted baking site.
The Final Result
By following these storage tips, your strawberry cake will stay moist, fresh, and flavorful for several days. Proper storage ensures that every slice remains as delicious as the first, and your cake can be enjoyed over time without sacrificing its texture. Whether you’re saving some for later or sharing with friends and family, proper storage is key to preserving your cake’s wonderful taste and moistness.
Conclusion
In conclusion, making the perfect strawberry cake is all about using fresh ingredients, following key baking techniques, and allowing the cake to cool properly before frosting. By using real strawberries, cake flour, buttermilk, and room temperature ingredients, you can create a moist, fluffy cake that’s sure to impress. Properly storing your cake will also ensure it stays fresh and delicious for days to come.
We encourage you to try this recipe for yourself and experience how simple steps can lead to a beautiful, flavorful cake. Once you’ve baked your strawberry cake, don’t forget to share your results with us! We’d love to see how your creation turned out.
If you’re looking for more cake inspiration, be sure to explore our other cake recipes on the blog. There’s always a new recipe waiting to be discovered, whether you’re baking for a special occasion or just treating yourself to a delicious dessert. Happy baking!