
Biting into a perfectly chewy, golden-brown bagel made with sourdough is a true delight. Homemade sourdough bagels offer unmatched taste, texture, and freshness, far better than store-bought options. The natural fermentation process with a sourdough starter deepens the flavor and improves digestibility.
This recipe guides both seasoned bakers and beginners through every step. You will mix, shape, boil, and bake your way to bakery-quality bagels. Each step ensures you achieve the perfect chewiness and glossy crust.
By the end, you will love having a new breakfast favorite and the joy of crafting bagels from scratch. Grab your sourdough starter, and let’s begin!
Why Sourdough Bagels Are Worth the Effort
Unmatched Flavor from Fermentation
One of the best things about sourdough bagels is the deep, complex flavor created during fermentation. Unlike bagels made with commercial yeast, sourdough bagels use a sourdough starter. This starter is a living mix of wild yeast and lactic acid bacteria. It gives sourdough bagels their tangy and rich flavor.
During fermentation, the starter interacts with the flour and water. It breaks down starches and releases flavorful compounds. Wild yeast adds mild, earthy sweetness. Meanwhile, the lactic acid bacteria create tangy notes that balance the flavors. Together, they produce bagels with a unique depth commercial yeast cannot match.
Extended fermentation further enhances these flavors. Over time, natural enzymes in the starter unlock nutty, malty, and savory undertones. This slow process also makes the bagels more aromatic.
Fermentation also improves the texture of sourdough bagels. The natural acids tighten the gluten structure, creating a chewy and dense result. This texture is ideal for toasting or enjoying fresh.
When you bite into a sourdough bagel, you taste the magic of fermentation. It’s a breakfast treat elevated by time and tradition.
Health Benefits of Using Sourdough Starter
Using a sourdough starter in your bagels offers more than just superior flavor; it also brings several health benefits. One of the most significant advantages is its effect on digestion. The natural fermentation process in sourdough breaks down phytic acid, which is present in whole grains. Phytic acid can inhibit the absorption of important minerals, but fermentation reduces its impact, making minerals like magnesium, zinc, and iron more bioavailable.
Sourdough fermentation also helps predigest some of the starches in the dough, which can make it easier on the digestive system. This process results in a lower glycemic index compared to bagels made with commercial yeast, meaning they have a smaller impact on blood sugar levels. As a result, sourdough bagels can be a better option for those managing blood sugar or insulin sensitivity.
Additionally, the wild yeast and lactic acid bacteria in the sourdough starter produce beneficial probiotics. These probiotics, while not present in large amounts after baking, can help improve gut health and support the immune system. The longer fermentation time, typical of sourdough, also contributes to a reduction in gluten, making the bagels more tolerable for some individuals with mild gluten sensitivity.
By using a sourdough starter, you’re not only creating a delicious bagel but also consuming a naturally fermented product that supports digestive health and overall well-being.
A Homemade Touch to Your Breakfast Table
Making sourdough bagels at home brings a delightful, personalized touch to your breakfast routine. Not only do you get to enjoy the fresh, comforting aroma of bagels baking in your kitchen, but you also benefit from cost savings and endless customization options.
Cost-Saving Benefits
Buying fresh, high-quality bagels from bakeries or grocery stores can add up quickly, especially if you’re a regular bagel eater. By making sourdough bagels at home, you can significantly reduce this cost. Ingredients like flour, water, and sourdough starter are affordable and yield multiple batches. Unlike store-bought options, which often come in packages of just a few bagels, homemade sourdough bagels allow you to bake a dozen or more at a time. This bulk baking saves money in the long run and ensures you always have a batch of fresh bagels ready to enjoy.
Customizable Flavor Options
Another huge benefit of homemade sourdough bagels is the ability to customize the flavors to your liking. While traditional bagels like plain, sesame, or poppy seed are delicious, you can get creative with endless variations. You can mix in your favorite ingredients such as garlic, onion, cheddar, or even dried fruits like raisins and cranberries. For an extra twist, try adding spices such as cinnamon, nutmeg, or cardamom for a warm, aromatic flavor.
You can also experiment with different toppings to add variety. From savory options like everything bagel seasoning or salt and pepper to sweet ones like honey or a smear of almond butter, the possibilities are only limited by your imagination. Want a savory bagel with sun-dried tomatoes and herbs? Or a sweet version with chocolate chips and cinnamon sugar? The choice is yours, and the beauty of homemade bagels is that you can tailor each batch to suit your taste preferences and dietary needs.
Healthier Options and Dietary Flexibility
Making bagels at home also allows you to adapt the recipe to meet specific dietary needs. You can experiment with different types of flour, such as whole wheat or gluten-free flour, to create healthier or gluten-free alternatives. If you’re watching your sugar intake, you can reduce the amount of sugar in the recipe or avoid it altogether, while still maintaining a delicious, chewy texture.
By adding your own flavors and adjusting the ingredients, you can control the quality of the food you’re eating, creating a bagel that perfectly matches your preferences, all while keeping it healthier and more affordable.
In essence, baking sourdough bagels at home gives you the freedom to infuse your personality and creativity into your meals, making your breakfast table both unique and satisfying.
Essential Ingredients and Tools for Sourdough Bagels
Key Ingredients You’ll Need
Making sourdough bagels requires just a handful of simple ingredients, but each one plays a critical role in achieving the perfect texture and flavor. Here are the key ingredients you’ll need for your sourdough bagels:
1. Sourdough Starter
The foundation of any sourdough-based recipe is the starter. This mixture of wild yeast and lactic acid bacteria brings a unique depth of flavor to the bagels. The starter also aids in fermentation, contributing to the chewy texture and tangy taste that sourdough bagels are known for. If you don’t have a starter on hand, you can either make one at home or purchase a ready-made version from specialty stores.
2. Bread Flour
Bread flour is a must when making sourdough bagels. It contains a higher protein content compared to all-purpose flour, which helps develop the gluten network needed for that chewy, dense texture that bagels are famous for. Using bread flour ensures your bagels have the right structure and strength to hold up to boiling and baking without losing their shape.
3. Water
Water is essential for hydrating the dough and activating the sourdough starter. The quality of the water can also impact the dough’s behavior, so using filtered or well-water is recommended to avoid any off flavors from chlorine or minerals. The right water-to-flour ratio helps create the dough’s consistency—firm enough to shape but soft enough to knead.
4. Salt
Salt is a key ingredient in sourdough bagels, as it enhances the flavor and controls yeast activity. It also tightens the gluten structure, improving the texture of the dough. While salt is not the star ingredient, it’s crucial for balancing the bagel’s taste and ensuring the dough rises at the right rate.
5. Honey or Barley Malt Syrup
A small amount of honey or barley malt syrup adds a touch of sweetness and helps with browning. Honey gives the bagels a mild, floral sweetness, while barley malt syrup adds a deeper, malty flavor that is characteristic of traditional bagels. These sweeteners also support the fermentation process, providing food for the yeast to grow and develop the dough.
Each of these ingredients contributes to creating the perfect sourdough bagel—chewy, flavorful, and satisfying. With these basics, you’re on your way to baking delicious, homemade sourdough bagels right at home!
Must-Have Kitchen Tools
To make the process of baking sourdough bagels easier and more efficient, you’ll need a few key kitchen tools. These tools ensure that your dough is mixed properly, your bagels maintain their shape during boiling and baking, and your cleanup is simple. Here’s a list of must-have tools for making your perfect batch of sourdough bagels:
1. Stand Mixer
A stand mixer, like a KitchenAid or other reliable brand, is an invaluable tool for mixing and kneading the dough. While you can mix and knead by hand, a stand mixer speeds up the process and provides consistent results. The dough hook attachment is perfect for developing the gluten structure needed for a chewy, dense bagel. It takes the hard work out of kneading, leaving you with smooth, elastic dough that’s ready for shaping.
2. Baking Sheet
A sturdy baking sheet is essential for holding your bagels as they bake. Opt for a large, flat sheet with a non-stick surface to ensure the bagels don’t stick during baking. If you want to get extra creative, you can use a perforated baking sheet, which allows better airflow around the bagels and helps them achieve a crispier crust. Line your baking sheet with parchment paper or a silicone baking mat to make cleanup even easier.
3. Parchment Paper
Parchment paper is a versatile tool that prevents your sourdough bagels from sticking to the baking surface, ensuring they come out easily once baked. It also promotes even browning and helps with cleanup since it absorbs excess moisture. You can cut parchment paper into individual squares for each bagel or line the entire baking sheet. This simple tool is a game-changer for achieving a crisp and golden crust without worrying about sticky dough.
4. Large Pot for Boiling
Boiling your bagels before baking is key to achieving that signature chewy texture. For this step, you’ll need a large pot that can comfortably hold several bagels at once without overcrowding. A deep pot ensures the bagels have enough space to float and cook evenly. Add a tablespoon or two of honey or barley malt syrup to the water to help with browning and flavor. Boiling is a crucial step in the process, and a large pot will make it much easier.
With these essential kitchen tools, you’ll be able to efficiently make sourdough bagels that rival those from your favorite bakery. Each tool serves an important purpose, ensuring that every step of the process—from mixing and kneading to boiling and baking—goes smoothly.
Why Proofing and Boiling Are Critical
Proofing and boiling are two essential steps in making sourdough bagels, and they play a significant role in developing the bagel’s signature chewy texture and shiny, golden crust. These steps are what separate homemade sourdough bagels from regular bread and make them uniquely delicious.
Proofing: Developing the Right Texture
Proofing, also known as the final rise, is the process of allowing the shaped bagel dough to rest and rise before boiling and baking. This stage is crucial because it allows the yeast and bacteria in the sourdough starter to continue working their magic, helping the dough become light and airy without compromising the dense, chewy texture typical of bagels.
During proofing, the dough expands as yeast ferments the sugars in the flour. This fermentation produces carbon dioxide gas, which forms bubbles within the dough. These bubbles are what give the bagel its characteristic texture. However, unlike typical bread, bagels require a denser dough to maintain that chewiness. Proofing gives the dough just enough time to relax and expand slightly, ensuring the bagels have a firm yet tender bite after baking.
If the dough is under-proofed, the bagels may turn out dense and overly tough. If over-proofed, they could become too airy and lose that desirable chewiness. Timing is key during this phase.
Boiling: Achieving the Perfect Crust
Boiling is perhaps the most important step in making bagels, as it is what creates that perfect, shiny, and slightly crispy crust. When the bagels are dropped into boiling water, the heat causes the dough’s starches to gelatinize. This process forms a protective barrier around the bagel, sealing in moisture and creating a smooth, shiny surface. The longer the bagels are boiled, the thicker and shinier the crust becomes.
Boiling also impacts the texture. As the bagels cook in the water, the outer layers firm up, while the inside remains soft and chewy. This gives the bagels their distinctive bite. If you skip the boiling step, your bagels will likely have a bread-like texture with a less defined crust, which is not the signature characteristic of traditional bagels.
Additionally, the water used for boiling can impact the flavor and texture of the crust. Adding honey or barley malt syrup to the water helps the bagels develop a richer golden color and a slightly sweet flavor, which balances the tang of the sourdough starter. This small addition also contributes to a more glossy, appealing finish.
Balancing Proofing and Boiling
Both proofing and boiling are critical to getting the perfect bagel. Proofing ensures that the dough has the right texture and structure for a chewy interior, while boiling creates the shiny, crispy exterior that completes the bagel. Together, these steps create a bagel that is soft and pillowy on the inside, with a satisfying crunch on the outside.
Taking the time to carefully proof and boil your sourdough bagels results in a product that’s both visually appealing and deliciously satisfying.
Step-by-Step Guide to Making Perfect Sourdough Bagels
Preparing the Dough
The process of preparing the dough is one of the most crucial stages in making sourdough bagels. Mixing the ingredients and kneading the dough to develop the gluten will ensure that your bagels have the desired chewy texture and structure. Here’s a deeper dive into how you can get the perfect dough for your bagels.
1. Mixing the Ingredients
The first step in preparing the dough is to combine your key ingredients: sourdough starter, bread flour, water, salt, and honey or barley malt syrup. Start by adding the dry ingredients into your mixing bowl, and then gradually pour in the wet ingredients.
The sourdough starter is essential because it contains wild yeast and beneficial bacteria that help leaven the dough. These microorganisms work together to ferment the dough and give the bagels their distinct flavor. Mixing the ingredients ensures that the yeast is evenly distributed throughout the dough, setting the stage for even fermentation.
Once the ingredients are added, mix everything together until it forms a rough dough. You can use a stand mixer with a dough hook for this step, or mix by hand with a wooden spoon if you prefer a more hands-on approach. The goal is to make sure all the ingredients are incorporated, without over-mixing at this stage.
2. Kneading to Develop Gluten
Once the ingredients are mixed, the next crucial step is kneading. Kneading is what transforms the mixture of flour and water into a smooth, elastic dough. This process is essential for developing gluten, which is responsible for the bagel’s chewy texture. Gluten is a protein that forms when flour is combined with water and worked through the dough.
Kneading the dough helps the gluten strands align and strengthen, giving the dough its structure and elasticity. The longer you knead the dough, the stronger the gluten network will become. For sourdough bagels, you want a dough that’s firm but not too stiff. Too little kneading can result in bagels that are too dense, while over-kneading can cause them to become too tough.
To knead by hand, turn the dough out onto a clean surface and use the heels of your hands to push the dough away from you. Fold it back in half, give it another push, and repeat. Knead for about 8-10 minutes until the dough becomes smooth and elastic. If using a stand mixer, set it on a low speed with the dough hook attachment and knead for around 5-7 minutes.
3. Test the Dough’s Consistency
A great way to test if the dough has been kneaded enough is the “windowpane test.” To perform this, take a small piece of dough and stretch it between your fingers. If the dough stretches thin enough to form a translucent “windowpane” without tearing, it has developed enough gluten. If the dough tears easily, continue kneading for a few more minutes until the dough is smooth and elastic.
At this point, your dough should feel soft, slightly tacky to the touch, but not overly sticky. It should hold its shape and not flop over. If the dough is too sticky, add a little more flour, but be careful not to add too much, as it can make the dough too dry.
4. Resting the Dough
Once the dough is properly kneaded, it’s time to let it rest. Allow the dough to rise in a warm, draft-free place for about 1-2 hours or until it has doubled in size. During this rise, the yeast will work to ferment the dough, producing carbon dioxide that makes the dough expand. This fermentation is what gives sourdough bagels their light, airy texture, while the kneading ensures that the dough retains its structure.
After the dough has rested and doubled in size, you’re ready to move on to shaping your bagels. Proper kneading is essential for getting the right texture and ensuring that the dough has the strength to hold its shape during boiling and baking.
Conclusion
The preparation of the dough is the backbone of great sourdough bagels. By carefully mixing the ingredients and kneading the dough to develop gluten, you ensure that the bagels will have that perfect chewy texture. This step, along with proper proofing and boiling, sets the stage for a batch of bagels that’s crispy on the outside, soft and chewy on the inside, and full of delicious sourdough flavor.
Shaping and Proofing the Bagels
Shaping and proofing are vital steps in making sourdough bagels. The way you shape your dough affects the final texture and appearance of your bagels, while proper proofing ensures they rise to their full potential. Here’s a detailed look at these two crucial steps:
1. Shaping the Bagels
Shaping the bagels correctly is key to getting that classic round shape with a perfectly centered hole. There are a couple of techniques you can use, depending on your preference and comfort level. Here’s how to shape your dough:
- Divide the Dough: Once your dough has rested and doubled in size, turn it out onto a lightly floured surface and divide it into equal portions. For standard-sized bagels, aim for portions of about 4-5 ounces (roughly the size of a small apple). You can adjust the size depending on your preference.
- Forming the Balls: Roll each piece of dough into a tight ball. The goal is to create a smooth surface and an even distribution of air pockets inside the dough. You can do this by cupping your hands around the dough and rolling it in a circular motion against the counter.
- Creating the Hole: To shape the bagel, take your dough ball and use your fingers to create a hole in the center. Insert your thumb into the middle and slowly stretch the dough outward, rotating it as you go. Be careful not to rip the dough. The hole should be wide enough to prevent it from closing during baking, but don’t make it too large, as it may distort the shape when boiled.
Alternatively, some bakers prefer the “rope” method. In this technique, you roll the dough into a long rope and then overlap the ends to form a circle, pinching the ends together. This method creates a more uniform ring, but both methods will yield great results.
2. Tips for an Even Rise
Proper proofing ensures your bagels will rise evenly, which contributes to their texture and appearance. Here’s how to ensure that your bagels proof correctly:
- Rest in a Warm Place: After shaping your bagels, it’s time for them to proof, or rise, again. Cover them with a damp kitchen towel or plastic wrap and place them in a warm, draft-free area. Ideal proofing temperatures range from 75°F to 80°F (24°C to 27°C). This allows the yeast in the sourdough starter to ferment and continue the rise.
- Proofing Duration: Let the bagels proof for about 45 minutes to an hour. They should puff up and feel slightly airy, but not double in size like during the first rise. The dough should still be firm enough to maintain its shape. If your bagels are over-proofed, they may spread out too much when boiled, resulting in a less desirable texture.
- Avoid Overcrowding: If you’re proofing multiple bagels at once, be sure to give each one enough space. They should be able to rise without touching each other. If necessary, use multiple trays or proofing containers to allow for an even rise.
- The Finger Test: To test if your bagels are proofed properly, you can do the “finger test.” Gently press your finger into one of the bagels. If the indentation remains and doesn’t bounce back, it’s ready to be boiled. If it springs back, give the dough a bit more time to proof.
3. Preparing for Boiling
Once the bagels have proofed, they’re ready to be boiled. It’s important that they’ve proofed enough to maintain their structure while floating in the water. If they haven’t risen enough, the bagels will be dense, and the boiling water will deflate them. Conversely, over-proofed bagels may lose their shape, leading to flat, uneven bagels.
Before boiling, preheat your oven to the desired temperature (usually around 425°F or 220°C) so it’s ready for the bagels after their quick dip in the water. You can also prepare a baking sheet lined with parchment paper or a silicone mat for easy transfer once the bagels are boiled.
Conclusion
Shaping and proofing your sourdough bagels correctly is essential to achieving the perfect texture and appearance. By carefully shaping the dough and allowing it to rise in a warm place, you ensure the bagels hold their structure while retaining the chewy interior and shiny, crispy crust. With these techniques, your bagels will rise beautifully and bake to perfection.
Boiling and Baking the Bagels
Boiling and baking are the final steps in making sourdough bagels that give them their signature chewy texture and golden, shiny crust. The way you handle these steps directly impacts the final result, so understanding the process is key to getting your bagels perfect every time.
1. Boiling the Bagels
Boiling the bagels before baking is what gives them their dense and chewy interior, as well as the glossy finish on the outside. Here’s how to get the perfect boil:
The Water Bath:
To boil your bagels, you’ll need a large pot of water. Add about 2-3 inches of water to the pot, and bring it to a gentle boil. The water should be simmering, not violently boiling. If the water is too hot, the bagels can become too puffy, losing their classic chewy texture. If it’s not hot enough, the bagels may not achieve the right density.
Adding Sweeteners:
To give your bagels that iconic glossy sheen and subtle flavor, you can add honey or barley malt syrup to the boiling water. Both of these ingredients enhance the caramelization process, which contributes to the rich golden color on the crust. Barley malt syrup is the traditional choice for bagels, as it adds a slightly malty, sweet flavor. Honey, on the other hand, provides a more delicate sweetness and promotes a soft, slightly sweet crust.
For every gallon of water, add about 1-2 tablespoons of honey or barley malt syrup. Stir the mixture to ensure it’s well-dissolved. If you prefer a slightly more complex flavor, you can also experiment with adding a small amount of baking soda to the water. This will slightly alkalize the water, enhancing the crust’s texture, though it’s not strictly necessary.
Boiling the Bagels:
Once your water bath is ready, gently lower each shaped bagel into the water. Use a slotted spoon or spider strainer for easy handling. Boil the bagels in batches, ensuring that each one has enough room to float freely. Let each bagel boil for about 1-2 minutes on each side. This brief boil allows the dough to firm up, creating a strong structure that holds the shape during baking.
The bagels will puff up slightly as they cook, but they should not double in size. You can test the texture by gently pressing the boiled bagel; it should feel firm but still soft.
2. Baking the Bagels
Once your bagels have been boiled and drained, it’s time to bake them to perfection. Baking is where the magic happens: the heat transforms the bagels into the golden, chewy, and delicious treats you’ve been waiting for.
Preheating the Oven:
Preheat your oven to 425°F (220°C), ensuring it’s fully heated before you place your bagels inside. This ensures the bagels bake evenly, getting the perfect balance between a crispy crust and a soft interior. If you have a baking stone, now is the time to use it. A baking stone helps distribute heat evenly, ensuring your bagels cook properly. If you don’t have one, a baking sheet will work just fine.
Placing on the Baking Sheet:
Place your boiled bagels onto a baking sheet lined with parchment paper or a silicone baking mat. Make sure the bagels are spaced evenly, leaving enough room between each one so they don’t stick together during baking.
Optional Toppings:
Before baking, this is also the time to add any toppings you’d like to your bagels. Classic choices include sesame seeds, poppy seeds, or everything bagel seasoning, which is a mix of sesame, poppy, garlic, and onion. To ensure the toppings stick, you can brush the tops of the bagels lightly with water before sprinkling them on.
Baking Time and Temperature:
Bake the bagels for about 20-25 minutes, or until the tops are golden brown and the bagels are firm to the touch. The exact baking time may vary depending on the size of your bagels and the specifics of your oven, so be sure to keep an eye on them as they bake. The bagels will continue to firm up as they cool.
If you prefer an extra crispy crust, you can increase the temperature to 450°F (230°C) for the last 5 minutes of baking, but be sure to watch carefully to prevent burning.
Cooling the Bagels:
Once baked, remove the bagels from the oven and allow them to cool on a wire rack. This will help prevent the bottoms from becoming soggy and allow the bagels to firm up. Cooling also allows the flavor to set, giving you the perfect balance of chewy interior and crispy exterior.
3. Achieving the Best Results
To achieve the best bagels possible, there are a few additional tips to consider:
- Don’t Skip the Boil: Boiling is essential for that chewy texture. Skipping or reducing the boiling time will result in bagels that are too soft and won’t have the signature chewy bite.
- Watch Your Oven: Every oven is different, so keep a close eye on the bagels while they bake. They can go from golden to overdone in a short amount of time.
- Use a Pizza Stone for Crispness: If you want the bagels to have an extra crispy bottom, consider baking them on a pizza stone. It helps achieve a consistent, crisp bake that’s especially good for bagels.
Conclusion
Boiling and baking are the final steps that give your sourdough bagels their signature texture and flavor. By properly boiling with honey or barley malt syrup, and baking at the right temperature, you create a chewy interior and golden, crispy crust that’s truly irresistible. With these steps in mind, your homemade sourdough bagels will be nothing short of perfect.
Tips and Tricks for Perfect Bagels Every Time
Mastering the Fermentation Process
Fermentation is the heart of sourdough bagels. It’s the process where the dough rises, flavors develop, and the texture becomes just right. Understanding how long to ferment the dough and under what conditions is crucial for creating bagels with deep, complex flavors and the perfect chewy texture. Here’s how to master the fermentation process to get the best possible results.
1. The Role of Fermentation in Sourdough Bagels
Fermentation is the magical process where wild yeast and bacteria work together to break down sugars in the dough, releasing carbon dioxide gas. This gas causes the dough to rise and expand. However, fermentation is not just about making the dough rise; it also helps develop the unique flavors associated with sourdough bagels. During fermentation, organic acids are produced, contributing to the tangy and slightly sour taste that sets sourdough bagels apart from traditional yeasted bagels.
Fermentation also helps develop the gluten structure in the dough. The longer the dough ferments, the more time the gluten strands have to strengthen, which is essential for the bagels’ chewy texture. It’s important to find the right balance in fermentation time—too little fermentation can result in flat, underdeveloped bagels, while too much fermentation can cause over-proofing, leading to bagels that lose their shape and texture.
2. Primary vs. Secondary Fermentation
The fermentation process for sourdough bagels occurs in two stages: primary fermentation (bulk fermentation) and secondary fermentation (proofing). Both stages are essential for developing the proper texture and flavor.
Primary Fermentation (Bulk Fermentation):
This is the first fermentation phase where the dough rises after mixing. During bulk fermentation, the dough should be allowed to ferment at room temperature for an extended period—usually 4 to 6 hours, or even longer if you prefer a more tangy flavor. The key to a successful bulk fermentation is slow, gradual development. This gives the yeast and bacteria time to work their magic.
A longer bulk fermentation at a lower temperature allows for more complex flavors and a chewier texture. Some bakers even allow the dough to ferment overnight in the refrigerator to further enhance the sourness and flavor complexity. The cold fermentation slows down the yeast activity while still allowing the bacteria to continue developing the flavor.
Secondary Fermentation (Proofing):
After the dough has been shaped into bagels, it undergoes secondary fermentation or proofing. This stage allows the dough to rise one more time before being boiled and baked. The proofing process typically lasts between 45 minutes and 1 hour at room temperature, though it may vary depending on the dough and environmental conditions.
It’s crucial to avoid over-proofing at this stage, as bagels that are proofed too long may lose their shape during boiling and baking. On the other hand, under-proofed bagels may result in dense and heavy bagels that lack the light, airy interior you want. A simple finger test—gently pressing the dough to see if it springs back—can help determine if the bagels are ready for the boil.
3. The Ideal Fermentation Time for Maximum Flavor
The fermentation time can vary based on your personal preferences and the temperature of your environment. Here’s a guide to help you master the timing for the perfect flavor and texture:
- Room Temperature Fermentation: At room temperature (around 70°F or 21°C), bulk fermentation will take about 4-6 hours. If you are using a higher hydration dough, it might take longer. This is the time when the dough becomes more active, and the flavor begins to develop. You’ll notice the dough will expand and bubble, signaling that the yeast is doing its job.
- Cold Fermentation: For a deeper, more tangy flavor, consider fermenting the dough in the refrigerator overnight (12-24 hours). This slow fermentation allows for the production of more lactic and acetic acids, which result in the characteristic sourdough flavor. Cold fermentation also helps with the dough’s structure, making the bagels chewier. If you use cold fermentation, be sure to bring the dough back to room temperature for about 30 minutes before shaping and proofing.
- Fermentation in a Warm Place: If you’re short on time, you can speed up the fermentation process by placing the dough in a warmer spot (around 80-85°F or 27-29°C). The warmer temperature accelerates the fermentation process, but it may also impact the flavor profile. While the dough will rise more quickly, the sourdough tang might not develop as fully. This method can be helpful when you’re making bagels in a pinch but still want to maintain a good rise and texture.
4. Signs of Well-Fermented Dough
To ensure your dough has fermented properly, there are a few indicators to look for:
- Increased Volume: The dough should double in size during the bulk fermentation process. If it hasn’t expanded sufficiently, it needs more time to ferment.
- Bubbles: You should see small bubbles throughout the dough when you stretch it gently. This is a sign that the yeast is actively working, and the dough is well-fermented.
- Smooth and Slightly Sticky: Well-fermented dough should feel smooth, with a slightly tacky texture when you handle it. It shouldn’t be overly sticky or dry.
- Slightly Tangy Aroma: A properly fermented dough will have a pleasant, slightly sour smell. This is a sign that the natural bacteria in your sourdough starter are doing their job.
5. Troubleshooting Fermentation Issues
While fermentation is a relatively simple process, a few common issues can arise. Here are some ways to troubleshoot:
- Dough Not Rising: If your dough isn’t rising properly during bulk fermentation, check the temperature of your environment. It may be too cold, which slows down the fermentation process. A warm, draft-free area will help. Alternatively, your sourdough starter might need more time to activate. Make sure your starter is healthy and bubbly before using it.
- Over-Fermentation: If your dough rises too quickly or is left too long at room temperature, it can become over-fermented. This results in a dough that’s too loose and sticky, and it may not hold its shape during boiling or baking. If this happens, reduce the fermentation time and consider using a colder fermentation method in the future to slow things down.
Conclusion
Mastering the fermentation process is essential for creating sourdough bagels that are flavorful, chewy, and full of character. By controlling fermentation time and temperature, you can influence the texture and tang of your bagels, allowing for a customized flavor profile that suits your preferences. Whether you prefer a longer cold fermentation for a more complex taste or a quicker room temperature rise for a lighter flavor, understanding the balance of fermentation is key to crafting the perfect sourdough bagels.
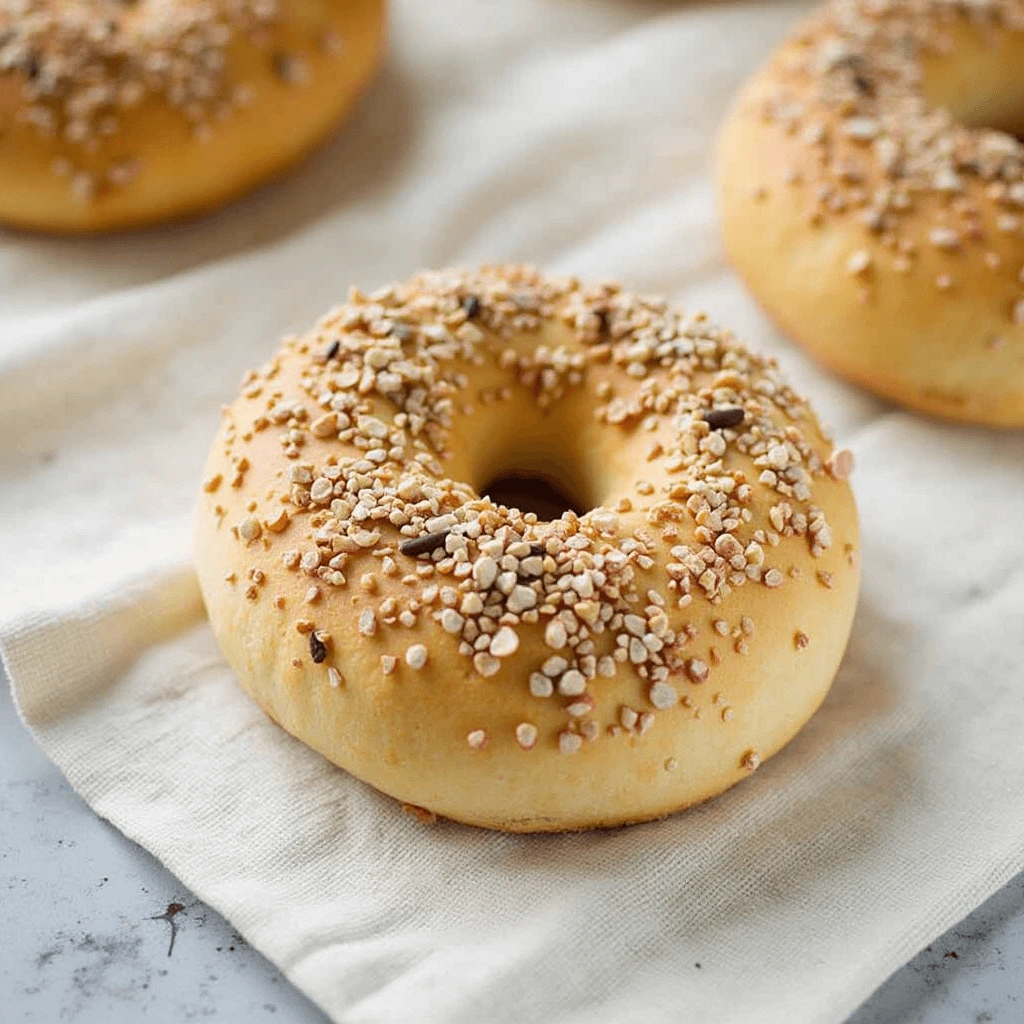
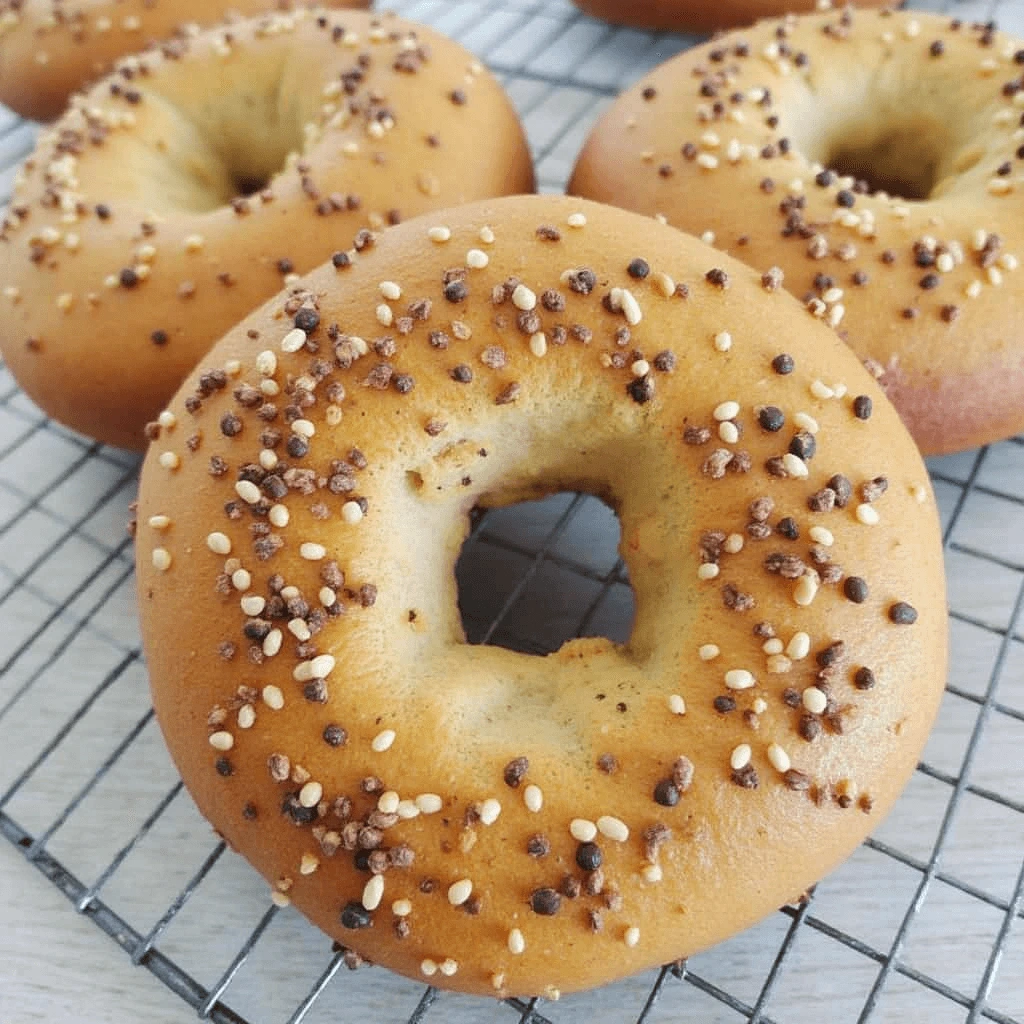
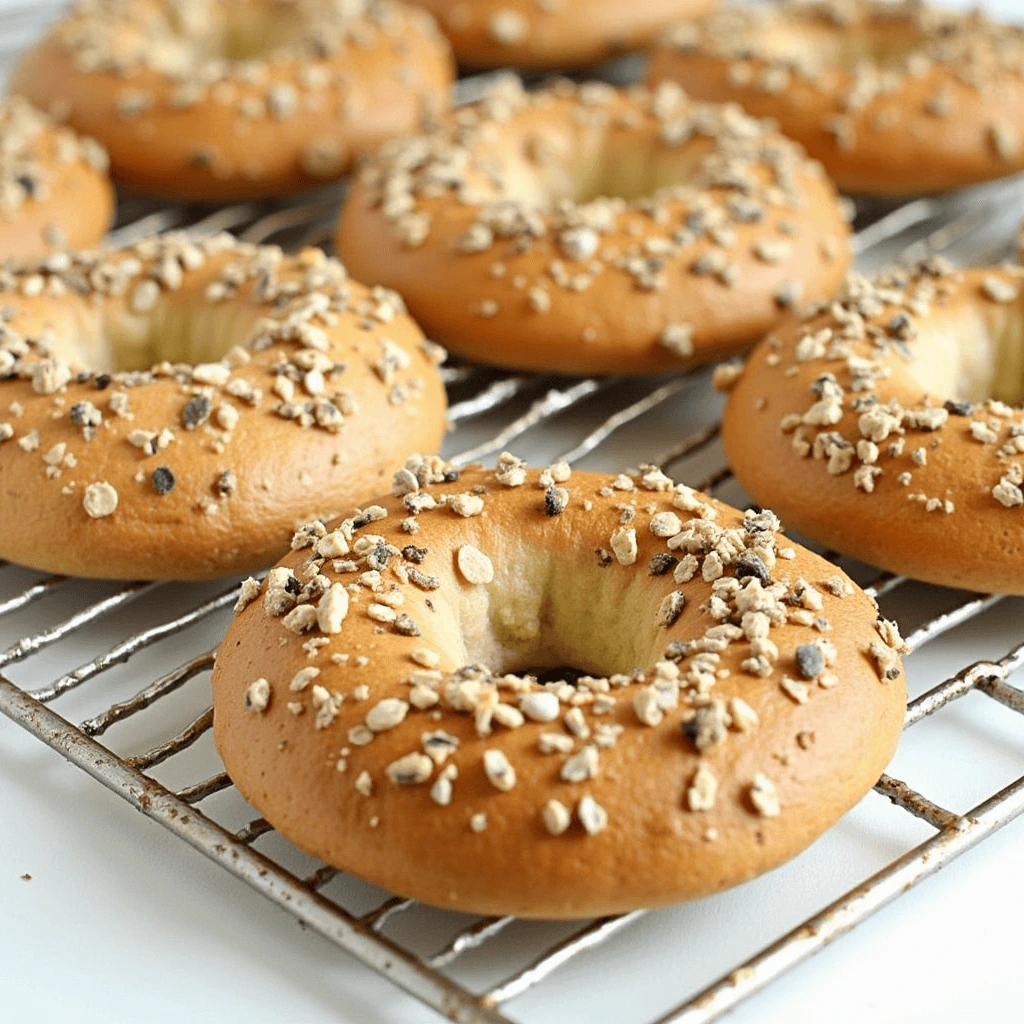
Adding Toppings and Flavors
One of the best parts of making homemade sourdough bagels is the ability to customize them with a variety of delicious toppings and flavor additions. While classic bagels are often left plain or with a simple topping, the world of bagel toppings is vast, offering endless opportunities for creativity. Whether you’re craving something savory or sweet, there are plenty of ways to enhance the flavor of your sourdough bagels.
1. Savory Toppings
Sesame Seeds:
Sesame seeds are a staple topping for bagels, adding both a subtle crunch and a rich, nutty flavor. When added to sourdough bagels, they complement the tangy flavor of the dough and provide a satisfying contrast to the chewy texture. Toasting the sesame seeds before sprinkling them on top can deepen their flavor and enhance their crispiness when baked.
Poppy Seeds:
Poppy seeds are another classic bagel topping that pairs beautifully with sourdough. They provide a delicate crunch and a mildly sweet flavor that balances out the natural sourness of the dough. Poppy seeds are often used in combination with sesame seeds for a traditional “everything” bagel topping.
Everything Bagel Seasoning:
For a truly flavorful bagel, consider using everything bagel seasoning. This mix typically includes sesame seeds, poppy seeds, dried onion flakes, garlic, and coarse salt. It’s the perfect savory topping for sourdough bagels, creating a deliciously aromatic, flavorful crust. The spices in everything seasoning enhance the rich, tangy flavor of sourdough and offer a satisfying combination of textures.
Garlic and Herb:
If you love garlic bread, why not incorporate those flavors into your bagels? Mix minced garlic with olive oil and your favorite dried herbs (such as rosemary, thyme, or oregano), then spread the mixture on top of your bagels before baking. This garlic and herb topping brings an aromatic, savory quality to your sourdough bagels that’s irresistible when paired with cream cheese or your favorite sandwich fillings.
Cheese Toppings:
For a cheesy bagel, you can sprinkle shredded cheese like cheddar, mozzarella, or Parmesan on top before baking. As the bagels bake, the cheese melts and forms a crispy, golden crust that adds extra richness to the flavor. You can also try incorporating some cheese directly into the dough for a cheesy surprise in every bite.
2. Sweet Toppings
Cinnamon Raisin:
One of the most beloved sweet bagel varieties is the cinnamon raisin bagel. Adding cinnamon and raisins to your sourdough bagel dough before shaping it creates a sweet, comforting flavor profile. Once baked, the bagels have a warm, aromatic scent with a natural sweetness from the raisins and a touch of spice from the cinnamon. For an extra indulgent twist, you can drizzle a little bit of honey or maple syrup over the top once the bagels are out of the oven.
Cranberry Orange:
For a slightly more sophisticated sweet option, try adding dried cranberries and orange zest to your sourdough bagel dough. The tartness of the cranberries combined with the bright citrus flavor of orange zest creates a deliciously festive bagel that’s perfect for breakfast or as a snack. You can even sprinkle a bit of sugar on top before baking to add a light glaze to the surface.
Maple Pecan:
If you’re craving a nutty, sweet flavor, consider adding chopped pecans and a drizzle of maple syrup to your sourdough bagels. The pecans bring a rich, buttery crunch, while the maple syrup adds natural sweetness without being overpowering. This topping makes for a decadent breakfast treat or a sweet snack with a cup of coffee.
Chocolate Chip:
For an indulgent, dessert-inspired bagel, you can add chocolate chips to the dough before shaping the bagels. As the bagels bake, the chocolate chips melt slightly, creating pockets of gooey chocolate in each bite. You can also sprinkle a little bit of sugar on top to give the bagels a sweet, slightly crispy surface. This option is a perfect way to turn a classic bagel into a treat for special occasions.
3. Unique Toppings for a Gourmet Twist
Lemon Zest and Lavender:
For a light, floral flavor, try adding lemon zest and a pinch of dried lavender to your bagel dough. The zest of the lemon adds a fresh, citrusy note, while the lavender provides a delicate, aromatic essence. This combination is perfect for spring and summer and pairs wonderfully with a light cream cheese spread or honey butter.
Chili Flakes and Cheese:
If you prefer a bit of heat with your bagels, consider using chili flakes as a topping. You can combine chili flakes with Parmesan cheese or cheddar for a savory, spicy bagel. The heat from the chili flakes contrasts nicely with the rich, tangy flavor of the sourdough, creating a satisfying combination of heat and flavor.
Caramelized Onions and Bacon:
For a more decadent savory option, add caramelized onions and crispy bacon bits to your bagels. The sweetness of the caramelized onions balances the savory, salty flavor of the bacon, creating a rich and satisfying topping. This combination is perfect for those who enjoy hearty, filling bagels that can double as a meal.
Pumpkin Spice:
Pumpkin spice isn’t just for fall desserts—it also works wonderfully as a bagel topping. Add a teaspoon or two of pumpkin pie spice to the dough along with some pureed pumpkin, and you’ll have a batch of fall-inspired sourdough bagels. You can top them with a sprinkle of cinnamon sugar for an extra sweet touch.
4. Tips for Applying Toppings
The key to perfect bagel toppings is ensuring they stick to the surface while the bagels bake. Here are a few tips for success:
- Boil Before Topping: When boiling your bagels, they will be a bit wet from the water. This moisture provides a perfect surface for toppings to adhere to. Simply sprinkle your desired topping onto the wet dough just before baking.
- Use an Egg Wash: If you prefer a glossy finish for your toppings, brush the surface of your bagels with an egg wash (a mixture of beaten egg and water) before applying the toppings. This will help the seeds and other toppings stick better and give the bagels a shiny, golden crust.
- Be Generous: When applying toppings, don’t be shy! Whether you’re using sesame seeds or everything bagel seasoning, apply a generous layer to ensure your bagels are full of flavor in every bite.
- Even Coating: For an even topping coverage, gently press the bagels into a dish of your chosen topping before baking. This helps ensure that every bagel is coated evenly and that the toppings stick during baking.
Conclusion
Adding toppings to your sourdough bagels opens up a world of flavor possibilities. From savory classics like sesame and everything seasoning to sweet variations like cinnamon raisin or chocolate chip, you can easily customize your bagels to suit your taste. Experiment with different combinations to discover your favorite toppings, and don’t be afraid to get creative! The beauty of making homemade sourdough bagels is that you can personalize them however you like, ensuring a fresh and unique experience every time you bake.
Common Mistakes to Avoid
While making sourdough bagels at home is an enjoyable process, there are several common mistakes that can impact the final result. Whether it’s dense bagels, uneven baking, or under-proofed dough, these issues can prevent your bagels from turning out as perfectly chewy and golden as you envision. Understanding and avoiding these mistakes will help you achieve bagels that are the right texture, flavor, and appearance. Let’s explore some of the most common issues and how to troubleshoot them.
1. Troubleshooting Dense Bagels
Dense bagels are one of the most common complaints when baking at home. A dense texture usually results from one of several factors:
Insufficient Gluten Development:
Gluten is what gives bagels their chewy, elastic texture. If the dough is not kneaded enough, the gluten strands won’t fully develop, and the bagels will end up dense and tough. To avoid this, make sure to knead your dough for about 10 minutes until it’s smooth and elastic. If using a stand mixer, ensure the dough has been mixed thoroughly and shows signs of elasticity.
Too Much Flour:
Over-measuring flour is another common mistake that can lead to dense bagels. Too much flour can dry out the dough, making it stiff and heavy. When measuring flour, always use the “spoon and level” method—spoon flour into your measuring cup and level it off with a knife. Alternatively, if you’re using a kitchen scale, aim for 500 grams of flour for a typical sourdough bagel recipe. Always err on the side of slightly less flour if you’re unsure.
Underproofing the Dough:
Proofing, or allowing the dough to rise, is critical to achieving a light and airy bagel. If the dough is underproofed, it won’t have enough air bubbles, and the bagels will turn out dense. To ensure proper proofing, let your dough rise in a warm place until it has roughly doubled in size. During the final proofing stage, don’t rush it—give it enough time to develop the right texture. Remember that cold temperatures, such as in a chilly kitchen, will slow down fermentation. Consider letting your dough rise for a longer period at a slightly warmer temperature if necessary.
2. Uneven Baking and Crust Issues
Another common issue is uneven baking, where some bagels are overbaked while others are underbaked, or the crust turns out too thick or too soft. Here are a few ways to troubleshoot uneven baking:
Inconsistent Oven Temperature:
An unevenly heated oven is a common culprit of unevenly baked bagels. Your oven temperature may not be accurate, causing some bagels to bake too quickly while others take longer. Always preheat your oven thoroughly before placing the bagels inside. You can use an oven thermometer to ensure that the temperature is accurate, as some ovens may run hotter or cooler than the set temperature.
Additionally, make sure that your baking sheet or stone is properly preheated to help evenly distribute heat. If you are using a baking stone, this can help create a uniform bake, ensuring that the bagels cook evenly.
Overcrowding the Pan:
Placing too many bagels on your baking sheet or stone can also lead to uneven baking. Allow enough space between each bagel so that hot air can circulate freely. Overcrowding can cause some bagels to bake unevenly, leading to soft or underdone spots. Be sure to space out your bagels by at least 2 inches on all sides.
Oven Position:
The position of your baking sheet in the oven also plays a role in how evenly your bagels bake. Bagels benefit from a hot, consistent heat, so make sure your baking sheet is placed in the center of the oven. Placing it too close to the top or bottom of the oven can result in an uneven crust. The center rack ensures that the bagels bake from all sides without any parts being overexposed to heat.
3. Under-Proofed Dough
Under-proofing the dough can lead to dense, tough bagels with minimal flavor. This issue is often caused by rushing the proofing process or using dough that hasn’t fermented enough. Proper proofing allows the yeast to create air pockets, which gives the bagels their signature chewy texture and subtle tang from the fermentation process.
Proofing in Too Cold of an Environment:
If the dough is placed in a cold environment, the fermentation process will slow down, leading to under-proofed dough. When proofing your dough, aim for a warm environment between 75°F to 80°F (24°C to 27°C). If your kitchen is too cold, you can try proofing your dough in an oven with just the light on, or place it on top of a warm stove. You can also cover the dough with a damp cloth to help maintain warmth and prevent the dough from drying out.
Not Allowing Enough Time for Final Proofing:
While the dough may rise during the initial fermentation, it’s just as important to allow the dough to rise again after shaping. This final proofing step gives the bagels their final texture and ensures they will bake properly. If the dough is under-proofed during this final rise, the bagels will not have enough time to fully expand and develop a light, airy interior. This step typically takes about 30-60 minutes, depending on the temperature of your kitchen.
4. Troubleshooting Boiling Issues
Boiling is a key step in bagel-making, as it contributes to the signature chewy texture and shiny crust. However, issues during the boiling process can lead to undesirable results.
Boiling Water Temperature:
The temperature of the water used for boiling plays a significant role in the bagels’ final texture. If the water is too cool, the bagels will not cook properly, and they will end up dense. Boil water that is gently simmering, not a rolling boil. This helps the bagels cook evenly without overcooking or becoming too tough.
Not Adding Enough Sweetener to the Boiling Water:
A common method to enhance the flavor and color of bagels is to add honey or barley malt syrup to the boiling water. This sweetener helps caramelize the crust, giving the bagels their signature golden-brown finish. If you skip this step or don’t use enough sweetener, your bagels may lack the characteristic shine and color that come with a well-boiled bagel.
Boiling Time:
Boiling your bagels for too long or too short can result in either undercooked or overcooked bagels. Most bagel recipes recommend boiling each bagel for about 1-2 minutes on each side. Over-boiling can lead to tough, rubbery bagels, while under-boiling results in a softer, less chewy texture. Keep a close eye on your bagels during the boiling process to ensure they get the right amount of cooking time.
Conclusion
Making sourdough bagels is a rewarding experience, but it does come with a few challenges. By avoiding these common mistakes, you can ensure that your bagels turn out with the perfect texture, flavor, and appearance. Proper kneading, proofing, boiling, and baking are all essential steps to creating bagels that are soft, chewy, and golden-brown. With a little attention to detail and some troubleshooting, you’ll be well on your way to mastering the art of sourdough bagels at home.
Serving and Storing Your Sourdough Bagels
Best Ways to Serve Sourdough Bagels
Sourdough bagels are not only delicious on their own but also incredibly versatile when it comes to toppings. Whether you’re enjoying them as a hearty breakfast, a midday snack, or a light dinner, the possibilities for toppings are endless. The tangy flavor of the sourdough base pairs beautifully with a wide range of ingredients, allowing you to get creative in the kitchen. Here are some of the best ways to serve your homemade sourdough bagels:
1. Classic Toppings for the Perfect Breakfast
One of the most popular ways to enjoy bagels is by pairing them with classic spreads and toppings. The chewy, slightly tangy texture of sourdough bagels enhances the rich, creamy taste of these spreads, making them the perfect breakfast treat.
Cream Cheese
Cream cheese is a classic topping for bagels, and for good reason. Its smooth and rich texture complements the firm, chewy nature of a freshly baked sourdough bagel. You can go simple with plain cream cheese or get creative by adding flavorings. Try a bit of fresh chives, dill, or smoked paprika mixed into the cream cheese for an added layer of flavor. For a sweet twist, you can add a touch of honey or maple syrup to the cream cheese for a smooth, sweet base.
Smoked Salmon (Lox)
For a more sophisticated and savory option, top your sourdough bagel with smoked salmon, also known as lox. The slightly smoky and salty salmon adds a luxurious flavor that pairs beautifully with cream cheese. Garnish with thinly sliced red onions, capers, and a sprinkle of fresh dill for the ultimate bagel experience. This combination is often associated with classic New York-style bagels but works just as well with homemade sourdough bagels.
Avocado
For a healthier, yet just as satisfying option, add mashed avocado on top of your sourdough bagel. The creamy texture of the avocado balances the tangy bite of the sourdough, creating a smooth, satisfying topping. To elevate it further, drizzle with olive oil, squeeze a bit of lemon juice, and sprinkle with salt, pepper, and red pepper flakes for extra flavor. A poached or fried egg on top makes it a filling breakfast.
2. Sweet Options for an Afternoon Snack
While sourdough bagels are often thought of as a savory snack, they also pair wonderfully with sweet toppings for a delicious midday treat. These options are perfect for those with a sweet tooth who want to indulge without going overboard.
Jam and Fruit Spreads
For a quick and sweet option, spread your sourdough bagel with your favorite jam or fruit preserves. Whether it’s strawberry, raspberry, blueberry, or even peach, the sweet and fruity flavor enhances the slightly sour tang of the bagel. If you prefer a more sophisticated topping, try pairing your jam with a smear of mascarpone or ricotta cheese for a rich, creamy texture that complements the sweetness of the fruit.
Nut Butters
Nut butters, such as peanut butter, almond butter, or cashew butter, make for a satisfying and protein-packed topping. The nuttiness of these spreads works wonderfully with the tangy flavor of sourdough bagels, and you can add a drizzle of honey or a sprinkle of cinnamon for extra flavor. If you’re feeling adventurous, add sliced bananas, chia seeds, or crushed nuts on top for a more filling snack.
Cinnamon Sugar
For a sweet and simple option, consider dusting your sourdough bagel with cinnamon sugar. After toasting the bagel, sprinkle a mixture of cinnamon and sugar on top, and you have a quick yet satisfying treat. If you want to take it a step further, drizzle with a little melted butter to create a rich, indulgent experience.
3. Savory and Hearty Combinations
If you prefer more savory toppings that are still hearty and filling, sourdough bagels provide the perfect base for a variety of toppings that will satisfy any appetite. These options are ideal for lunch, dinner, or a substantial snack.
Egg and Cheese
A warm, toasted sourdough bagel with a fried or scrambled egg and melted cheese is the ultimate comfort food. The combination of creamy egg and gooey cheese pairs perfectly with the chewy texture of the bagel, making for a filling, savory meal. You can go for traditional cheese options like cheddar or Swiss, or even experiment with goat cheese or feta for a more unique flavor. Add some fresh greens like spinach or arugula for an extra crunch and burst of freshness.
Turkey or Roast Beef
For a more substantial and savory option, top your sourdough bagel with slices of deli turkey, roast beef, or even pastrami. Layer with some mustard, pickles, and fresh lettuce for a sandwich that’s hearty yet balanced. The sourdough bagel’s slightly tangy flavor enhances the savory meats, and the chewy texture of the bagel holds up well to the hearty filling.
Grilled Veggies
Grilled vegetables make an excellent vegetarian topping for sourdough bagels. Try roasted or grilled bell peppers, zucchini, eggplant, or even mushrooms. The smoky, savory flavor of the vegetables adds depth, while the soft yet chewy texture of the bagel complements them perfectly. You can also add a spread of hummus or tzatziki to enhance the flavor, creating a well-rounded, satisfying meal.
4. Creative Combinations for Adventurous Eaters
For those who love to experiment with unique flavor pairings, sourdough bagels provide a blank canvas for many exciting and unexpected combinations. Here are a few ideas that are sure to impress:
Brie and Fig Jam
Pairing creamy brie cheese with the sweetness of fig jam is a gourmet way to top your sourdough bagel. The richness of the brie contrasts beautifully with the sweet, fruity fig jam, and together they create a sophisticated topping that’s perfect for brunch or a light snack. Add a handful of arugula or spinach for a touch of green and extra flavor.
Buffalo Chicken
If you love bold flavors, consider topping your sourdough bagel with shredded buffalo chicken. The spiciness of the buffalo sauce, combined with the tangy and creamy texture of ranch dressing or blue cheese, makes for an exciting topping. Add some sliced celery and carrots for crunch, and you’ve got a bagel worthy of a game day snack or hearty lunch.
Apple and Cheddar
For a sweet-savory combo, slice up an apple and top your sourdough bagel with sharp cheddar cheese and thin apple slices. The crisp sweetness of the apple pairs perfectly with the sharpness of the cheddar, creating a balance of flavors that will keep you coming back for more.
Conclusion
No matter your preference, sourdough bagels offer a versatile base for countless topping ideas. Whether you’re in the mood for a classic savory option like cream cheese and smoked salmon, a sweet and fruity jam topping, or a hearty meal with eggs and cheese, the possibilities are endless. These bagels are not only a great way to start your day, but they also offer plenty of room for creativity and flavor exploration. With so many topping ideas to choose from, you’ll never tire of this delicious, homemade treat!
How to Store and Reheat Bagels
Once you’ve made your delicious sourdough bagels, you’ll want to store them properly to maintain their freshness and chewy texture. Knowing how to store and reheat them correctly ensures that your bagels stay just as tasty as the day they were made. Here are some tips for storing and reheating your sourdough bagels:
1. Storing Fresh Bagels
To keep your sourdough bagels fresh, you’ll need to store them properly to prevent them from getting stale or moldy too quickly.
Room Temperature Storage
If you plan to eat your bagels within 2-3 days, storing them at room temperature is perfectly fine. Simply place them in a paper bag or a bread box to allow air circulation while maintaining a relatively stable environment. Avoid plastic bags for short-term storage, as they can trap moisture, leading to soggy or moldy bagels.
Freezing for Long-Term Storage
For longer-term storage, freezing is the best option. Freezing preserves the freshness and flavor of the bagels for up to 3 months. To freeze your bagels, allow them to cool completely after baking. Then, slice them in half to make it easier to toast later. Wrap each bagel in plastic wrap or aluminum foil, and then place them in a resealable freezer bag to prevent freezer burn. Make sure to squeeze out excess air before sealing the bag.
2. Reheating Bagels
Reheating bagels properly is key to reviving their chewy texture and bringing back the fresh-baked flavor. Whether you’re reheating a bagel you’ve stored at room temperature or one that’s been frozen, here are a few methods to consider:
For Room Temperature Bagels
If your bagels have been stored at room temperature, they can be easily reheated in a toaster or oven. Here’s how to do it:
- Toaster: Simply slice your bagel in half and toast it in a standard toaster. Toast to your preferred level of crispiness. This method works best if the bagels are not too soft or moist.
- Oven: Preheat your oven to 375°F (190°C). Place the bagels directly on the oven rack for 5-7 minutes or until the outside is slightly crispy. This method gives a nice texture without drying out the bagel.
For Frozen Bagels
If you’ve frozen your bagels, follow these steps to reheat them:
- Toaster: Take the frozen bagels directly from the freezer and slice them in half. Pop them into the toaster on a low setting, allowing them to toast for a few extra cycles until the bagel is heated through and crispy on the outside.
- Oven: Preheat your oven to 375°F (190°C). Wrap the frozen bagel in foil and bake for 10-12 minutes. For a crispier exterior, you can unwrap the foil during the last 2-3 minutes of baking. This method helps retain moisture inside the bagel while crisping up the outside.
Microwave Method (Quick Reheat)
While the microwave is not the ideal method for reheating bagels, it can be used in a pinch. To avoid a rubbery texture, wrap the bagel in a damp paper towel and microwave it for 15-20 seconds. This will soften the bagel without drying it out. For added crispness, toast the bagel briefly after microwaving.
3. Tips for Maintaining Freshness
- Avoid Refrigerating: While it may seem like a good idea to store bagels in the fridge to keep them fresh, refrigeration actually dries out bagels faster, causing them to lose their chewy texture.
- Freshness Tip: If you’re planning to enjoy bagels over several days, slice them before storing. This way, you can easily toast individual halves as needed without compromising the texture of the entire bagel.
- Reviving Stale Bagels: If your bagels become stale, lightly spritz them with water before reheating. The steam helps rehydrate the dough, giving the bagel a fresher texture when toasted.
Conclusion
Proper storage and reheating are essential for keeping your sourdough bagels as fresh and delicious as when they were first baked. By following these storage and reheating tips, you can enjoy your homemade bagels for days or even weeks to come. Whether you store them at room temperature, freeze them for later, or reheat them using one of the suggested methods, your bagels will remain a delightful treat every time you enjoy them.
For more tips on how to store and reheat your homemade bagels, check out this guide to storing baked goods.
Conclusion: Why You Should Try Making Sourdough Bagels at Home
Making sourdough bagels at home offers several incredible benefits. Not only do you get to enjoy the unmatched flavor and chewiness that only fermentation can provide, but you also have the opportunity to customize your bagels to suit your preferences. With a simple sourdough starter, a few essential ingredients, and a bit of patience, you can create bagels that rival those from your favorite bakery—fresh, flavorful, and just the right texture. Plus, you can experiment with toppings and add-ins like sesame seeds, cinnamon raisin, or everything seasoning to make each batch unique.
We encourage you to give this sourdough bagel recipe a try, and don’t be afraid to get creative with your flavors. Whether you’re a seasoned baker or a beginner, this recipe is approachable and rewarding. It’s a fun way to elevate your breakfast or snack game while learning the magic of fermentation.
We’d love to hear about your bagel-making adventures! Try out the recipe, share your results, or ask any questions in the comments section below. Your feedback and creativity help make this recipe even better for everyone. Happy baking!